
If you’ve ever needed to change or replace your grinder wheel, you know it can feel tricky and even a bit frustrating. But what if you could learn a simple, step-by-step method that makes the whole process quick and safe?
Taking off your grinder wheel the right way not only saves you time but also protects you from potential accidents. In this guide, you’ll discover exactly how to remove your grinder wheel with confidence, even if you’re new to power tools.
Keep reading, and you’ll master this essential skill in no time.
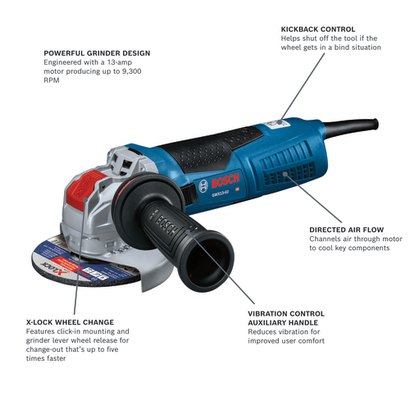
Credit: www.boschtools.com
Safety Precautions
Always wear protective gearbefore handling the grinder wheel. Safety glasses protect your eyes from dust and sparks. Gloves keep your hands safe from sharp edges. A dust mask stops you from breathing harmful particles.
Disconnect the power sourceto avoid accidental starts. Unplug the grinder or switch off the circuit breaker. This step ensures the tool cannot turn on while you work.
Tools Needed
To remove a grinder wheel, a wrench or spanneris essential. These tools help loosen the nut holding the wheel. The size of the wrench should match the nut size to avoid damage.
Replacement parts are also important. Keep spare wheel nuts, washers, and the grinding wheelitself ready. This ensures smooth and safe operation after replacement.
Prepare The Grinder
First, make sure the grinder is unplugged for safety. Use a brush or cloth to clean the wheel area. Removing dust and debris helps you see parts clearly and prevents accidents.
Next, locate the spindle lock button on the grinder. Press and hold this button to lock the spindle. This stops the wheel from moving and makes it easier to remove.
Remove The Wheel Guard
First, unplug the grinder to ensure safety. The wheel guardcovers the grinding wheel and protects you from sparks and debris.
Locate the screws or bolts holding the wheel guard in place. Use a suitable wrenchor screwdriverto loosen them carefully.
Remove the screws or bolts completely, then gently take off the wheel guard. Keep the parts in a safe place for reassembly later.
Check the guard for damage before putting it back on. A damaged guard should be replaced to maintain safety.
Loosen The Wheel Nut
Begin by loosening the wheel nut to free the grinder wheel. Use the correct wrench and turn it counterclockwise until it moves easily. This step helps remove the wheel safely and without damage.
Use The Correct Wrench
Choose the wrench that fits the nut size exactly. A wrong wrench can slip or damage the nut. Use a sturdy wrench made for grinders. Check the wrench teeth for wear to avoid slipping. Hold the wrench firmly before turning.
Turn In The Right Direction
The nut usually loosens by turning counterclockwise. Some grinders have reverse threads; check your tool’s manual. Apply steady pressure to break the nut free. Avoid sudden force, which can cause injury. Keep the grinder stable while loosening the nut.

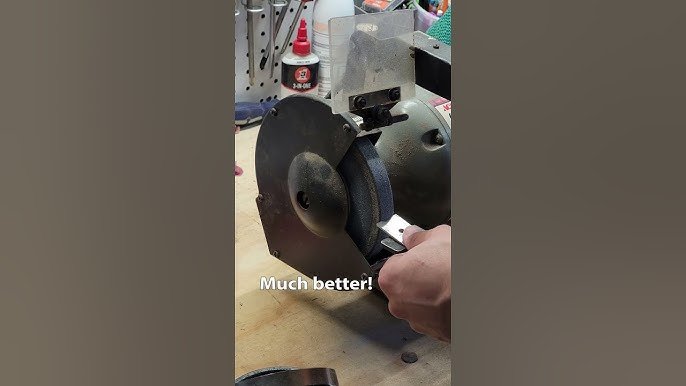
Credit: www.reddit.com
Take Off The Grinder Wheel
Grinder wheels are sharp and can break easily. Handle the wheel carefullyto avoid cuts or injuries. Always wear gloves and hold the wheel by its edges. Do not touch the rough surface directly.
Check the wheel for cracks, chips, or damage before removal. A damaged wheel can be dangerous and should be replaced immediately. Use good light to inspect the wheel condition. Look for any signs of wear or weakness.
Replace Or Store The Wheel
Remove the grinder wheel carefully and check it for damage before storing. Store wheels in a dry, safe place to prevent cracks or warping. Replace worn or broken wheels immediately to maintain safety and performance.
Install New Wheel
Make sure the grinder is unplugged first. Take the new wheel and place it on the spindle. Tighten the nut to hold the wheel firmly. Use a wrench to make sure it is tight but do not over-tighten. Check that the wheel spins freely without rubbing. Wear safety goggles before turning on the grinder. Test the wheel at low speed to see if it works well.
Store Old Wheel Safely
Keep the old wheel in a dry place to avoid damage. Store it flat, not standing on its edge. Label the wheel with its size and type for easy use later. Avoid stacking heavy items on top of the wheel. Store away from children and pets to keep it safe.
Reassemble The Grinder
Make sure the nut is tightened securelyto hold the wheel in place. Use the correct wrench to avoid slipping. Tightening prevents the wheel from moving during use, which keeps you safe.
Next, reattach the wheel guard. The guard protects you from sparks and debris. Align it properly with the grinder body before fastening. Secure it tightly so it does not come loose.
- Check the nut for tightness after reassembly.
- Ensure the wheel guard covers the wheel fully.
- Test the grinder briefly to confirm all parts are fixed well.
Test The Grinder
Reconnect the grinder to power to test the wheel. Make sure the power cord is securely plugged in. Turn on the grinder and listen carefully.
The wheel should spin smoothly without wobbling. Watch for any unusual noises or vibrations. These signs show if the wheel is mounted correctly.
- Check if the wheel stops quickly after turning off.
- Ensure the safety guard is in place during the test.
- If the wheel wobbles, stop and adjust it.
Proper operation means the grinder is safe to use. Test it in a clear area to avoid accidents.
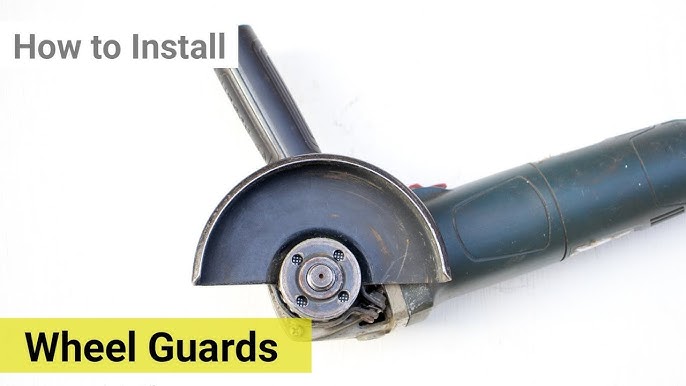
Credit: www.youtube.com
Frequently Asked Questions
How Do I Safely Remove A Grinder Wheel?
First, unplug the grinder to ensure safety. Use a wrench to loosen the wheel nut by turning it counterclockwise. Remove the wheel carefully, avoiding damage. Always wear gloves and eye protection during the process to prevent injuries.
What Tools Are Needed To Take Off A Grinder Wheel?
You need a wrench or spanner matching the wheel nut size. Sometimes, a locking pin or special tool is required to hold the wheel shaft. Safety gloves and eye protection are essential for a safe removal process.
How Can I Prevent Damaging The Grinder Wheel?
Avoid using excessive force when loosening the wheel nut. Use the correct wrench size to prevent slipping. Handle the wheel gently to avoid cracks or chips. Always follow the manufacturer’s removal instructions for best results.
How Often Should I Replace A Grinder Wheel?
Replace the grinder wheel when it shows cracks, chips, or significant wear. Also, change it if it becomes unbalanced or causes vibrations. Regular inspection before use ensures safe and effective grinding performance.
Conclusion
Removing a grinder wheel is simple when done step by step. Always ensure the grinder is unplugged before starting. Use the right tools to avoid damage. Keep safety your top priority throughout the process. Regular maintenance helps your grinder work better and last longer.
Practice these tips to remove wheels with confidence and ease. Stay safe and take your time.