
As the chilly winds start to blow, your gas grill needs special care to stay in top shape. If you want your grill to work perfectly when grilling season returns, you can’t just leave it outside all winter.
Taking a few simple steps to winterize your gas grill will protect it from rust, damage, and unwanted surprises. In this guide, you’ll discover easy, practical tips that save you time and money. Ready to keep your grill ready for next season?
Let’s get started!
Credit: www.coversandall.com
Prepare The Grill
Preparing your gas grill for winter helps keep it in good shape. Cleaning and checking parts prevents damage during cold months.
Follow simple steps to get your grill ready. This care saves time and money before next grilling season.
Clean Grates And Burners
Start by removing the grates from the grill. Use a grill brush or sponge to clean off grease and food bits.
Next, clean the burners carefully. Clear any clogs to keep gas flow smooth when you use the grill again.
- Remove grates and scrub with warm soapy water
- Use a soft brush to clean burner holes
- Rinse parts and let them dry fully
Remove Ash And Debris
Clear out any ash or leftover debris inside the grill. This stops rust and keeps the grill clean for storage.
Use a small brush or vacuum to get rid of dirt in hard-to-reach areas. Check under the burners too.
- Empty ash catcher or tray
- Brush out debris from inside the grill
- Vacuum if needed for thorough cleaning
Check For Damage
Look over all parts for rust, cracks, or wear. Fix or replace damaged parts to keep the grill safe.
Check hoses and connections for leaks. Tighten or replace parts to avoid gas problems next season.
- Inspect grates and burners for cracks or rust
- Check gas hoses for cracks or leaks
- Tighten loose connections and replace broken parts

Credit: barbecuesgalore.ca
Disconnect And Store Propane
Winterizing your gas grill includes safely handling the propane tank. This process prevents leaks and damage during cold months.
Follow clear steps to turn off, detach, and store your propane tank correctly. Safety is the top priority.
Turn Off And Detach Tank
Start by turning off the propane tank valve fully. This stops the gas flow completely.
- Close the valve by turning it clockwise until tight.
- Disconnect the regulator from the tank by unscrewing it.
- Check the connection for any signs of wear or damage.
- Keep the protective cap on the tank valve to prevent dirt entry.
Store Tank Safely
Store your propane tank in a cool, well-ventilated outdoor area. Avoid enclosed spaces like garages.
| Storage Tip | Reason |
|---|---|
| Keep tank upright | Prevents gas leaks and pressure issues |
| Place away from heat sources | Reduces risk of fire or explosion |
| Store in shaded spot | Protects tank from temperature swings |
| Use a secure base | Prevents tipping and damage |
Protect Internal Components
Protecting your gas grill’s internal parts is key to keeping it in good shape. Cold weather and moisture can cause damage.
Taking simple steps helps stop rust and wear. This guide covers how to inspect and cover burners and apply a protective coating.
Inspect And Cover Burners
Start by checking burners for dirt, rust, or damage. Clean them gently with a brush if needed.
- Look for cracks or holes in the burners
- Remove food debris or spider webs
- Check burner holes for clogs
- Cover burners with a grill-safe cap or wrap
- Use aluminum foil if no burner caps are available
Apply Protective Coating
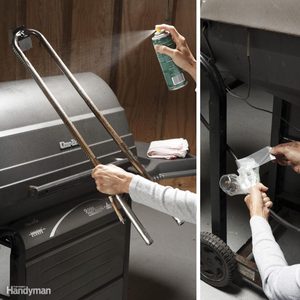
Applying a protective coating prevents rust and corrosion on metal parts. Use coatings designed for grills.
| Type of Coating | Best Use |
| High-heat spray paint | Burners and grates |
| Silicone spray | Hinges and moving parts |
| Food-safe oil | Cooking surfaces |
Apply coating evenly. Let it dry before storing the grill for winter.
Cover And Store The Grill
Protecting your gas grill during winter keeps it safe and ready. Proper cover and storage prevent rust and damage.
Follow simple steps to cover and store your grill correctly. This care helps extend its life and performance.
Choose A Weatherproof Cover
Select a cover made from durable, waterproof material. It should fit snugly to block rain, snow, and dirt.
- Look for covers with vents to reduce moisture buildup.
- Choose UV-resistant fabric to prevent sun damage.
- Make sure the cover fits your grill model well.
- Check that it is easy to put on and take off.
- Consider covers with secure straps or ties.
Find The Ideal Storage Spot
Pick a dry, sheltered place to keep your grill. Avoid damp areas that cause rust or mold.
| Storage Location | Advantages | Disadvantages |
| Garage | Protected from weather, secure | May be cramped or cluttered |
| Covered Patio | Easy access, some protection | Less protection from cold and wind |
| Outdoor Shed | Good protection, free space | Needs ventilation, may be damp |
| Open Backyard | Convenient location | Exposed to weather, not recommended |
Prepare For Spring Use
Winterizing your gas grill helps it work well in spring. Proper care keeps it safe and clean.
Follow these steps to check and ready your grill after winter storage.
Perform A Thorough Inspection
Look over your grill carefully for damage or wear. Check all parts before use.
- Inspect the grill body for rust or cracks.
- Check the burner tubes for blockages or holes.
- Examine gas hoses for cracks or leaks.
- Look at the igniter to make sure it sparks properly.
- Clean the cooking grates and remove any leftover debris.
Test And Reassemble Parts
After inspection, test all parts to confirm they work well. Then put everything back correctly.
| Part | Test Method | Action if Faulty |
|---|---|---|
| Burner | Turn on gas and light burner | Clean or replace if flame is uneven or weak |
| Gas Hose | Apply soapy water and check for bubbles | Replace if bubbles appear indicating leaks |
| Igniter | Press igniter button and listen for sparks | Replace battery or igniter if no spark |
| Cooking Grates | Clean and inspect for rust | Replace if heavily rusted or damaged |
Credit: www.familyhandyman.com
Frequently Asked Questions
How Do I Clean My Gas Grill Before Winter?
Before winterizing, clean your gas grill by removing grates and scrubbing with soapy water. Use a grill brush to clean burners and interior surfaces. Ensure all parts are dry before reassembling. This prevents rust and ensures your grill is ready for use when spring arrives.
Should I Disconnect The Propane Tank?
Yes, disconnect the propane tank when winterizing your gas grill. Store it in a cool, ventilated area away from direct sunlight. This prevents potential leaks or damages from temperature fluctuations. Reconnect it safely when you’re ready to use your grill again.
Can I Leave My Grill Outside In Winter?
It’s possible, but use a high-quality grill cover to protect it. Ensure the grill is clean and dry before covering. This prevents rust and extends the life of your grill. If possible, store it in a garage or shed for extra protection.
What Parts Need Lubrication Before Winter?
Lubricate hinges, wheels, and any moving parts with a food-safe spray. This prevents rust and ensures smooth operation when you use it again. Remember, lubrication is key to maintaining the longevity of your gas grill.
Conclusion
Winterizing your gas grill protects it from cold weather damage. Clean all parts carefully and remove leftover grease. Cover the grill with a weatherproof cover. Store it in a dry place to avoid rust. Check connections and hoses before next use.
Taking these steps saves time and money later. Your grill will stay safe and ready for spring. Simple care now means many good cookouts ahead. Keep your grill in top shape all year.