

If your small slicer blade is dull or damaged, you might feel stuck and unsure how to fix it. But replacing that blade yourself is easier than you think—and it can save you time and money.
In this guide, you’ll discover simple steps to safely and quickly replace your small slicer blade. By the end, you’ll have your slicer working like new again, ready to make your kitchen tasks smoother and safer. Keep reading to find out exactly what you need to do!
Tools Needed
To replace a small slicer blade, gather the right tools. You will need a screwdriverthat fits the blade screws well. A pair of needle-nose pliershelps to hold small parts. Use a clean clothto wipe the blade and surrounding area.
Keep a replacement bladethat matches your slicer model. Having a small containerto hold screws prevents loss. Safety is key; wear cut-resistant glovesto protect your hands.
- Screwdriver (Phillips or flathead)
- Needle-nose pliers
- Replacement slicer blade
- Clean cloth
- Small container for screws
- Cut-resistant gloves
Preparing The Slicer
Ensure safety first. Always unplug the slicer before starting. This prevents any accidental starts. Look for the power cord. Pull it gently from the outlet. Keep the cord away from water. This avoids damage or electric shocks. Make sure the slicer is on a stable surface. This helps avoid any accidents.
Locate the food tray on the slicer. It holds the items you slice. Find the tray release button. Press it gently. Slide the tray out slowly. Be careful with your fingers. Place the tray on a safe spot. Keep it clean for the next use. Check the slicer is empty before proceeding.
Removing The Old Blade
The blade guardkeeps the slicer blade safe during use. To remove it, find the small latch or button holding it in place. Press or slide this gently to release the guard. Take care not to force it, as this can cause damage.
Once the guard is off, the blade becomes more exposed. Be very careful not to touch the sharp edge. Always hold the blade by its center or the plastic hub.
Use a clean cloth or gloves to grip the blade. Slowly lift or slide the blade off the slicer. If it feels stuck, check for any screws or locks still attached. Avoid using too much force to prevent injury.

Credit: maxtormetal.com
Installing The New Blade
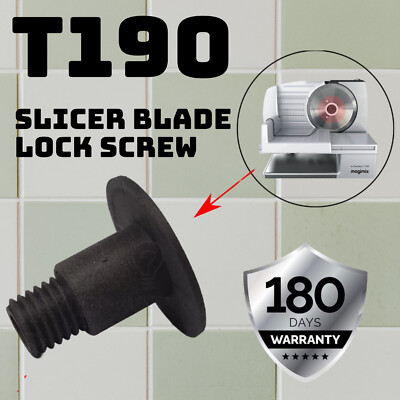
Start by holding the new blade carefully. Align it with the slot where the old blade was. The sharp edge should face outward to cut properly. Make sure the holes in the blade match the pegs or screws on the slicer base.
Once aligned, press the blade gently but firmly into place. Check if it sits flat and does not wobble. A loose blade can be dangerous and cause uneven slicing.
- Use the screws or clips to secure the blade firmly.
- Tighten screws evenly to avoid tilting the blade.
- Do not over-tighten; it may damage the blade or slicer.
- After securing, try spinning the blade to ensure it moves smoothly.
Proper alignment and secure fixing keep the slicer safe and efficient.
Testing The Slicer
After reassembling the parts, test the slicer carefully. Make sure the blade spins freely without wobbling. Check that all screws and attachments are tight and secure. This ensures the slicer works smoothly and safely.
Reassembling involves putting all parts back in the right order. Align the blade carefully to avoid damage. Attach the guard and tighten the screws firmly. This helps prevent accidents during use.
Running a safety check is vital before use. Ensure the slicer is unplugged while checking. Look for any loose parts or sharp edges. Confirm the blade guard is in place and functioning well. Test the slicer in a safe area to avoid injury.

Credit: www.youtube.com
Maintenance Tips
Cleaning the blade is key for safe use and long life. Use a soft cloth to wipe off crumbs and food bits. Avoid water on the motor part. Dry the blade completely after cleaning. Use mild soap and water for tough stains. Keep the blade away from sharp impacts to avoid damage.
Storing the slicer safely prevents accidents and keeps it sharp. Always unplug before storing. Cover the blade with a protective sheath or cloth. Store in a dry place to avoid rust. Keep out of reach of children. Place on a stable surface to avoid falls.
Credit: www.ebay.com
Frequently Asked Questions
How Do I Safely Remove A Small Slicer Blade?
First, unplug the slicer to avoid accidents. Use gloves to protect your hands. Carefully unlock the blade locking mechanism. Gently lift the blade out, avoiding sharp edges. Store the blade safely or dispose of it properly.
What Tools Are Needed To Replace A Small Slicer Blade?
You typically need a screwdriver, gloves, and a replacement blade. Some slicers include a blade removal tool. Always check your slicer’s manual for specific tools. Using the right tools ensures a safe and smooth replacement process.
How Often Should I Replace My Small Slicer Blade?
Replace the blade when it becomes dull or damaged. Frequent use may require replacement every few months. Sharp blades ensure cleaner cuts and safer operation. Regular inspection helps maintain optimal slicer performance and food quality.
Can I Use Any Blade For My Small Slicer?
No, use blades recommended by the slicer manufacturer. Incorrect blades can damage the slicer or cause injury. Check size, shape, and compatibility before purchasing a replacement blade. Using the right blade ensures safety and efficiency.
Conclusion
Replacing a small slicer blade is simple and quick with the right steps. Take your time and follow safety rules carefully. Clean the slicer parts before installing the new blade. Test the slicer to make sure it works well. Regular blade changes keep your slicer sharp and safe.
This helps you cut food evenly every time. Now, you can replace the blade with confidence and ease. Keep your slicer in good shape for better cooking results.