
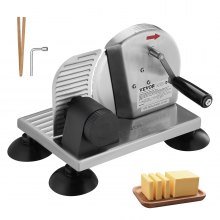
Replacing a slicer motor might sound tricky, but with the right steps, you can do it safely and confidently. If your slicer isn’t working like it used to, the motor could be the problem.
Don’t worry—this guide will walk you through everything you need to know to fix it without risking injury or damage. Keep reading, and you’ll learn how to handle the job like a pro, protecting yourself and your equipment every step of the way.

Credit: www.youtube.com
Tools And Materials Needed
Essential tools include a screwdriver, wrench, and pliers. A multimeter helps check electrical connections. A flashlight may be needed for better visibility.
Safety gear is vital to protect yourself. Wear safety goggles to protect eyes from debris. Use gloves to avoid cuts and electric shock. A dust mask keeps you safe from dust particles.
| Replacement Parts | Description |
|---|---|
| Slicer Motor | Make sure it matches the model number of your slicer. |
| Screws and Bolts | Use the right size to secure the motor firmly. |
| Wiring Connectors | Replace any worn or damaged connectors for safety. |
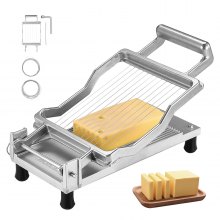
Credit: eur.vevor.com
Preparing The Workspace
Move all unnecessary items away. Keep the space tidy and clean. This helps prevent accidents. Make sure the floor is dry. No water should be near the tools. Organize your tools neatly. Place them where you can reach easily.
Unplug the machine first. This is very important for safety. Check the power button. It should be in the off position. Confirm with a voltage tester. No power should flow to the machine. Safety comes first.
Use bright lights to see well. Shadows can hide small parts. Position the light above your work area. Make sure it’s stable. You need to see all parts clearly. Good lighting helps prevent mistakes.
Removing The Old Motor
First, unplug the slicer from the power source to avoid electric shock. Remove any covers or panels blocking the motor to gain clear access. Check the area around the motor for screws or clips holding the cover.
Next, carefully disconnect the wiring. Use a screwdriver or pliers if needed to loosen wire connectors. Label wires with tape to help during reassembly. Avoid pulling wires hard to prevent damage.
Finally, detach the mounting screws that hold the motor in place. Keep screws in a safe spot for reuse. Gently lift the motor out once all screws are removed. This step may require a little force but be careful not to break anything.

Credit: www.amazon.com
Installing The New Motor
Place the new motor carefully in its slot. Make sure it fits well and is aligned properly. Check that the motor shaft matches the slicer’s gear or blade.
Secure the motor mounts firmly. Use screws or bolts that came with the motor. Tighten them enough to stop any movement but avoid overtightening.
- Match the wiring colors from the motor to the slicer’s wires.
- Use connectors or wire nuts to join wires safely.
- Ensure all connections are tight and insulated to prevent shorts.
- Double-check the wiring diagram for correct connections.
Testing The Replacement
Power the slicer motor on using a safe power source. Make sure the power switch is off before plugging in. Use insulated gloves to avoid electric shock. Observe the motor as it starts. Listen for any unusual sounds. The motor should run smoothly without noise or jerks.
Check if the slicer blades move as expected. If the motor does not start, unplug immediately. Inspect the wiring connections for loose or damaged wires. Ensure the motor is properly grounded to prevent hazards.
| Common Issue | Possible Cause | Fix |
|---|---|---|
| Motor does not start | Loose wiring or no power | Tighten wires and check power source |
| Motor runs but blades do not move | Broken coupling or belt | Replace coupling or belt |
| Unusual noise | Worn bearings or debris | Clean debris or replace bearings |
Maintenance Tips For Longevity
Keeping the slicer motor clean helps it work well for longer. Dust and food bits can cause damage. Wipe the motor and its parts often using a dry cloth. Avoid water near electrical parts.
Lubricating the motor parts keeps them moving smoothly. Use the right oil or grease, not too much or too little. Check your slicer’s manual for the correct type. Lubricate only the parts that need it.
| Inspection Area | What to Check | How Often |
|---|---|---|
| Motor housing | Cracks, loose screws | Weekly |
| Electrical connections | Frayed wires, secure plugs | Monthly |
| Blade and moving parts | Wear and tear, smooth movement | After each use |
Frequently Asked Questions
How Do I Safely Disconnect The Slicer Motor?
To safely disconnect the slicer motor, first unplug the machine. Then, remove the cover and disconnect wiring carefully. Avoid touching exposed wires to prevent shocks.
What Tools Are Needed To Replace A Slicer Motor?
You need a screwdriver, wrench set, multimeter, and possibly pliers. These tools help remove the motor and check electrical connections safely.
How Can I Test The New Slicer Motor Before Installation?
Use a multimeter to check motor continuity. Power it briefly to ensure it runs smoothly. Testing prevents future operational issues.
What Safety Precautions Should I Take During Replacement?
Always unplug the slicer, wear gloves, and avoid wet conditions. Handle electrical parts carefully to prevent injury or damage.
Conclusion
Replacing a slicer motor takes care and patience. Follow each step with focus and caution. Turn off power before you start working. Use the right tools to avoid damage. Check connections carefully to ensure safety. Test the motor after installation to confirm it works.
Taking time helps avoid mistakes and keeps you safe. Proper handling extends the slicer’s life. Simple steps lead to a smooth repair. Keep these tips in mind for any future fixes.