
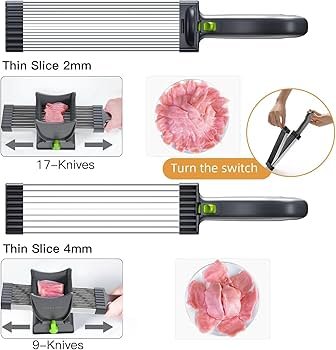
Are your slices not as thin and perfect as they used to be? It might be time to replace your slicer blade.
A sharp, well-maintained blade makes all the difference when you want those precise, paper-thin slices. But don’t worry—changing your slicer blade is easier than you think. In this guide, you’ll discover simple, step-by-step instructions to get your slicer working like new again.
Keep reading, and you’ll be slicing like a pro in no time.
Tools Needed
Wear cut-resistant glovesto protect your hands from sharp blades. Safety goggles keep your eyes safe from any flying debris. A sturdy apron helps protect your clothes and body during the blade replacement process.
| Replacement Part | Description |
|---|---|
| Slicer Blade | A thin, sharp blade designed for precise slicing. |
| Blade Screws | Small screws that hold the blade in place securely. |
| Blade Removal Tool | Tool to safely remove and install the blade without damage. |
Preparing The Slicer
Always unplug the slicerbefore starting any work. This ensures safetywhile handling sharp parts. Next, clean the slicer surface with a soft cloth. Remove any food crumbs or grease for a clear workspace.
To remove the old blade, locate the blade lockor screws holding it. Use the right tool to carefully unlock or unscrew the blade. Lift the blade gently to avoid cuts. Place the old blade aside safely for disposal or storage.
Installing The New Blade
Begin by unplugging the slicer for safety. Remove the old blade carefully, then align and secure the new blade tightly. Ensure the blade is stable before use for thin, even slices.
Aligning The Blade Correctly
Place the new blade gently on the slicer. Ensure it fits snugly. Check that the holes on the blade line up. This helps in easy rotation later. Use your hand to hold it steady. Don’t rush this step to avoid mistakes.
Securing The Blade In Place
Tighten the screws around the blade. Make sure they are secure. Use a screwdriver to turn them clockwise. Check each screw twice for tightness. The blade should not wobble. A loose blade can cause accidents. Always double-check your work for safety.
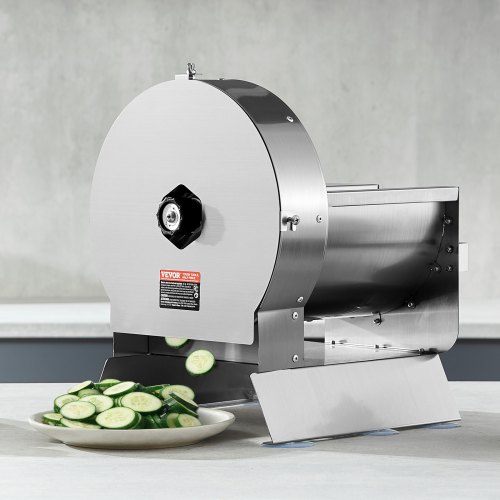
Credit: www.vevor.ca
Adjusting For Thin Slices
To get thin slices, adjust the thickness dial carefully. Turn the dial toward the smaller numbers for thinner cuts. Make small changes to avoid cutting slices too thin or thick. Each slicer model may have different dial settings, so check the manual if needed.
Test the slice thickness by running a few pieces through the slicer. Check if the slices are the right thinness. If slices are too thick, lower the dial further. If too thin, raise it slightly for safety and ease. Repeat testing until slices match your needs.
Safety Checks
Check the blade for any loose parts before starting. A stable blade ensures safe slicing. Tighten screws and bolts as needed. A loose blade can cause accidents or uneven slices.
Verify that safety guards and locks are in place. These features prevent injuries during operation. Test the safety switch to confirm it works properly. Without these protections, the risk of cuts increases.
- Blade must be firmly attached to the slicer.
- Safety guards should cover moving parts.
- Locking mechanisms must hold the blade steady.
- Emergency stop button should respond immediately.

Credit: www.amazon.ca
Maintenance Tips
A clean slicer bladeworks best for thin, even slices. Set a regular cleaning scheduleto remove food bits and grease. Use warm water and mild soap, then dry fully to stop rust.
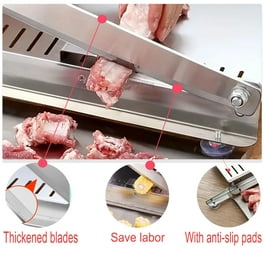
Keep the blade sharp. Dull blades make slicing harder and unsafe. Use a blade sharpeneror send the blade to a professional for sharpening. Check sharpness often to keep performance high.
- Clean blade after every use
- Dry blade well to prevent rust
- Sharpen blade every few weeks
- Use proper tools for sharpening
Credit: www.walmart.com
Frequently Asked Questions
How Do I Safely Remove The Slicer Blade?
First, unplug the slicer to avoid accidents. Use gloves to protect your hands. Loosen the blade screws carefully, then lift the blade straight off.
What Tools Are Needed To Replace A Slicer Blade?
You typically need a screwdriver and gloves. Some models may require a wrench or Allen key. Always check your slicer manual for specific tools.
How Often Should I Replace My Slicer Blade?
Replace the blade when it becomes dull or damaged. Generally, this is after several months of regular use. Sharp blades ensure thin, precise slices and safe operation.
Can I Sharpen The Slicer Blade Instead Of Replacing It?
Yes, sharpening is possible and extends blade life. Use a professional sharpener or follow manufacturer guidelines. Replace the blade if sharpening no longer improves performance.
Conclusion
Replacing a slicer blade for thin slices is simple and safe. Follow the steps carefully and take your time. Using the right tools helps make the job easier. Check the blade condition regularly to keep slicing smooth. A sharp blade means better, thinner cuts every time.
Stay cautious to avoid accidents while handling the blade. With practice, blade replacement will become quick and routine. Enjoy perfectly sliced food without hassle or worry.