
Is your meat thermometer not giving accurate readings? It might be time to replace the probe.
Knowing how to replace the probe on your meat thermometer can save you money and keep your cooking on point. In this guide, you’ll find simple, step-by-step instructions that anyone can follow. By the end, you’ll have your thermometer working like new, so you can cook with confidence every time.
Keep reading—you’re just a few easy steps away from perfectly cooked meals!
Tools Needed
To replace the probe on a meat thermometer, gather a few essential tools. A small screwdriverhelps open the thermometer casing. Use a replacement probedesigned for your thermometer model. A pair of needle-nose plierscan assist in removing and placing the probe. Have some clean clothor paper towels ready to keep the work area tidy. If the probe is held by screws or clips, the screwdriver is necessary. A battery testeror fresh batteries might be useful to check the thermometer after replacement.
Removing The Old Probe
First, turn offthe meat thermometer and unplugit from any power source. This ensures safety while handling the probe.
Gently disconnect the probe wirefrom the main unit. Some models have a plug, while others may have a screw or clip.
Check your thermometer for any locking mechanismholding the probe in place. Release or unscrew it carefully.
Hold the probe firmly near its base and pull it out slowlyto avoid damage to the wire or sensor.
- Do not yank the probe cable.
- Keep the thermometer steady.
- Inspect the connector for dirt or damage.
Choosing A Replacement Probe
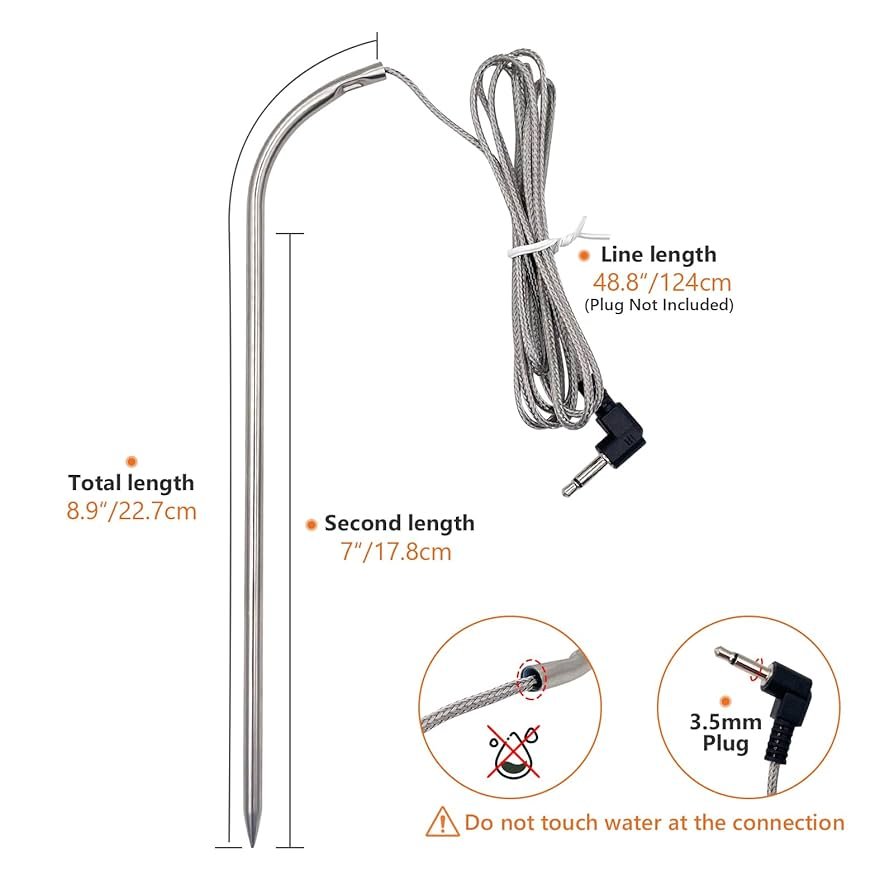
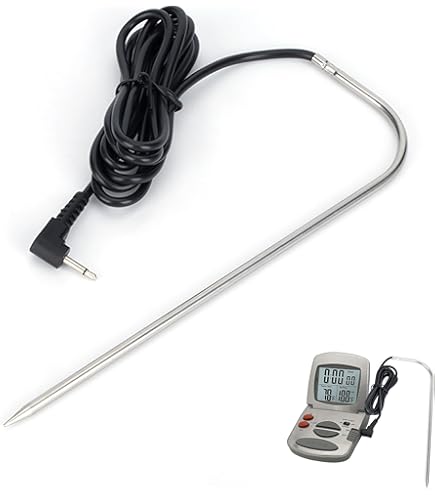
Choosing the right replacement probeis key for accurate temperature readings. Probes come in different types and sizes. Some fit digital thermometers, while others suit analog ones. The probe must be compatiblewith your meat thermometer model to work well.
Common probe types include:
- Wired probesthat connect via a cable
- Wireless probesthat send data remotely
- Standard metal probesfor most cooking
- Specialty probesfor grilling or smoking
Ensure the probe length and connector type match your device. Using the wrong probe can cause wrong readingsor damage the thermometer.
| Place to Buy | Details |
|---|---|
| Online stores | Wide selection; check reviews and compatibility |
| Kitchen supply shops | Expert advice; see probes in person |
| Manufacturer websites | Exact match for your thermometer model |
Credit: www.amazon.com
Installing The New Probe
First, locate the probe’s connector on the thermometer. It should fit snugly into the socket. Align the new probe’s plug with the port carefully. Push the plug gently until it is secure. Avoid forcing it, as this might damage the connector.
Secure the connection by locking any clips or screws if available. This keeps the probe from loosening during use. Check that the probe wire is not twisted or bent sharply. A smooth cable helps prevent breakage and ensures accurate readings.
- Check the fit: The probe should not wiggle.
- Lock clips if the thermometer has them.
- Keep the wire straight and untangled.
- Test the connection by turning on the thermometer.
Testing The New Probe
Testing the new probe ensures your meat thermometer works accurately. Insert the probe and check if it shows the correct temperature quickly. This simple step helps avoid cooking mistakes and keeps your food safe.
Calibrating The Thermometer
Start by placing the new probe in ice water. Let it sit for about 3 minutes. The thermometer should read 32°F (0°C). If it does not, adjust the calibration screw or button until it shows the correct temperature.
Checking Accuracy
Next, check the thermometer in boiling water. It should read 212°F (100°C) at sea level. Differences in altitude can change this reading slightly. Note the temperature and compare it to the known boiling point to ensure accuracy.

Credit: m.uchidg.com
Maintenance Tips
Keep the probe cleanafter each use. Use a soft cloth or sponge with warm, soapy water. Avoid harsh chemicals that may damage the probe. Rinse well and dry it completely before storing.
Store the thermometer in a dry place. Protect the probe from bending or damage. A small case or box works well. Avoid leaving it in hot or damp areas to keep it working longer.

Credit: www.youtube.com
Frequently Asked Questions
How Do I Know When To Replace My Meat Thermometer Probe?
Replace the probe if it shows inaccurate readings, physical damage, or corrosion. Faulty probes risk food safety and cooking precision.
What Tools Are Needed To Replace A Meat Thermometer Probe?
You typically need a small screwdriver, replacement probe, and possibly pliers. Check your thermometer manual for specific tool requirements.
Can I Use Any Probe To Replace My Meat Thermometer’s Probe?
No, use a compatible probe designed for your thermometer model. Using the wrong probe can cause inaccurate readings or damage.
How Do I Safely Disconnect The Old Probe From The Thermometer?
Turn off the thermometer and unplug it if possible. Gently unscrew or detach the probe connector without forcing it.
Conclusion
Replacing a meat thermometer probe is simple. Follow these easy steps. First, ensure the device is off. Remove the old probe carefully. Insert the new probe securely. Check connections to avoid errors. Test the thermometer with boiling water. Accurate readings ensure perfect meals.
Remember, maintenance keeps your device lasting longer. A well-functioning thermometer enhances cooking precision. Enjoy tasty and safe dishes every time. Keep these tips handy for future reference. Happy cooking!