

Is your meat slicer blade dull or damaged? Replacing it might seem tricky, but you can do it yourself quickly and safely.
Imagine slicing your favorite meats smoothly again without any hassle. In this guide, you’ll learn simple, step-by-step instructions to swap out your blade like a pro. Keep reading, and you’ll save time, money, and frustration while keeping your slicer in perfect shape.
Ready to get started? Let’s dive in!
Tools Needed
To replace a meat slicer blade, some important toolsare needed. These help make the job safeand easy. A wrenchor screwdriveris often used to remove screws or bolts holding the blade. A replacement blademust match the slicer model for perfect fit and function.
Safety gear is very important. Wear cut-resistant glovesto protect your hands from sharp edges. Safety glasseskeep eyes safe from any flying debris. Always unplug the slicer before starting work to avoid accidental cuts.
- Wrench or screwdriver
- Replacement blade
- Cut-resistant gloves
- Safety glasses
- Cloth to clean blade and slicer
Credit: tortariaestancia.com.br
Preparing The Slicer
Make sure the slicer is turned off. Then, unplug it from the wall. This keeps you safe from electric shocks. Never touch the slicer with wet hands. It can be dangerous.
Use a clean cloth to wipe around the slicer. Remove any food bits from last use. This keeps the area hygienic and tidy. A clean space also makes work easier. Be careful with sharp edges while cleaning. Always keep your fingers safe.
Removing The Old Blade
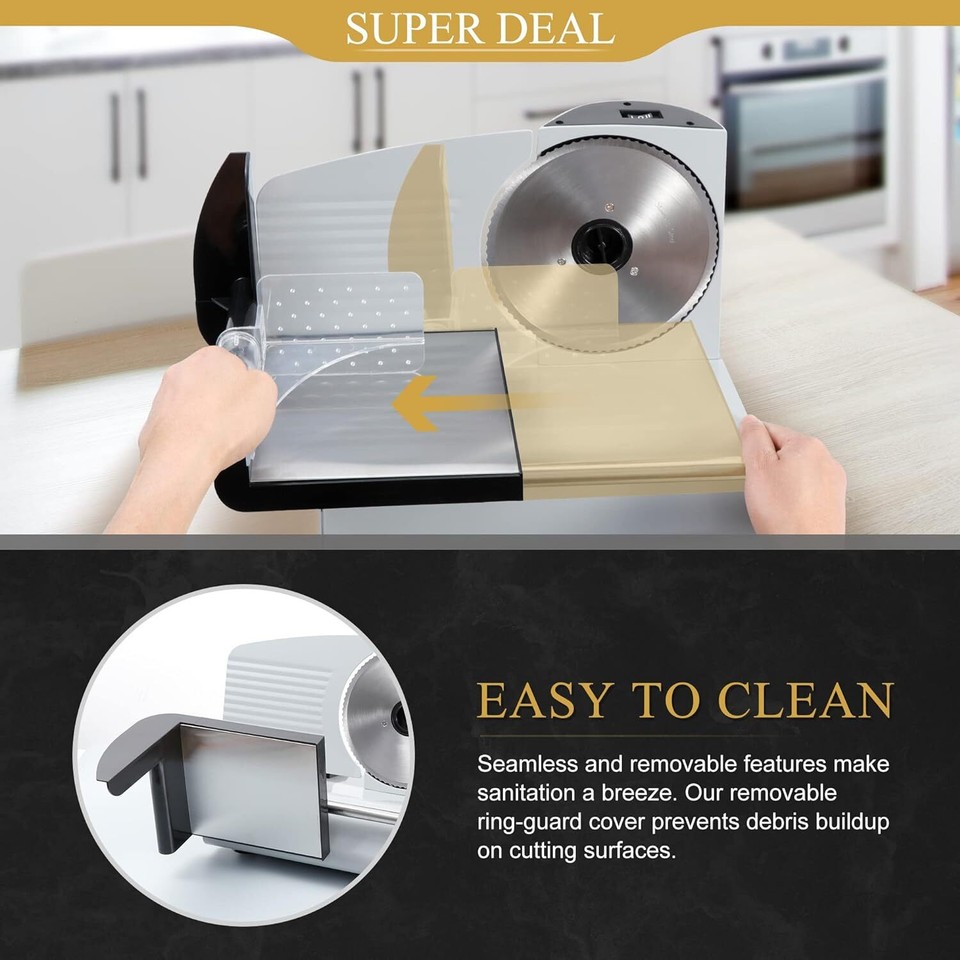
Start by unplugging the meat slicer for safety. Use a screwdriver or wrench to loosen the screwsholding the blade guard. This guard protects you from the sharp blade. Keep the screws safe for later use. Carefully remove the blade guard and set it aside.
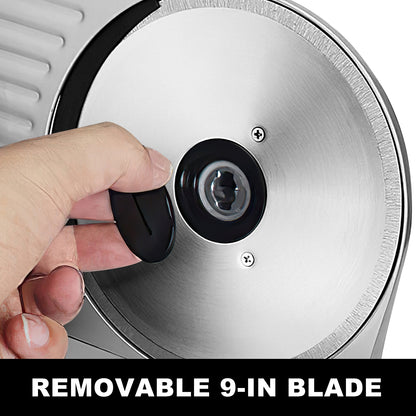
Next, hold the blade firmly to stop it from moving. Use the appropriate tool to loosen the center nutthat holds the blade in place. Turn the nut slowly and carefully. Once loose, gently lift the blade away from the slicer. Avoid touching the sharp edges. Place the old blade on a safe surface to avoid accidents.
Installing The New Blade
Place the new blade on the slicer carefully. Make sure the sharp edge faces outward.
Align the blade hole with the slicer’s center bolt. This helps keep it steady.
Check the blade sits flat and does not wobble. This ensures safe slicing.
- Use the provided washers if needed.
- Tighten the center bolt slowly.
- Do not overtighten; the blade must spin freely.
- Test the blade by spinning it by hand.
- Secure any locking nuts or screws firmly.
Testing The Slicer
Carefully put all parts back in their place. Make sure the blade fits tightly. Check that the guard and screws are secure. The slicer should look the same as before.
Before turning the slicer on, check the power switch is off. Make sure the blade moves freely without any noise. Test the slicer with a small piece of food. Watch for smooth, even slicing.
Safety is very important. Confirm the blade guard is locked. Use a cloth or gloves to avoid cuts. Keep hands away from the blade while testing. Make sure the slicer stops quickly when turned off.
Maintenance Tips
Keep the meat slicer blade cleanto avoid rust and dullness. Use a damp clothwith mild soap after every use. Dry the blade well to stop water damage. Never use harsh chemicals that can hurt the blade.
Sharpen the blade regularly to keep it cutting smoothly. Use a sharpening stoneor a device made for slicer blades. Follow the blade’s angle to avoid damage. Sharpen only a few times to keep the blade strong. Dull blades make slicing hard and unsafe.
Troubleshooting Common Issues
Blade alignment issuescan cause uneven slicing and damage. Check the blade’s position to ensure it is straight. Use a level surface to verify if the blade sits correctly. Tighten any loose screws holding the blade in place. Misaligned blades may cause the slicer to jam or produce uneven cuts.
Unusual noisesoften indicate a problem with the blade or motor. Listen for grinding or rattling sounds during operation. These noises may come from worn bearings or a dull blade. Inspect the blade for chips or damage, and replace it if needed. Clean and lubricate moving parts to reduce friction and noise.
- Check blade alignment regularly
- Tighten all screws securely
- Replace damaged or dull blades
- Clean and lubricate parts
- Inspect motor and bearings for wear

Credit: www.amazon.co.uk
Credit: www.techwood.online
Frequently Asked Questions
How Often Should I Replace A Meat Slicer Blade?
Replace the meat slicer blade when it becomes dull or damaged. Frequent use may require replacement every few months. Always inspect the blade regularly for sharpness and any signs of wear or rust to maintain safe, efficient slicing.
What Tools Do I Need To Replace The Blade?
You typically need a screwdriver or Allen wrench, depending on your slicer model. Always consult your slicer’s manual for specific tools and instructions. Use gloves to protect your hands during replacement.
Is It Safe To Replace The Meat Slicer Blade Myself?
Yes, replacing the blade yourself is safe if you follow the manufacturer’s instructions carefully. Always unplug the machine before starting, wear cut-resistant gloves, and handle the blade with caution to avoid injury.
How Do I Clean The Meat Slicer Blade Before Replacement?
Turn off and unplug the slicer before cleaning. Use warm, soapy water and a soft cloth to clean the blade. Avoid harsh chemicals; dry the blade thoroughly to prevent rust before installing a new one.
Conclusion
Replacing a meat slicer blade can be simple and safe. Follow each step carefully and take your time. Use the right tools and wear gloves to protect your hands. A sharp, clean blade helps your slicer work well and cut evenly.
Regular blade changes keep your machine in good shape. Now, you can slice meat smoothly and enjoy fresh cuts anytime. Keep your slicer clean and check the blade often. Safe and easy blade replacement makes cooking more enjoyable.