
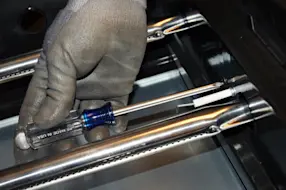
Is your built-in grill not lighting up like it used to? A faulty igniter is often the culprit, and replacing it might be simpler than you think.
Imagine firing up your grill quickly, without struggling or delays. In this guide, you’ll learn step-by-step how to replace your igniter safely and easily. By the end, you’ll be back to enjoying perfect grilled meals with no hassle. Keep reading to discover the straightforward fix that will bring your grill back to life.
Tools Needed
Replacing the igniter on a built-in grill requires specific tools. Using the right tools makes the job safer and easier.
Gather all tools before starting to avoid interruptions during the repair.
Basic Hand Tools
You need some common hand tools to remove and install the igniter properly.
- Screwdrivers (Phillips and flathead) to remove screws
- Adjustable wrench or socket set for nuts and bolts
- Pliers to grip and pull wires or connectors
Safety Equipment
Safety gear protects you from hazards while working on the grill.
- Work gloves to protect your hands
- Safety glasses to shield your eyes
- Flashlight or work light for better visibility
Testing And Replacement Tools
These tools help check the igniter and ensure the new one works correctly.
| Tool | Purpose |
|---|---|
| Multimeter | Test electrical continuity of igniter wires |
| Replacement igniter | New part to install on the grill |
| Wire strippers | Prepare wires for connection if needed |
Safety Precautions
Replacing the igniter on a built-in grill requires care. Safety is very important to avoid accidents.
Follow these safety tips before and during the replacement process to protect yourself and your grill.
Turn Off The Gas Supply
Always shut off the gas supply before starting any repair work. This stops gas flow and prevents leaks.
Close the main valve on the propane tank or natural gas line to cut off fuel.
Disconnect The Grill From Power
Unplug the grill from any electrical source. This avoids electric shocks while handling the igniter.
If your grill uses batteries for the igniter, remove them before starting.
Work In A Well-ventilated Area
Make sure your grill is outside or in a space with good airflow. This reduces gas buildup risks.
Avoid working in enclosed or poorly ventilated areas to stay safe from fumes.
Use Proper Tools And Protective Gear
Use the right tools to avoid damaging the grill or igniter parts. This also helps prevent injuries.
- Wear safety gloves to protect your hands
- Use eye protection to guard against sparks
- Handle small parts carefully to avoid dropping them
Check For Gas Leaks After Replacement
Once the igniter is replaced, test the grill for gas leaks before use. This ensures your safety.
Apply soapy water around connections and look for bubbles that show leaks.
Locating The Igniter
Replacing the igniter on a built-in grill starts with finding its exact location. The igniter is the part that creates the spark to light the burner.
Knowing where the igniter sits helps you remove and replace it safely. This guide will explain how to find the igniter in common built-in grills.
Check Near The Control Panel
The igniter is usually close to the grill’s control panel. Look for a small button or knob that you press to create a spark. The igniter wire runs from this button to the burners.
Look Under The Grill Hood
Open the grill hood and inspect the area above the burners. The igniter tip often sits near the burner tubes. This tip creates the spark to light the gas.
- Remove the cooking grates to get a clear view
- Locate the burner tubes inside the grill
- Find the small metal tip near the burners
- Trace the wire from this tip back to the igniter button
Identify Igniter Components
| Component | Description |
| Igniter Button | Located on the control panel, pressed to spark |
| Igniter Wire | Connects button to the igniter tip |
| Igniter Tip | Small metal piece near burners that sparks |
Use The Grill Manual
The grill’s manual often shows the igniter’s exact position. Look for diagrams or part lists. This makes locating the igniter easier and quicker.
Tip:If you lost the manual, search online using your grill’s model number. Many manufacturers offer free PDF manuals.
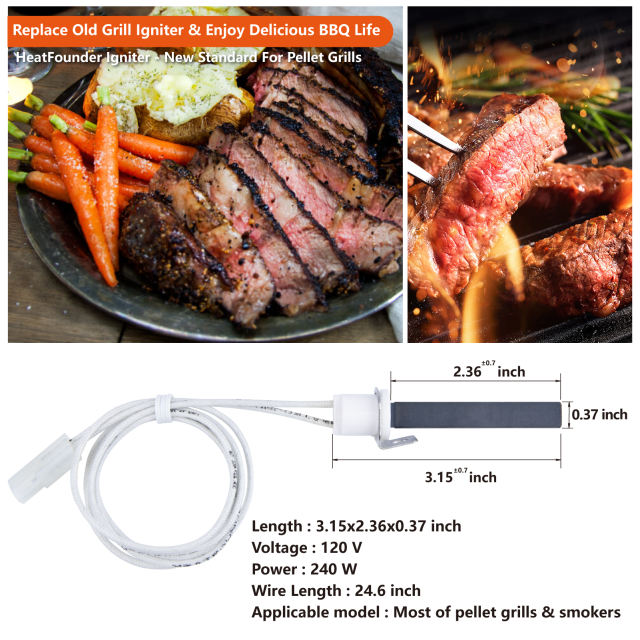
Credit: store.heatfounder.com
Removing The Old Igniter
Removing the old igniter is an important step before installing a new one. It helps keep your built-in grill working safely and well.
This guide shows you how to remove the old igniter carefully and correctly.
Disconnecting The Power Source
First, turn off the grill’s power to avoid electric shock. You can do this by unplugging it or switching off the circuit breaker.
Make sure the power is completely off before you continue to the next step.
- Unplug the grill from the wall outlet.
- If hardwired, switch off the circuit breaker.
- Test that the igniter does not spark.
Detaching The Igniter
Locate the igniter on your grill. It usually sits near the burner or control panel.
Remove the screws or clips holding the igniter in place. Carefully disconnect the wires from the igniter.
- Find the mounting screws or clips.
- Use a screwdriver to remove screws.
- Gently pull the igniter away from the grill.
- Disconnect the wires by pulling the connectors.
Installing The New Igniter
Replacing the igniter on your built-in grill is a simple process. Installing the new igniter correctly ensures your grill lights safely and reliably.
Follow these steps to position the igniter and secure its connections properly. This will help your grill work like new again.
Positioning The Igniter
Place the new igniter where the old one was located. The igniter tip must be near the burner for a spark to light the gas.
Make sure the igniter does not touch any metal parts that can cause a short circuit. Keep it steady and aligned with the burner.
- Locate the original igniter mounting hole
- Insert the igniter tip close to the burner
- Avoid contact with metal surfaces
- Check that the igniter is steady and straight
Securing The Connections
Attach the igniter wire to the connector firmly. Loose connections may stop the igniter from working.
Use the screws or clips provided to fix the igniter in place. Make sure all parts are tight and secure.
- Connect the igniter wire to the grill’s ignition terminal
- Tighten any screws or fasteners holding the igniter
- Double-check all connections are firm
- Test the igniter before closing the grill
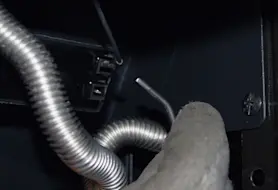
Credit: www.searspartsdirect.com
Testing The Igniter
Testing the igniter on your built-in grill helps find if it works properly. A faulty igniter can stop your grill from lighting up.
This guide shows simple ways to check the igniter before replacing it.
Check The Battery
Many igniters use a small battery to create a spark. First, check if the battery is dead or loose.
- Open the igniter housing carefully.
- Remove the battery and test it with a voltmeter.
- If the battery is weak, replace it with a new one.
- Put the battery back and tighten the housing.
Listen For The Clicking Sound
When you press the igniter button, you should hear a clicking noise. This means the igniter is trying to create a spark.
If there is no clicking, the igniter might be broken or the battery is dead.
Inspect The Electrode And Spark Gap
The electrode is where the spark jumps to light the gas. Dirt or damage here stops the spark.
| Check Item | What to Look For |
| Electrode tip | Clean and free of grease or rust |
| Spark gap | Gap about 1/8 inch wide |
| Wiring | No breaks or loose connections |
Test The Spark With A Multimeter
You can test the igniter’s spark strength using a multimeter set to measure voltage.
- Disconnect the igniter wires from the grill.
- Set the multimeter to AC voltage mode.
- Attach the multimeter leads to the igniter terminals.
- Press the igniter button and watch the reading.
- A low or zero voltage reading means the igniter is faulty.
Perform A Visual Spark Test
Warning:Make sure the gas is turned off before doing this test to avoid fire risk.
Press the igniter button and watch the electrode area for a spark. You should see a bright spark jump across the gap.
If no spark appears, the igniter needs repair or replacement.
Troubleshooting Tips
Replacing the igniter on a built-in grill can fix lighting problems. Before replacing, some simple checks can save time.
These troubleshooting tips help find common issues with your grill igniter.
Check The Battery
The igniter often uses a battery to create a spark. A dead battery stops the spark from working.
Remove the battery and test it with a battery tester or replace it with a new one.
- Open the igniter housing
- Take out the battery carefully
- Test or replace the battery
- Reassemble and test the igniter
Clean The Electrode Tip
Grease and dirt on the electrode tip can block the spark. Clean the tip with a soft cloth or fine sandpaper.
Make sure the tip is dry before testing the igniter again.
Inspect The Igniter Wire
Damaged or loose wires stop the igniter from sparking. Check the wire for breaks or loose connections.
Secure any loose wires and replace damaged ones before testing again.
Ensure Proper Electrode Gap
The gap between the electrode and the burner should be about 1/8 inch. Too big or small a gap affects the spark.
Use a ruler or gap tool to check and adjust the distance carefully.
Test The Igniter Button
The button that triggers the igniter can wear out. Press the button and listen for a clicking sound.
If no click is heard, the button may be faulty and need replacement.
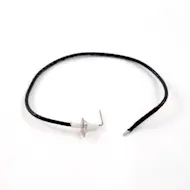
Credit: www.searspartsdirect.com
Frequently Asked Questions
How Do I Identify A Faulty Igniter?
To identify a faulty igniter, check for visible damage or corrosion. Test it by pressing the igniter button and listening for a clicking sound. If there’s no sound or spark, it might be faulty. Replacing it could restore your grill’s functionality.
What Tools Are Needed To Replace An Igniter?
To replace an igniter, you’ll need a screwdriver, a wrench, and possibly pliers. Ensure you have the correct replacement igniter for your grill model. These basic tools will help you safely and efficiently complete the replacement process.
Can I Replace The Igniter Myself?
Yes, replacing the igniter is a simple DIY task. Ensure the grill is off and cool before starting. Follow the manufacturer’s instructions for your specific grill model. With the right tools and safety precautions, you can successfully replace it yourself.
How Long Does It Take To Replace An Igniter?
Replacing an igniter typically takes about 30 minutes. This includes removing the old igniter, installing the new one, and testing it. With preparation and the right tools, the process is straightforward and quick.
Conclusion
Replacing the igniter on your built-in grill is simple and quick. Follow the steps carefully to avoid any mistakes. Use the right tools to make the job easier. Check the new igniter works before closing the grill. Regular maintenance helps keep your grill safe and ready.
Enjoy cooking with a reliable, working igniter every time. A little effort saves you from bigger problems later. Keep your grill in good shape for many cookouts.