
Are you struggling with a stuck grinder wheel and don’t know where to start? Removing a grinder wheel might seem tricky, but with the right steps, you can do it safely and quickly.
Whether you need to replace a worn-out wheel or switch to a different type, this guide will walk you through the process in a clear, simple way. Keep reading, and you’ll be able to tackle your grinder with confidence—no frustration, no guesswork.
Your next project starts with this easy fix!

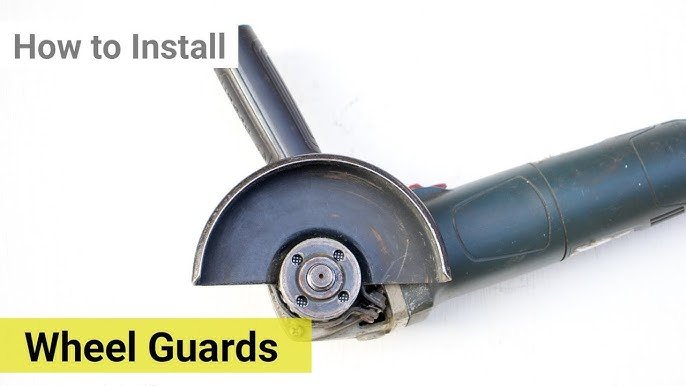
Credit: www.youtube.com
Tools Needed
Removing a grinder wheel needs the right tools. Always have these ready before starting.
- Wrenchor spanner to loosen nuts.
- Screwdriverfor removing guards.
- Replacement wheelthat fits the grinder.
- Clothto clean the wheel and parts.
Using the correct safety gearis very important to protect yourself.
- Safety glassesto protect eyes from dust and sparks.
- Glovesto protect hands from cuts and dirt.
- Dust maskto avoid breathing dust.
- Ear protectionif the grinder is loud.

Credit: www.amazon.com
Prepare The Grinder
Ensure the grinder is unplugged to avoid accidents. Clear the area around the wheel for easy access. Gather necessary tools like a wrench and safety gloves before starting.
Unplugging The Tool
Always unplug the grinderbefore starting work. This prevents accidentsand electrical shocks. Double-check the power cord is out of reach. Safety is the top priority when handling power tools.
Cleaning The Wheel Area
Remove dust and debris around the wheel using a brush or cloth. A clean area makes it easier to see the parts clearly. Dirt can block your view and cause mistakes. Keep the grinder dry to avoid slipping or rust.
Loosen The Wheel
First, find the locking mechanismthat holds the wheel in place. It can be a nut, bolt, or a clamp. Check carefully to know what type it is.
Choose the right wrenchthat fits the locking part. Using the wrong tool can cause damage or slip. A proper fit ensures safety and ease.
- Use a spanner or adjustable wrench for nuts.
- A hex key fits hex bolts.
- Locking pliers work well on clamps.
Turn the wrench slowly and steadilyto loosen the lock. Avoid quick or forceful moves to prevent injury. Keep a firm grip on the tool.
Remove The Wheel
The locking nutholds the grinder wheel tightly in place. Use a wrench to unscrew the nutby turning it counterclockwise. This may need some force if it is very tight. Keep the grinder steady for safety.
Once the nut is loose, you can take off the wheel. Carefully pull the wheel away from the grinder shaft. If it feels stuck, gently wiggle it until it comes off.
- Always wear safety gloves to protect your hands.
- Make sure the grinder is unplugged before starting.
- Keep parts organized to avoid losing them.
Inspect And Replace
Before removing the grinder wheel, inspect it carefully. Look for cracks, chips, or wear. Any damage can be dangerous during use. A damaged wheel should never be used again.
Choose a new wheel that matches the size and typeof the old one. Check the speed ratingon the wheel to ensure it fits your grinder. Using the wrong wheel can cause accidents.
- Measure the diameter and thickness of the old wheel.
- Check the hole size for proper fitting.
- Pick a wheel designed for the material you will cut or grind.
Reinstall The Wheel
Place the new grinder wheel carefully on the spindle. Make sure it fits snugly without tilting. Align the hole in the wheel with the spindle’s shaft. This helps the wheel spin evenly and safely.
Hold the wheel steady while fitting the washer over the spindle. The washer keeps the wheel stable during use. Next, screw the locking nut onto the spindle by hand.
Use a wrench to tighten the locking nut firmly. Do not over-tighten as it may crack the wheel. A secure fit stops the wheel from wobbling or falling off.
- Check wheel position before tightening.
- Hand-tighten first, then use a wrench.
- Do not force the nut too much.
Test The Grinder
Secure the wheel tightly before testing the grinder. A loose wheel can cause accidents. Use the correct tool to fasten the nut holding the wheel. Make sure it does not wobble or move.
Perform a safety check to protect yourself. Wear safety glasses and gloves. Stand to the side, not directly in front of the wheel. Check for cracks or damage on the wheel before use.

Credit: www.reddit.com
Frequently Asked Questions
How Do I Safely Remove A Grinder Wheel?
First, unplug the grinder for safety. Use a wrench to loosen the wheel nut. Remove the wheel carefully to avoid damage.
What Tools Are Needed To Remove A Grinder Wheel?
You need a wrench or spanner, usually provided with the grinder. Sometimes, a screwdriver may help to hold the spindle.
How To Loosen A Stuck Grinder Wheel Nut?
Apply penetrating oil and let it sit for 10 minutes. Use a wrench with steady pressure to loosen the nut.
Can I Remove The Grinder Wheel Without Disassembling The Grinder?
No, you must remove the wheel guard and nut to safely take off the wheel.
Conclusion
Removing a grinder wheel is simple with the right steps. Always wear safety gear to protect yourself. Use tools carefully and follow instructions closely. Check the wheel and machine for damage before starting. Taking your time helps avoid mistakes and accidents.
Practice these tips to keep your grinder in good shape. Stay safe and work smart every time you change a wheel. This way, your grinder will last longer and work better.