

Imagine enjoying warm, crispy ice cream cones made fresh right at home whenever you want. You don’t need fancy tools or special skills—just a simple waffle maker and a little know-how.
Making your own ice cream cones lets you customize flavors, control ingredients, and impress your family and friends with a delightful treat. Ready to discover how easy and fun it is? Keep reading, and you’ll learn step-by-step how to turn your waffle maker into a cone-making machine that brings joy to every scoop.
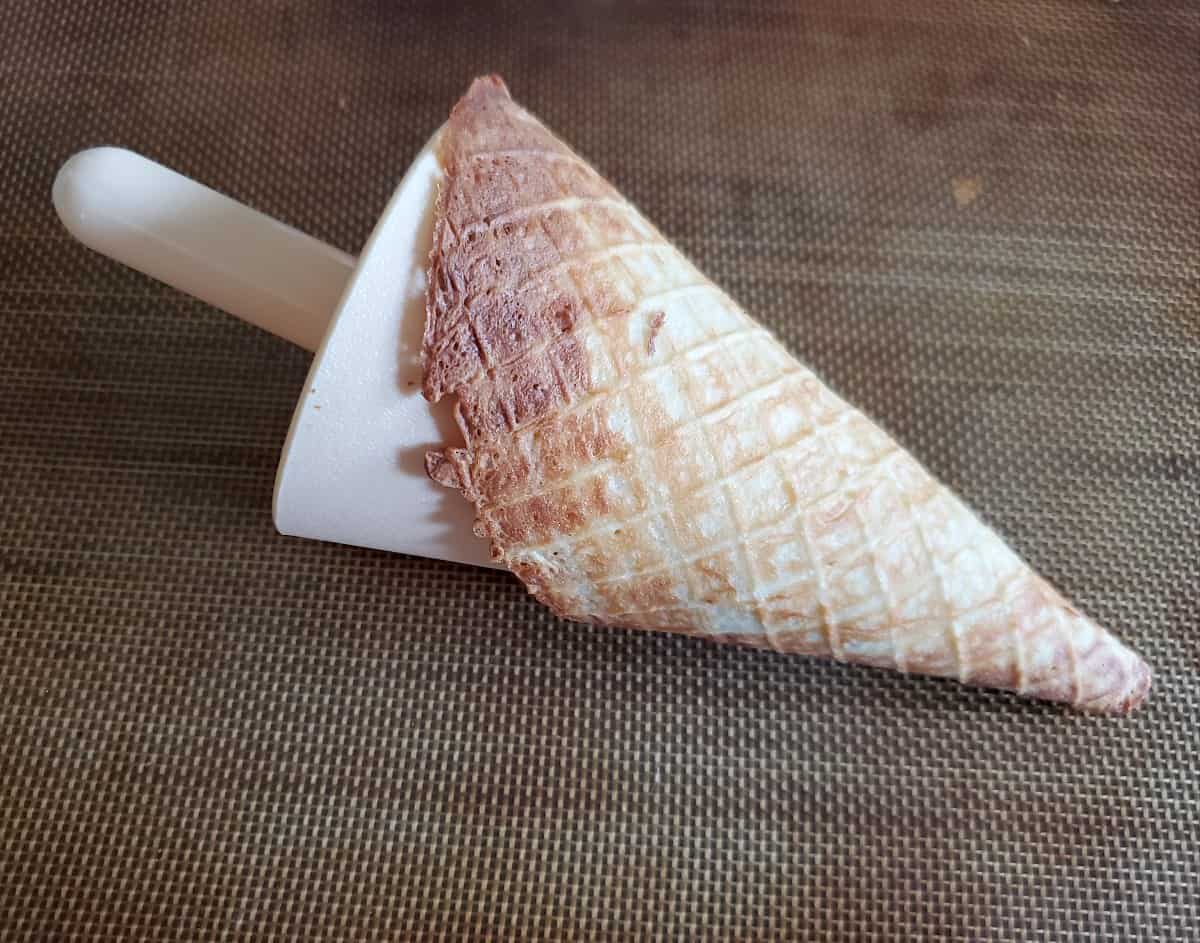
Credit: honestandtruly.com
Ingredients Needed
Making ice cream cones with a waffle maker is fun and easy. You only need a few simple ingredients.
These ingredients create a thin, crispy cone that holds your favorite ice cream perfectly.
All-purpose Flour
All-purpose flour is the base for the cone batter. It gives the cones structure and crispness.
Use sifted flour to avoid lumps and get a smooth batter.
Sugar
Sugar adds sweetness and helps the cones brown nicely in the waffle maker.
Granulated sugar works well for this recipe.
Eggs
Eggs bind the ingredients together and add richness to the cones.
Use large eggs at room temperature for best results.
Butter
Butter makes the cones tender and adds flavor. Melted butter blends easily into the batter.
You can use unsalted butter to control the salt level.
Milk
Milk thins the batter so it spreads evenly in the waffle maker.
Whole milk or any milk alternative works fine.
Vanilla Extract
Vanilla extract adds a mild, sweet flavor to the cones. It complements the ice cream well.
Use pure vanilla extract for the best taste.
Choosing The Right Waffle Maker
Making ice cream cones with a waffle maker is fun and tasty. The right waffle maker helps you create perfect cones every time.
Choosing the right waffle maker depends on size, shape, and heat control. These factors affect how your cones turn out.
Waffle Maker Size And Shape
Look for a waffle maker that makes thin, flexible waffles. Thin waffles are easier to roll into cone shapes.
- Choose a round or square shape with flat edges.
- A smaller size makes better cone shapes.
- Check if the plates are removable for easy cleaning.
Heat Control And Cooking Time
Good heat control helps cook waffles evenly. This prevents burning or undercooking the cones.
- Choose a waffle maker with adjustable temperature settings.
- Look for quick heating features to save time.
- Check if it has a timer or indicator light for easy use.
Material And Durability
Choose a sturdy waffle maker made from durable materials. It should withstand daily use without damage.
| Material | Benefits |
| Cast Iron | Even heating, long-lasting |
| Non-stick Coating | Easy to clean, less sticking |
| Stainless Steel | Durable, rust-resistant |
Additional Features To Consider
- Non-slip feet to keep the maker stable.
- Cool-touch handles for safe use.
- Compact size for easy storage.
- Power indicator lights for convenience.
Preparing The Batter
Making ice cream cones with a waffle maker starts with a good batter. You need the right mix to get crispy, tasty cones.
This guide shows how to prepare the batter in three parts: mixing dry ingredients, adding wet ingredients, and checking the consistency.
Mixing Dry Ingredients
Start by combining all dry ingredients in a large bowl. This helps the batter blend smoothly later.
- Flour – use all-purpose for best results
- Sugar – adds sweetness and color
- Baking powder – helps the cones rise slightly
- Salt – balances the sweetness
Adding Wet Ingredients
Mix wet ingredients separately before adding to the dry mix. This prevents lumps and keeps the batter smooth.
| Wet Ingredient | Purpose |
| Milk | Gives moisture and helps mix dry ingredients |
| Eggs | Bind the batter and add richness |
| Melted Butter | Adds flavor and crispness to the cones |
| Vanilla Extract | Enhances the taste |
Achieving The Right Consistency
The batter should be smooth and pourable but not too thin. This helps the cones hold shape and cook evenly.
- Mix all ingredients gently until smooth.
- Check the batter drips slowly from a spoon.
- If too thick, add a little milk to loosen it.
- If too thin, add a small amount of flour to thicken.
- Let the batter rest for 10 minutes before cooking.

Credit: kirbiecravings.com
Preheating The Waffle Maker
Preheating the waffle maker is a key step to make ice cream cones. It ensures the waffle batter cooks evenly and forms a perfect cone shape.
This guide explains how to preheat the waffle maker properly for the best results.
Set The Right Temperature
Most waffle makers have temperature settings. Set the heat to medium-high for crispy cones without burning.
Preheat Time
Allow the waffle maker to heat up for about 5 minutes. This time lets the plates reach the right temperature.
Check The Indicator Light
Most waffle makers have a light that shows when they are ready. Wait for this light before adding batter.
Prepare The Surface
Once preheated, lightly grease the plates with oil or non-stick spray. This helps cones release easily.
- Set temperature to medium-high
- Wait 5 minutes to heat
- Watch for the ready indicator light
- Grease the waffle plates lightly
| Temperature Setting | Medium-High |
| Preheat Time | About 5 minutes |
| Indicator Light | On when ready |
| Greasing | Light oil or spray |
Cooking The Cones
Cooking ice cream cones with a waffle maker is a fun way to make fresh cones at home. The key is to cook the batter just right. This guide covers pouring the batter, cooking time, and checking when the cones are done.
Follow these steps carefully to get crisp, golden cones that hold their shape well. A waffle maker can give you the perfect texture and color.
Pouring The Batter
Pour the batter evenly on the center of the waffle maker plate. Avoid adding too much batter to prevent thick cones. Spread the batter slightly if needed, but do not cover the edges completely.
- Use a ladle or spoon for better control.
- Keep the batter amount small for thin, crisp cones.
- Do not overflow to avoid batter leaking out.
- Close the lid gently after pouring.
Cooking Time And Temperature
Set your waffle maker to medium heat if it has a temperature control. Cooking time usually ranges from 1 to 3 minutes depending on the machine and batter thickness.
| Temperature Setting | Approximate Cooking Time |
|---|---|
| Low | 3 minutes |
| Medium | 2 minutes |
| High | 1 minute |
Checking Doneness
Check if the cone is golden brown and firm. It should lift easily from the waffle plate. If it sticks or looks pale, cook a bit longer.
- Open the lid carefully to avoid breaking the cone.
- Use a spatula to gently lift the cone if needed.
- If soft, close the lid and cook for 30 more seconds.
- Remove and shape the cone while warm for best results.
Shaping The Cones
Shaping ice cream cones with a waffle maker is simple and fun. The key is to work quickly while the waffle is warm.
After cooking the waffle, you need to roll it into a cone shape before it cools and hardens.
Rolling Techniques
Use a clean, flat surface to roll the waffle. Place the hot waffle on it and act fast to shape the cone.
- Lift one edge of the waffle carefully with a spatula.
- Roll it into a cone shape, starting from one side.
- Press the edge firmly to seal the cone.
- Adjust the tip of the cone to make it tight and pointed.
- Hold the shape for a few seconds until it starts to cool.
Cooling Tips
| Cooling Method | Benefit |
|---|---|
| Place cone in a glass | Keeps shape upright and prevents flattening |
| Cool at room temperature | Allows slow hardening without cracks |
| Do not refrigerate immediately | Prevents cone from becoming soft or soggy |
| Use a cooling rack | Air circulates evenly for better texture |
Let the cone cool fully before filling it with ice cream. This keeps it crisp and perfect for serving.
Storing And Serving
Making ice cream cones with a waffle maker is fun and tasty. After making them, you need to store and serve them properly.
Good storage keeps cones fresh and crispy. Serving ideas make your ice cream more enjoyable.
Keeping Cones Crispy
Keep cones dry and cool to stay crispy. Moisture makes cones soft and soggy quickly.
Store cones in an airtight container or plastic bag. Avoid putting them near wet or humid places.
- Use a sealed container to block air
- Store cones in a cool, dry place
- Do not stack cones tightly to avoid breaking
- Use cones within a few days for best taste
Serving Suggestions
Serve cones with your favorite ice cream flavors. Add toppings for extra taste and fun.
You can also decorate cones with chocolate or sprinkles before filling them.
- Fill cones with one or more ice cream flavors
- Add sprinkles, nuts, or chocolate chips
- Dip cone edges in melted chocolate and let harden
- Serve with fresh fruit or whipped cream on top

Credit: www.yahoo.com
Troubleshooting Common Issues
Making ice cream cones with a waffle maker is fun and tasty. Sometimes, you may face problems. These issues are easy to fix with simple tips.
This guide covers how to avoid soggy cones and fix batter problems. Follow these steps for better cones every time.
Avoiding Soggy Cones
Soggy cones happen when moisture stays trapped inside. This makes the cone soft and less crunchy. To keep cones crisp, try these tips.
- Cool cones completely before storing or serving.
- Store cones in an airtight container to block humidity.
- Use a clean waffle maker to avoid leftover moisture.
- Cook cones until they are golden brown and firm.
- Avoid stacking cones right after cooking to let steam escape.
Fixing Batter Problems
Thick or thin batter can cause issues. Thick batter may not spread well. Thin batter can make cones fragile. Check the batter consistency and adjust as needed.
| Problem | Cause | Solution |
| Batter too thick | Too much flour or not enough liquid | Add milk or water slowly to thin batter |
| Batter too thin | Too much liquid or not enough flour | Add a little flour to thicken batter |
| Cones stick to waffle maker | Waffle maker not greased or batter too wet | Lightly oil waffle plates before use |
| Uneven cooking | Waffle maker temperature too low or batter uneven | Preheat waffle maker fully and spread batter evenly |
Creative Variations
Making ice cream cones with a waffle maker is easy and fun. You can try different flavors and ingredients to make unique cones.
These creative variations help you enjoy new tastes and textures with your homemade cones.
Adding Flavors
You can add flavors to your waffle batter before cooking. This changes the taste of the cones and makes them special.
Try adding vanilla, cinnamon, or cocoa powder to the batter. These simple additions create tasty cones.
- Vanilla extract for a sweet, classic flavor
- Cinnamon powder for a warm, spicy touch
- Cocoa powder for a chocolate taste
- Lemon zest for a fresh, citrus flavor
- Almond extract for a nutty aroma
Using Alternative Ingredients
You can use different ingredients in your waffle cone batter. This lets you make cones for special diets or new flavors.
Try gluten-free flour or add mashed sweet potatoes for color and taste. These swaps keep cones tasty and fresh.
- Gluten-free flour for those with gluten intolerance
- Mashed sweet potatoes for natural sweetness and color
- Coconut flour for a tropical flavor
- Oat flour for added fiber and texture
- Honey or maple syrup instead of sugar for natural sweetness
Frequently Asked Questions
How Do You Make Ice Cream Cones With A Waffle Maker?
To make ice cream cones, prepare a waffle batter and heat your waffle maker. Pour a small amount of batter onto the preheated surface. Cook until golden brown. Quickly shape the waffle into a cone using a cone roller. Let it cool and harden.
Enjoy your homemade cone with ice cream!
What Ingredients Are Needed For Waffle Cones?
You will need flour, sugar, eggs, butter, milk, and vanilla extract. Combine these ingredients to create a smooth batter. Adjust the sweetness to your preference. Ensure the batter is lump-free for the best results. These simple ingredients make delicious, crispy waffle cones.
Can I Use A Regular Waffle Maker For Cones?
Yes, you can use a regular waffle maker. The key is using less batter for thinner waffles. After cooking, immediately shape the waffle into a cone. Work quickly as they harden fast. With practice, you can achieve perfectly shaped cones using a regular waffle maker.
How Long Do Waffle Cones Stay Fresh?
Waffle cones stay fresh for about 2-3 days when stored properly. Keep them in an airtight container to maintain crispness. Avoid humidity and moisture, which can make them soggy. For the best taste and texture, enjoy them fresh on the day they’re made.
Conclusion
Making ice cream cones with a waffle maker is simple and fun. You only need a few ingredients and a little time. The cones turn out crispy and warm, perfect for any ice cream flavor. This method saves money and lets you enjoy fresh cones anytime.
Try different batter flavors for variety. Enjoy your homemade cones with family and friends. Keep practicing to get the best shape and taste. Homemade cones add a special touch to your sweet treats. Give it a try and enjoy every bite.