
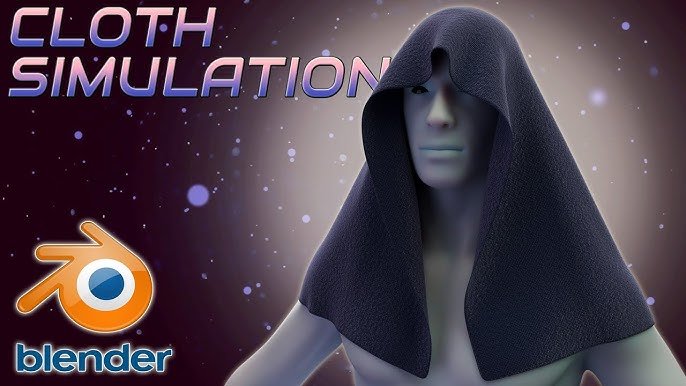
Have you ever wanted to create your own clothes in Blender but didn’t know where to start? Making clothes for your 3D models can seem tricky, but with the right steps, you can bring your designs to life quickly and easily.
You’ll discover simple techniques that will help you design realistic clothes from scratch. Whether you’re a beginner or looking to improve your skills, this guide will give you clear, actionable tips to make your creations stand out. Ready to turn your ideas into stunning 3D outfits?
Let’s dive in!

Credit: www.reddit.com
Getting Started With Blender
Blender is a free 3D software used to create models and animations. You can design clothes with Blender by learning its basics first.
This guide helps you start with Blender. You will learn how to install it, understand the interface, and use tools for clothing design.
Installing Blender
Go to the official Blender website to download the program. It works on Windows, Mac, and Linux computers.
Choose the right version for your system and run the installer. The setup is simple and takes a few minutes.
- Visit blender.org
- Select your operating system
- Download the installer file
- Run the installer and follow instructions
- Open Blender after installation
Interface Basics
The Blender interface has many parts. Knowing the main areas helps you work faster and easier.
The 3D Viewport is where you see and edit your models. Panels on the sides give tools and settings.
- 3D Viewport: Main workspace for modeling
- Outliner: Shows all objects in your scene
- Properties Editor: Change settings for objects and tools
- Timeline: Used for animation
- Toolbar: Quick access to common tools
Essential Tools For Clothing Design
Blender has special tools to help you make clothes. These tools make modeling fabric easier and more realistic.
Use the cloth simulation to make fabric move naturally. Sculpting tools help shape details like folds and wrinkles.
- Mesh modeling: Create the base shape of clothes
- Cloth simulation: Add realistic fabric movement
- Sculpting: Add details and texture to clothes
- Modifiers: Use tools like Subdivision Surface for smooth edges
- UV Mapping: Prepare clothes for texturing
Creating A Basic Garment
Making clothes in Blender lets you design custom outfits for your models. You can create simple garments like shirts or dresses with the cloth tools.
This guide covers how to set up your workspace, use the cloth modifier, and model a basic shirt step by step.
Setting Up The Workspace
Start by opening Blender and creating a new project. Use the default layout or choose the modeling workspace for better tools.
- Open Blender and select General > New File
- Switch to the Modeling workspace from the top tabs
- Delete the default cube by selecting it and pressing X
- Import or add the base model to dress
- Enable the Cloth physics tab in the Properties panel
Using The Cloth Modifier
The cloth modifier simulates fabric movement. Add it to your garment mesh to make it behave like real cloth.
| Step | Action | Notes |
| 1 | Select your garment mesh | Make sure it is separate from the base model |
| 2 | Go to the Physics Properties tab | Look for the Cloth section |
| 3 | Click Add Cloth | The modifier is now active |
| 4 | Adjust settings like Quality and Mass | Higher quality means slower simulation |
| 5 | Use Pinning to fix parts of cloth | Pin vertices to keep them in place |
Modeling A Simple Shirt
To create a basic shirt, start with a simple mesh shape that fits your model. Then use modifiers and editing tools to refine it.
- Add a cube or plane to the scene
- Scale and position it over the model’s torso
- Enter Edit Mode and shape the mesh to form the shirt
- Use loop cuts and extrude to add sleeves
- Apply the Cloth modifier to simulate fabric
- Run the simulation to see the shirt fall naturally
Advanced Modeling Techniques
Creating clothes in Blender requires careful attention to detail. Advanced modeling techniques help make clothes look realistic. These techniques involve sculpting, seam creation, and pattern work.
Understanding these methods improves your ability to design complex clothing models. This guide covers three important techniques to enhance your clothing projects.
Sculpting Details And Folds
Sculpting adds realistic textures and shapes to clothes. You create folds, wrinkles, and fabric thickness with sculpt tools. This makes the garment look natural and worn.
- Use the Grab brush to pull fabric edges
- Apply the Crease brush to define sharp folds
- Use Smooth to soften harsh edges
- Try Inflate to add volume to fabric areas
- Combine brushes for varied fabric effects
Creating Seam Lines
Seam lines show where fabric pieces join. They add realism and structure to clothes. Use edge loops and marking seams in Blender to create these lines.
| Method | Description | Tip |
| Edge Loops | Insert loops near seams for detail | Keep loops close for sharp seams |
| Mark Seam | Define sewing lines on mesh edges | Use for UV unwrapping and texture |
| Bevel Edges | Round edges for softer seam appearance | Adjust bevel width carefully |
Working With Patterns
Patterns help shape clothes in Blender. Use flat shapes and arrange them on the model. Patterns guide cutting and sewing steps in real garment making.
Follow these tips for pattern work:
- Create basic shapes for each clothing piece.
- Align patterns on the body model properly.
- Use modifiers like Shrinkwrap to fit patterns tightly.
- Join patterns by merging edges where seams will be.
- Check symmetry to keep patterns balanced.
Texturing And Materials
Making clothes in Blender needs good texturing and materials. These make the clothes look real and detailed.
This guide shows how to add fabric textures and use shader nodes. It also covers adding realistic details to your clothes.
Applying Fabric Textures
Start by choosing a fabric texture that fits your clothes. You can use images of cotton, denim, or silk.
Apply the texture to your model using the UV editor. This maps the fabric image correctly on the clothes.
- Unwrap the clothing model in Edit mode
- Import your fabric texture image
- Assign the texture to the material’s base color
- Adjust the scale and position for the best fit
Using Shader Nodes
Shader nodes help create realistic fabric looks. Mix different shaders for better effects.
Use a Principled BSDF shader as a base. Add texture maps like bump, roughness, and normal maps.
- Connect fabric texture to the Base Color input
- Add a Bump node with a bump map for fabric texture depth
- Use Roughness map to control fabric shininess
- Mix shaders to add translucency or sheen
Adding Realistic Details
Small details make clothes look real. Add seams, wrinkles, and wear marks.
Use texture painting or image masks to add these details. They add depth and character to clothes.
- Paint seam lines along edges
- Add wrinkle maps in areas that fold
- Use dirt or wear textures on edges
- Adjust normal maps for surface roughness
Animating Clothes
Animating clothes in Blender makes your characters look more real. Clothes move naturally with the body.
This guide covers rigging, fabric simulation, and testing the animation in Blender.
Rigging For Movement
Rigging links clothes to the character’s skeleton. It lets clothes follow body movements.
Use weight painting to control how much the clothes move with each bone. This keeps the fabric from stretching oddly.
Simulating Fabric Dynamics
Fabric simulation adds realistic cloth behavior. Blender’s cloth physics help clothes bend, fold, and flow.
Adjust settings like stiffness and damping to match the type of fabric. Soft cloth moves differently than stiff cloth.
- Enable cloth physics on the clothing mesh
- Set material properties like bending and friction
- Use collision objects to prevent clothes from passing through the body
Testing Cloth Animation
Test animations to see how clothes react during movement. Play different poses and actions to check the simulation.
Look for unnatural stretching or clipping through the body. Adjust rigging and physics settings if needed.
- Run the animation timeline to watch cloth movement
- Pause and inspect problem areas closely
- Make small changes to physics or weights and retest

Credit: www.youtube.com
Rendering And Final Touches
Rendering clothes in Blender brings your 3D models to life. Final touches make the fabric look real and polished.
This guide covers lighting, post-processing, and exporting your finished clothing design.
Lighting And Scene Setup
Good lighting shows the details and texture of your clothes. Set up your scene with lights that highlight folds and fabric.
- Use a three-point lighting system for balanced light.
- Add an HDRI environment for natural reflections.
- Adjust light color to match the mood of your design.
- Position lights to create soft shadows on the fabric.
Post-processing Effects
Post-processing enhances the final render by adding effects. These effects improve colors, contrast, and sharpness.
| Effect | Purpose | Common Settings |
|---|---|---|
| Bloom | Makes bright areas glow softly | Threshold, Intensity, Radius |
| Color Correction | Adjusts hues and saturation | Lift, Gamma, Gain |
| Depth of Field | Blurs background for focus | Focus Distance, Aperture |
Exporting Your Finished Piece
Export your render in a format that preserves quality. Choose settings based on use, like web or print.
- Set resolution to at least 1920 x 1080 pixels.
- Choose PNG or TIFF for lossless quality.
- Save a copy in JPEG for smaller file size.
- Check your render for any errors or noise.
- Use Blender’s compositor to finalize before export.
Troubleshooting Common Issues
Making clothes in Blender can be tricky. Some common problems may happen during the process.
Fixing these issues helps your cloth look better and work smoothly in your project.
Fixing Cloth Penetration
Cloth penetration occurs when the fabric passes through the character or other objects. This looks unnatural and breaks the illusion.
To fix this, increase the collision quality and adjust the distance settings in the cloth and collision modifiers.
- Raise the collision thickness in the collision settings.
- Increase the quality steps in the cloth simulation panel.
- Use vertex groups to control cloth stiffness near the body.
- Check for overlapping meshes before simulation.
Improving Simulation Speed
Cloth simulation can be slow and delay your work. Faster simulations help you test and make changes quickly.
Lower the quality settings and use simpler cloth meshes to speed up the simulation without losing much detail.
- Reduce the number of cloth mesh vertices.
- Lower the simulation quality steps.
- Use caching to avoid re-simulating each time.
- Disable self-collision if not needed.
Resolving Texture Errors
Textures may not show correctly on cloth if UV maps are wrong or images are missing. This makes clothes look bad.
Check your UV unwrap and make sure all texture files are properly linked in Blender.
- Re-unwrap the cloth mesh if textures stretch or distort.
- Verify image paths in the shader editor.
- Reload missing textures from the file menu.
- Use simple materials first to test before adding complex textures.

Credit: www.youtube.com
Frequently Asked Questions
How Do I Start Making Clothes In Blender?
Begin by modeling a base mesh that fits your character. Use Blender’s cloth simulation for realistic fabric behavior. Adjust parameters like gravity and stiffness to suit your design.
What Blender Tools Help Create Realistic Fabric?
Use the Cloth Modifier for fabric simulation. The Sculpt mode refines folds and wrinkles. Texture painting adds fabric patterns and details for realism.
Can I Animate Clothes In Blender?
Yes, Blender allows cloth animation using the Cloth Modifier. Animate character movements, and the clothes will react dynamically to motion and collisions.
How To Optimize Clothes For Game Use In Blender?
Use low-poly modeling and bake high-detail textures. Apply normal maps for fabric detail. Ensure the cloth mesh deforms correctly with character rigging.
Conclusion
Creating clothes in Blender takes practice and patience. Start with simple shapes and tools. Learn how to use cloth simulation for realistic effects. Adjust materials and textures to match your style. Keep experimenting with different settings to improve. Watch tutorials and try new techniques often.
Soon, you will create clothes that look real. Enjoy the process and have fun designing. Your skills will grow step by step. Keep practicing, and your Blender clothes will impress.