
Have you ever wanted to make your own waffle iron at home? Imagine having a custom-made tool that fits your style and needs perfectly.
Whether you’re tired of expensive gadgets or just love DIY projects, building your own waffle iron can be a fun and rewarding experience. In this guide, you’ll discover simple steps and tips to create a waffle iron that works just for you.
Keep reading, and soon you’ll be enjoying delicious waffles made with your very own homemade device.
Choosing Materials
Making a waffle iron starts with choosing the right materials. Good materials help your waffle iron work well and last long.
Focus on three parts: heating element, cooking plates, and safety components. Each part needs careful material choices.
Selecting The Heating Element
The heating element warms the waffle iron to cook the batter. Choose materials that heat evenly and fast.
Common heating elements use metal wires or plates. Nichrome wire is a popular choice because it resists heat well.
- Use nichrome wire for steady heat
- Metal plates offer quick temperature changes
- Make sure the heating element fits your power needs
Picking The Cooking Plates
Cooking plates touch the batter and shape the waffles. They must be non-stick and durable.
Cast iron and aluminum are common materials. Cast iron holds heat well but is heavy. Aluminum heats fast and is light.
- Choose cast iron for even heat and durability
- Choose aluminum for quick heating and light weight
- Coat plates with non-stick material for easy cleaning
Gathering Safety Components
Safety parts protect users from burns and electrical shocks. Use materials that do not conduct heat or electricity easily.
Insulated handles and heat-resistant casings are important. Also, use proper wiring and switches for electrical safety.
- Use plastic or silicone for insulated handles
- Choose heat-resistant materials for the outer casing
- Use certified electrical wires and switches
Designing The Waffle Iron
Designing a waffle iron needs careful thought. It is important to think about size, shape, and features.
This guide will help you plan the main parts of your waffle iron design.
Deciding On Size And Shape
Choose a size that fits your kitchen and cooking needs. A small waffle iron is easy to store.
The shape affects how waffles look. Square, round, or heart shapes are popular choices.
- Small size: good for one or two waffles
- Large size: makes more waffles at once
- Square shape: classic look and easy cutting
- Round shape: traditional waffle style
- Novelty shapes: fun and unique waffles
Planning The Handle And Hinge
The handle needs to stay cool for safe use. It should be easy to grip and strong.
The hinge connects the two plates. It must be sturdy and allow smooth opening and closing.
- Use heat-resistant materials for the handle
- Design a handle shape that fits the hand well
- Choose a hinge that moves without sticking
- Make sure the hinge holds plates tightly together
Incorporating Temperature Control
Temperature control helps make waffles just right. It lets users set how hot the iron gets.
Include a clear control dial or buttons. Add a light or sound to show when the iron is ready.
- Use a thermostat to keep steady heat
- Add a temperature dial with simple numbers
- Include an indicator light or beep
- Ensure control parts are easy to use and clean
Building The Base
Making a waffle iron starts with building a strong base. The base holds all the parts together. It needs to be stable and safe for use.
This guide covers how to assemble the frame, install the heating element, and wire for power. Each part is important to make your waffle iron work well.
Assembling The Frame
First, build the frame using metal or heat-resistant materials. The frame shapes the waffle iron and holds the plates.
Use screws or bolts to join parts firmly. Make sure the frame is square and even. Check that the top and bottom fit well together.
- Select strong metal sheets or plates
- Cut pieces to the right size
- Join pieces with screws or bolts
- Ensure the frame is stable and aligned
Installing The Heating Element
The heating element is what cooks the waffles. Place it carefully inside the frame. It must touch the cooking plates evenly.
Secure the heating element so it does not move. Check for any gaps that could cause uneven heating. Use heat-resistant insulation around it if needed.
- Choose a heating element with correct wattage
- Fit it flat against the cooking plates
- Attach it firmly with screws or clips
- Use insulation to avoid heat loss
Wiring For Power
Connect the heating element to a power source. Use safe and thick wires to handle the electric load. Secure all connections tightly.
Add a switch or thermostat to control the heat. Make sure all wires are insulated to prevent shocks or short circuits.
- Use wires rated for high temperature
- Connect wires to the heating element terminals
- Install a power switch and safety fuse
- Insulate and secure all wire connections
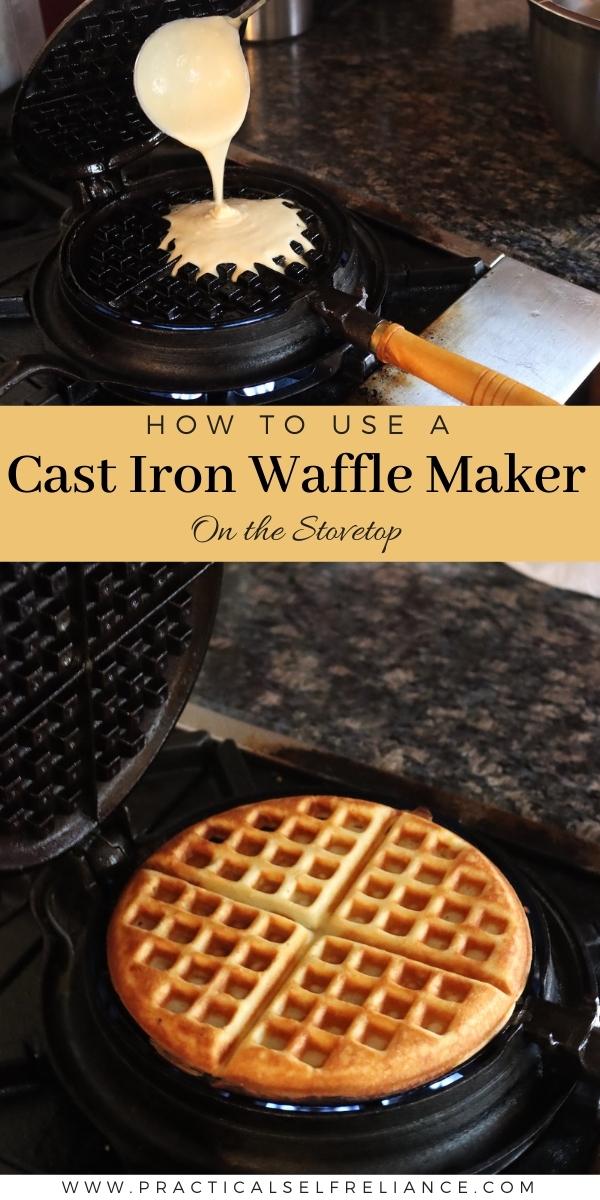
Credit: practicalselfreliance.com
Preparing The Cooking Plates
Cooking plates are the core part of a waffle iron. They shape and cook the batter into waffles. Proper preparation ensures even cooking and easy cleaning.
This guide covers shaping the plates, applying a non-stick coating, and attaching them to the frame.
Shaping The Plates
Start by cutting metal sheets to the right size. Use a mold to press the pattern into the plates. This pattern creates the waffle’s signature grid.
- Cut metal sheets carefully to fit the frame.
- Use a hydraulic press with the waffle pattern mold.
- Press metal sheets evenly for consistent depth.
- Check plates for smooth edges and clean shapes.
Applying Non-stick Coating
Non-stick coating prevents batter from sticking to the plates. It also makes cleaning faster. Use heat-resistant coatings made for cookware.
| Coating Type | Application Method | Drying Time |
|---|---|---|
| PTFE (Teflon) | Spray or brush | 30 minutes at 200°C |
| Ceramic | Spray only | 45 minutes at 250°C |
| Silicone | Brush | 20 minutes at 180°C |
Attaching Plates To The Frame
Secure the cooking plates firmly to the waffle iron frame. Use screws or clips that fit the design. Check alignment to ensure even cooking.
- Place plates on the frame, matching holes.
- Insert screws or clips to hold plates tightly.
- Test plate movement; they should not wobble.
- Make sure electrical parts do not touch plates.
Adding Safety Features
Making a waffle iron requires careful attention to safety. Adding safety features helps prevent accidents and injuries. This guide covers key safety additions you can include.
Focus on insulating heat surfaces, using heat resistant handles, and incorporating overheat protection. These steps make your waffle iron safer to use.
Insulating Heat Surfaces
Heat surfaces get very hot and can cause burns. Insulating these areas reduces the risk of accidental contact with hot parts. Use materials that block heat transfer effectively.
- Cover heating plates with a thin layer of heat-resistant silicone.
- Add a ceramic coating to outer metal parts near the heating area.
- Use mica sheets between heating elements and the housing.
- Ensure insulation material does not affect heating performance.
Adding Heat Resistant Handles
Handles should stay cool to touch. Heat resistant handles protect users from burns. Choose materials that do not conduct heat easily.
| Material | Heat Resistance | Durability |
| Bakelite | High | Good |
| Silicone | Moderate | Flexible |
| Wood | Moderate | Varies |
| Thermoplastic | High | Strong |
Attach handles firmly to prevent wobbling. Check that they do not loosen after repeated heating cycles.
Incorporating Overheat Protection
Overheat protection stops the waffle iron from getting too hot. This feature prevents damage and fire risks. Use sensors and automatic switches for safety.
Important components for overheat protection:
- Thermostat to monitor temperature
- Thermal fuse to cut power at high heat
- Automatic shutoff switch
Test these features during assembly to ensure they work properly. Replace any faulty parts immediately.
Testing The Waffle Iron
Testing your homemade waffle iron is essential. It ensures the appliance works well and makes tasty waffles.
This guide covers how to check temperature accuracy, even heating, and cooking trial waffles.
Checking Temperature Accuracy
Use a cooking thermometer to check if the iron heats to the right temperature. This helps avoid burnt or undercooked waffles.
- Turn on the waffle iron and let it heat fully.
- Place the thermometer on the cooking surface carefully.
- Wait a few minutes to get a stable reading.
- Compare the reading to your target cooking temperature, usually between 350°F and 375°F.
- Adjust the heating element if the temperature is too high or low.
Ensuring Even Heating
Even heating is key for golden waffles. Check heat distribution across the cooking plates.
| Area | Temperature Reading (°F) | Note |
| Center | 360 | Ideal temperature |
| Top Left | 350 | Slightly cooler |
| Top Right | 355 | Good heat |
| Bottom Left | 345 | Needs adjustment |
| Bottom Right | 360 | Ideal temperature |
If you find uneven heat, check wiring and heating elements. Fix or replace parts if needed.
Trial Waffle Cooking
Cook a test waffle to see how the iron performs. Adjust settings if the waffle is too dark or light.
Follow these tips during your trial:
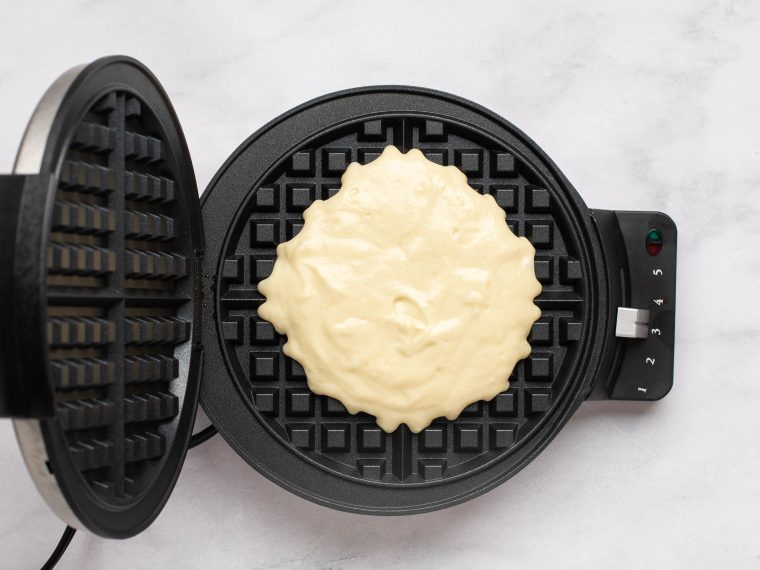
- Preheat the iron fully before pouring batter.
- Use a consistent amount of batter each time.
- Close the lid gently and cook for 3 to 5 minutes.
- Check the waffle color and texture after cooking.
- Adjust temperature or cooking time as needed.
Maintenance Tips
Keeping your waffle iron in good shape helps it work well for a long time.
Simple care steps can stop problems and keep waffles tasting great.
Cleaning The Plates
Clean the plates after every use to avoid buildup and burnt batter.
- Unplug the waffle iron and let it cool completely.
- Use a soft cloth or sponge with warm soapy water to wipe the plates.
- Avoid abrasive tools that can scratch the non-stick surface.
- For stuck bits, use a soft brush or toothpick gently.
- Dry the plates well before storing to stop rust or damage.
Storing Safely
Store your waffle iron carefully to protect it from damage and dust.
| Storage Tip | Reason |
|---|---|
| Keep in a dry place | Prevents rust and electrical issues |
| Wrap the cord loosely | Avoids damage to the wire |
| Store upright or flat | Keeps the plates safe and clean |
| Use a cover or bag | Keeps dust off the waffle iron |
Troubleshooting Common Issues
If your waffle iron has problems, check these simple fixes before calling for help.
Fix:Check the power cord and outlet. Try another socket.
Problem:Batter sticks to the plates.
Fix:Clean plates well and use a light coat of oil before cooking.
Problem:Uneven cooking.
Fix:Preheat fully and avoid opening the iron too soon.
Problem:Smoke or burning smell.
Fix:Remove any old batter and clean plates. Avoid using too much oil.
:max_bytes(150000):strip_icc()/22180-waffles-i-VAT-018-step-03-a95688b095904956a8ab7daa42232f34.jpg)
Credit: www.allrecipes.com
Credit: www.onceuponachef.com
Frequently Asked Questions
What Materials Are Needed For A Waffle Iron?
To make a waffle iron, you’ll need cast iron or non-stick metal, handles, and heating elements. These materials ensure durability and efficient cooking. Additionally, screws and rivets are essential for assembly. Using high-quality materials can enhance the waffle iron’s performance and lifespan.
How Does A Waffle Iron Work?
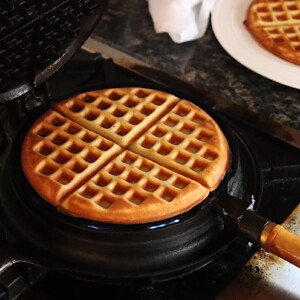
A waffle iron works by heating two metal plates to cook batter evenly. The plates imprint the batter with a characteristic grid pattern. The heating elements ensure consistent temperature, cooking the waffle to golden perfection. By closing the plates, the heat distributes evenly for a crisp exterior.
Can I Make A Waffle Iron At Home?
While making a waffle iron at home is challenging, it’s not impossible with the right tools. You need metalworking skills, appropriate materials, and safety precautions. Ensure you have access to heating elements and durable metal. It’s often easier to purchase one, but DIY enthusiasts can try crafting their own.
How Do I Maintain A Waffle Iron?
To maintain a waffle iron, regularly clean it with a soft cloth and mild detergent. Avoid abrasive materials to prevent damage. Ensure the plates are completely dry before storing. Check the power cord and heating elements periodically for any wear or damage to ensure safety.
Conclusion
Making a waffle iron at home is easier than it seems. With basic tools and parts, you can build one yourself. It saves money and adds fun to cooking. Experiment with different batter recipes once your iron is ready. Enjoy fresh, warm waffles any time you want.
Remember to follow safety steps during assembly. This project brings creativity and tasty treats together. Give it a try and enjoy homemade waffles made your way.