
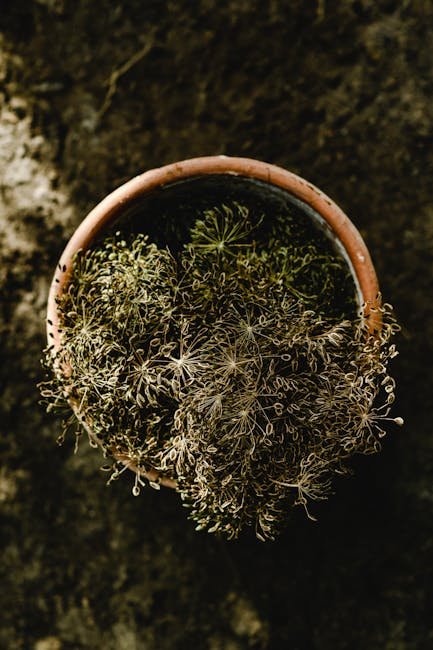
Have you ever found yourself with an abundance of fresh dill and wondered how to preserve its vibrant flavor for later use? You’re in the right place.
Drying dill in the oven is a simple yet effective method to ensure you always have this aromatic herb on hand, ready to sprinkle into your favorite dishes. Imagine reaching into your pantry and pulling out a jar of your own home-dried dill, intensifying the taste of your culinary creations.
This guide is tailored to help you master the art of drying dill in the oven, ensuring you capture and preserve its essence effortlessly. Let’s dive into the step-by-step process that will transform your cooking forever.
Benefits Of Drying Dill
Drying dill is a simple way to preserve its flavor. Dried dill can be used all year round. It keeps its aroma and taste for months. Fresh dill may spoil quickly in the fridge. Drying helps save money on buying new dill. Use dried dill in soups, sauces, and dips. It adds a unique flavor to dishes. Dry dill is easy to store in jars or bags. It takes up less space than fresh dill. Drying dill in the oven is fast and convenient. It can be done in less than an hour. Oven-dried dill is perfect for cooking and seasoning.
Selecting Fresh Dill
Pick dill that is bright green and fragrant. Avoid any yellow or wilted leaves. Fresh dill should have stems that are firm, not soft. Smell the dill to ensure it has a strong, fresh scent. If it smells weak, it’s not fresh enough. Check for any insects or dirt on the leaves. Clean dill is easier to dry and tastes better.
Preparing Dill For Drying
Preparing dill for drying in the oven requires washing and patting the sprigs dry. Arrange them on a baking sheet and set the oven to low heat.
Washing And Drying
Rinse dill gently under cool water. This removes dirt and bugs. Shake off excess water carefully. Place dill on a clean towel. Pat it dry with another towel. Ensure dill is completely dry. Wet dill can rot in the oven. Use paper towels if needed. Keep the dill spread out on the towel. This helps it dry faster.
Removing Stems
Hold a dill sprig in your hand. Use scissors to cut away thick stems. They can be tough and chewy. Keep the soft, green leaves. These are perfect for drying. Be gentle to avoid bruising the dill. Handle it with care. Place the trimmed dill on a baking sheet. It’s now ready for the oven.
Setting Up The Oven
Preheat the oven to 175°F (80°C) for drying dill. Ensure even heat distribution by adjusting the racks. This gentle temperature preserves the herb’s flavor and nutrients.
Choosing The Right Temperature
Select a low temperature for drying dill. Usually, 95°F to 110°Fis ideal. This range helps preserve the flavor. Keep the oven door slightly open. This allows moisture to escape. Use an oven thermometer for accuracy. It ensures the right temperature is maintained.
Preheating Guidelines
Turn on the oven to preheat. Set it to the chosen temperature. Wait for the oven to reach the right heat. This may take a few minutes. Check the thermometer to be sure. Preheating ensures even drying of dill. Place the dill on a baking sheet. Spread it out evenly. This helps each piece dry properly.
Arranging Dill On Baking Sheet
Arrange dill evenly on a baking sheet for even drying. Keep the sprigs separate to ensure proper airflow and drying.
Using Parchment Paper
Place parchment paperon the baking sheet. This keeps dill clean. Arrange dill evenly over the paper. Make sure the dill is not overlapping. Overlapping makes it dry unevenly. Spread the dill in a single layer.
Spacing For Airflow
Leave spacebetween each dill sprig. Air needs to move around them. This helps dill dry better. Proper spacing prevents mold. It also speeds up drying. Dill needs enough room to breathe.
Drying Process
Dry dill in the oven by spreading fresh sprigs evenly on a baking sheet. Set the oven to its lowest temperature and leave the door slightly ajar. Check frequently until dill is crisp, usually in 2-4 hours.
Monitoring Time And Temperature
Start by preheating the oven to 225 degrees Fahrenheit. Spread the dill evenly on a baking sheet. Make sure the dill is not overlapping. Place the sheet in the oven. Keep the oven door slightly ajar. This allows moisture to escape. Check the dill every 15 minutes. Adjust the temperature if needed. Make sure the dill is drying evenly.
Checking For Doneness
Once the dill is dry, it should be crispy. Gently touch the leaves to check. If they crumble easily, they are ready. If still soft, continue drying. Check every 5 minutesafter initial drying. Remove from the oven when done. Let it cool before storing. Store in an airtight container.
Storing Dried Dill
Dry dill in the oven by spreading sprigs on a baking sheet. Set the oven to the lowest temperature, around 100°C (212°F), and dry for 2-4 hours. Turn off the oven, letting dill cool inside to avoid moisture. Store in airtight containers for lasting freshness.
Choosing The Right Container
Glass jars are perfect for storing dried herbs. They keep moisture out. Plastic containers can also work well. Make sure they have tight lids. Label your containers with the date. This helps you keep track of freshness. Avoid clear containers. Light can harm the dill’s flavor.
Optimal Storage Conditions
Store dried dill in a cool, dark place. A pantry or cupboard is ideal. Avoid direct sunlight. It can fade the color and taste. Keep away from heat sources. Heat can make the dill lose flavor. Humidity is bad for dried herbs. Use a dry spot for storage.
Using Dried Dill In Cooking
Drying dill in the oven preserves its flavor for cooking. Arrange fresh dill on a baking sheet. Set the oven to low heat and bake until the leaves are crisp. Store dried dill in an airtight container for future use.
Flavor Enhancements
Dried dilladds a fresh, tangy taste to dishes. It’s perfect for soups, salads, and sauces. A little sprinkle can change a recipe’s flavor. It brings out the best in fish and chicken. Vegetables like potatoes and carrots love dill too. Remember, dried herbs are stronger than fresh. Use less when cooking. Start with a pinch, then add more if needed. Taste as you go for the best result.
Recipe Ideas
Try making dill-flavored butter. Mix softened butterwith dried dill and a pinch of salt. Spread on warm bread or steamed veggies. Make a dill sauce for salmon. Combine yogurt, lemon juice, and dill. Stir well and pour over grilled fish. For a quick snack, sprinkle dried dill on popcorn. It’s yummy and healthy!
Frequently Asked Questions
What Is The Best Way To Dry Out Fresh Dill?
Air-drying is the best way to dry fresh dill. Bundle small dill bunches, secure with string, and hang upside down in a cool, dry, and dark place. Ensure good air circulation for optimal drying. Dill is ready when leaves crumble easily.
Store dried dill in an airtight container.
How To Dry Dill In The Oven Without A Dehydrator?
Preheat the oven to 180°F (82°C). Spread dill sprigs on a baking sheet. Bake for 2-4 hours, checking regularly. Ensure dill is completely dry and crumbly. Store in an airtight container.
How Do You Convert Fresh Dill To Dry?
Use a 1:3 ratio to convert fresh dill to dry. Replace 1 tablespoon of fresh dill with 1 teaspoon of dried dill. Adjust to taste for recipes.
What Is The Best Way To Preserve Fresh Dill?
To preserve fresh dill, rinse and pat dry thoroughly. Chop and freeze in airtight containers. Alternatively, dry dill by hanging it in a cool, dark place until crisp. Store dried dill in an airtight container. Both methods maintain flavor for months, enhancing dishes with ease.
Conclusion
Drying dill in the oven is simple and efficient. First, wash the dill thoroughly. Next, spread it on a baking sheet. Ensure the oven is set to a low temperature. Monitor closely to avoid burning. Once dry, store in an airtight container.
This method preserves flavor and aroma well. Dried dill enhances many dishes, adding a delightful touch. It’s convenient for long-term use, keeping your kitchen stocked. Try it today and enjoy flavorful meals. Your culinary creations will benefit from this handy technique.
Happy cooking!