
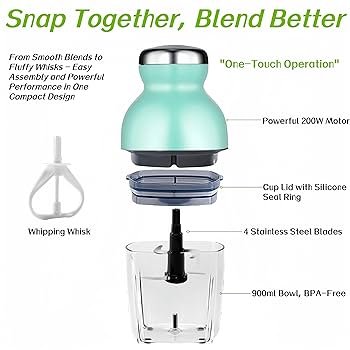
If you’ve ever struggled to clean your mini food processor or needed to replace a part, you know how tricky it can be to take it apart. But what if disassembling your mini food processor was easier than you think?
In this guide, you’ll discover simple, step-by-step instructions that anyone can follow. By the end, you’ll feel confident handling your appliance safely and efficiently. Keep reading to unlock the secrets to quick and hassle-free disassembly—and make your kitchen routine smoother than ever.
:max_bytes(150000):strip_icc()/faw-mini-food-processors-primary-rkilgore-0828-1-ef83ffc1910f4bc29b822ca52c5ee722.jpeg)
Credit: www.foodandwine.com
Tools Needed
- Screwdriver:A small flathead or Phillips screwdriver helps remove screws.
- Wrench:Useful for loosening nuts or bolts inside the processor.
- Plastic pry tool:Safe to open plastic parts without damage.
- Clean cloth:For wiping parts and keeping the workspace tidy.
- Container:To keep small screws and parts safe.
Having these tools ready makes disassembly easier and faster. Always work carefully to avoid breaking parts.
Safety Tips
Always unplug the mini food processor before starting. This prevents accidents. Ensure your hands are dry. Wet hands can cause slips. Work in a well-lit area. Good light helps you see clearly. Use the right tools for the job. Proper tools make tasks easier and safer.
Keep small parts away from children. They can be a choking hazard. Handle blades carefully. They are sharp and can cut you. Store all parts safely when not in use. This helps avoid damage or loss.
Read the manual for specific instructions. Each model may have different steps. Follow these tips every time you disassemble. Safety should always come first.
Unplugging The Device
Always unplug the mini food processorbefore starting. This stops any electric shock or injury. Check that the plug is fully out of the socket. Keep your hands dryto avoid slipping. Never pull the cord to unplug; hold the plug itself. Make sure the device is on a flat surfaceand stable. Wait a few minutes for the motor to stop spinning. This ensures safety and prevents damage. Only proceed with disassembly once the device is completely offand unplugged.
Removing The Lid
Ensure the mini food processor is unplugged before starting. Grip the lid firmlyto avoid slipping. Twist the lid counterclockwiseuntil it loosens. Some lids may have locking tabs—press or slide them gently. Avoid using force to prevent damage. If stuck, try twisting while pulling upward slowly. Keep hands dry for a better grip. Set the lid aside safely to avoid contamination.
Detaching The Bowl
Make sure the mini food processor is unplugged before starting. Hold the base firmly with one hand. With the other hand, grip the bowl. Turn the bowl gently in the direction opposite to how it locks. It should twist easily without force. Lift the bowl straight up once it is loose. Watch out for sharp blades inside the bowl. Handle the bowl carefully to avoid cuts. If the bowl feels stuck, try twisting it back and forth slowly. Do not use strong force as it may break the parts. Clean the bowl after detaching to keep it fresh.
Taking Out The Blade
Unplug the mini food processor before starting. This keeps you safe. Hold the bowl firmly with one hand. With the other hand, twist the blade counterclockwise. The blade should loosen and come off easily. Be careful; the blade is very sharp. If it does not turn, check for a locking button. Press the button to unlock the blade. Avoid using too much force. Use a cloth to hold the blade if it is slippery. Place the blade on a safe surface. Never leave it loose inside the bowl. Clean the blade carefully after removal. Always handle the blade with care to avoid cuts.
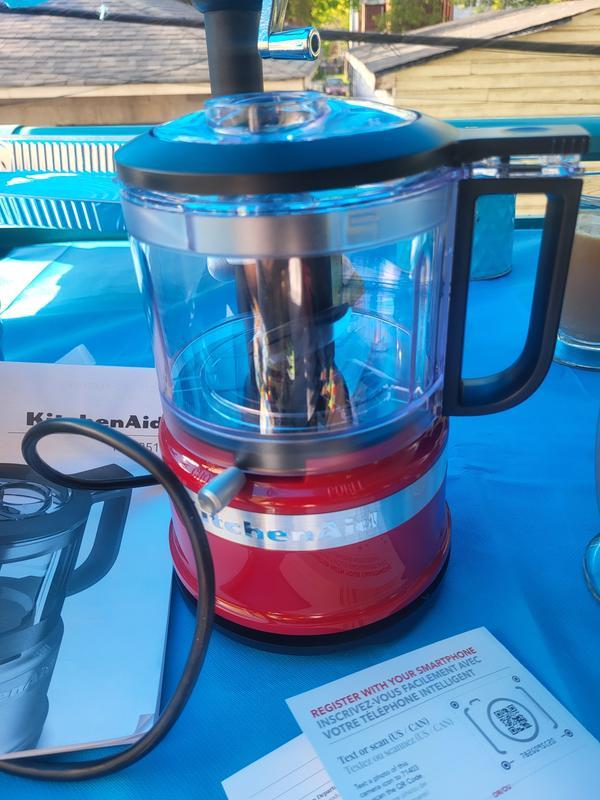
Cleaning Each Part
Remove the blade carefully to avoid cuts. Wash it with warm, soapy water. Use a soft brush to clean hard-to-reach spots.
Take off the bowl and lid. Rinse them under running water. Use a sponge to scrub away food bits.
Wipe the base unit with a damp cloth only. Do not immerse it in water to protect the motor.
- Dry all parts thoroughly before reassembling.
- Check the blade for any damage or rust.
- Store the parts in a clean, dry place.
Credit: www.kitchenaid.com
Reassembling The Processor
Ensure all parts are clean and dry before reassembling. Place the bowlback onto the base, aligning it properly. Insert the bladecarefully to avoid cuts. Make sure it sits securely on the motor shaft.
Attach the lidfirmly on top of the bowl. Check that the lid locks into place to avoid spills. Plug in the processor only after full assembly.
- Confirm no parts are damaged or missing.
- Handle blades with care to prevent injury.
- Test the lock mechanism before use.
- Do not force parts to fit; they should align easily.
Troubleshooting Common Issues
Common issueswith mini food processors include blades not turning and parts stuck together. Check if the processor is properly plugged in and the power button is pressed. Sometimes, the blade locksif the bowl is not seated correctly on the base.
Clean any food debris stuck around the blade or bowl edges. Food pieces can block the blade or stop the lid from locking. Let the parts soak in warm water to loosen stuck food.
- Ensure the blade is installed the right way.
- Check the bowl and lid for cracks or damage.
- Do not force parts apart; twist gently.
- Use a soft cloth to dry parts before assembly.
Always unplug before trying to fix or clean. Small parts can be sharp, so handle with care.
:max_bytes(150000):strip_icc()/faw-cuisinart-core-custom-4-cup-mini-chopper-rkilgore-0130-a8b91d85408e44f3ae1b0d3af5f3b39f.jpeg)
Credit: www.foodandwine.com
Frequently Asked Questions
How Do I Safely Disassemble A Mini Food Processor?
First, unplug the device to ensure safety. Remove the lid and blades carefully. Detach the bowl from the base. Avoid forcing any parts to prevent damage.
Can I Remove The Blade For Cleaning?
Yes, most mini food processors have removable blades. Handle blades with care to avoid cuts. Clean blades with warm, soapy water and dry thoroughly.
What Parts Can Be Disassembled In A Mini Food Processor?
Typically, the lid, blade, bowl, and sometimes the base can be disassembled. Check your model’s manual for specific instructions to avoid damage.
Is It Necessary To Disassemble Before Storage?
Disassembling helps keep parts clean and extends the appliance’s life. Store components separately in a dry place to prevent mold and odors.
Conclusion
Disassembling a mini food processor is simple with the right steps. Start by unplugging the device for safety. Remove the lid and blade carefully to avoid cuts. Then, separate the bowl from the base. Clean each part with warm, soapy water.
Dry everything before putting it back together. Regular disassembly keeps your food processor working well. It also helps prevent food buildup and odors. Follow these easy steps to maintain your kitchen tool. Your mini food processor will stay clean and last longer.
Simple care makes a big difference.