
If you love the smell of fresh bread and the thrill of cooking outdoors, learning how to cook bread in a cast iron Dutch oven on your grill is a game changer. Imagine biting into a crusty, golden loaf that you made yourself, with a soft, warm inside that melts in your mouth.
You don’t need a fancy oven or special tools—just your grill, a sturdy Dutch oven, and a simple recipe. This method brings a unique smoky flavor and perfect crust that will make your homemade bread unforgettable. Keep reading, and you’ll discover easy steps and insider tips to master this delicious skill right in your backyard.
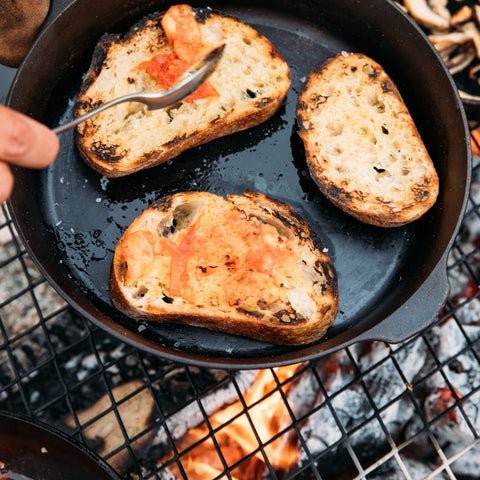
Credit: practicalselfreliance.com
Choosing The Right Dutch Oven
Choose a cast iron Dutch oventhat holds heat well and lasts long. The best size is usually between 4 to 7 quarts. Small pots won’t fit a big loaf; large ones take longer to heat.
The materialmust be thick and heavy for even cooking. Cast iron with an enameled surfaceis easier to clean. Plain cast iron needs seasoning but can last forever.
Look for a lid that fits tightly. A tight lid traps steam inside, helping the bread rise and get a crispy crust. Some lids have a flat topto hold coals for better heat.

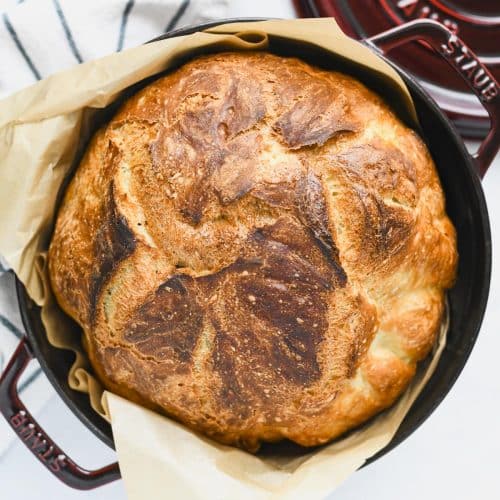
Credit: food52.com
Preparing The Dough
To make good dough, gather flour, water, yeast, salt, and sugar. Use warm water to help yeast grow. Measure ingredients carefully for best results.
Mix ingredients in a large bowl. Stir until combined and form a rough dough. Knead dough on a clean surface for 8 to 10 minutes. Press and fold the dough, then turn it. Kneading builds gluten, which helps bread rise and become soft.
Place dough in a greased bowl. Cover with a clean cloth or plastic wrap. Let dough rise in a warm place until it doubles in size. This usually takes 1 to 2 hours. Check dough by gently pressing with a finger; if it springs back slowly, it is ready.
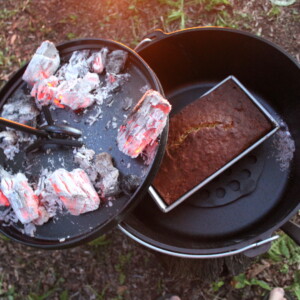
Preheating The Grill And Dutch Oven
Set the grill temperature to around 450°F (230°C). This heat is perfect for baking bread in a cast iron Dutch oven. Use a grill thermometer to check the temperature. Adjust the vents to control airflow and keep the heat steady.
Place the Dutch oven inside the grill while it heats up. Let it preheat for about 20-30 minutes. The Dutch oven needs to be very hot to create a crispy crust on the bread. Use oven mitts to handle the hot pot safely.
Shaping And Loading The Dough
Shape the dough gently into a round loaf. Use light hands to keep air inside. A smooth surface helps the bread rise evenly on the grill. Dust your work surface with flour to stop sticking. Fold edges toward the center to form a tight ball.
Place a piece of parchment paperinside the Dutch oven. This stops the dough from sticking to the pot. It also makes it easier to lift the bread out after baking. The parchment paper can handle the heat of the grill without burning quickly.
- Use enough parchment paper to cover the bottom and sides.
- Gently transfer the shaped dough onto the paper.
- Ensure the dough sits centered in the pot for even cooking.
Baking Process On The Grill
Managing heat and ventilationis key to baking bread in a cast iron Dutch oven on a grill. Use indirect heat by placing hot coals around, not under, the pot. Keep the grill lid closed to trap heat and steam inside. Open vents slightly to let out some moisture but retain warmth. This creates a perfect environment for crusty bread with a soft inside.
Timing for a perfect bakedepends on the bread type and grill temperature. Generally, bake for 30 to 45 minutes at 400°F (204°C). Remove the lid after 20 minutes to brown the crust. Check the bread by tapping; a hollow sound means it’s done. Use a thermometer if needed—internal bread temperature should reach 190°F (88°C).
Achieving The Perfect Crust
Creating steaminside the Dutch oven helps form a crispy crust. Place a small pan of water inside the grill before heating. Or, sprinkle water on the hot coals carefully to produce steam. Another way is to cover the dough with a lid that traps moisture.
To get a good crust color and texture, use medium-high heat for the first 20 minutes. This helps the crust brown well. Then lower the heat to finish baking without burning. Baking with the lid on keeps the bread soft inside and crusty outside.
- Use a preheated Dutch oven for even heat.
- Keep the lid on during the first half of baking.
- Check the crust color; it should be golden-brown.
- Remove the lid in the last 10 minutes for a firmer crust.
Cooling And Serving
Let the bread cool in the cast iron Dutch oven for about 15 minutes. This helps the bread finish cooking inside and keeps the crust crisp. After removing from the oven, place the bread on a wire rack. This stops moisture from making the crust soggy.
Slice the bread only when it is fully cool. Cutting too soon can make the bread doughy and sticky. Use a sharp serrated knife for clean slices.
Store leftover bread in a paper bag or a cloth bag. This keeps the crust crunchy while the inside stays soft. Avoid plastic bags, which make the bread lose its crust texture quickly.
Troubleshooting Common Issues
Burnt crustoften happens when the heat is too high or uneven. Use a lower flame or move the Dutch oven away from direct flames. Place a heat diffuser under the pot if possible. Check the bread early to avoid burning. Keep the lid on to trap heat evenly.
Undercooked breadmeans the inside is still doughy. Raise the temperature slightly or cook longer with the lid on. Use a thermometer to check the bread’s center; it should be about 190°F (88°C). Avoid opening the lid too often because heat escapes and slows cooking.
- Use medium heat, not high heat.
- Preheat the Dutch oven well before baking.
- Keep the lid closed most of the time.
- Check bread after 20 minutes for doneness.
- Use a thermometer for best results.
Enhancing Flavor And Texture
Adding herbs and seedsto bread dough boosts its flavor and texture. Fresh herbs like rosemary or thyme add a fragrant aroma. Seeds such as sesame, poppy, or sunflower create a crunchy crust. Mix herbs or seeds into the dough or sprinkle on top before baking for a tasty finish.
Using different flours changes the bread’s taste and feel. Whole wheat flour gives a nutty flavorand denser texture. Rye flour adds a slightly sour taste and rich color. Blending flours can create unique textures and flavors.
| Flour Type | Flavor | Texture |
|---|---|---|
| All-purpose | Mild, neutral | Soft and light |
| Whole wheat | Nutty | Dense and hearty |
| Rye | Slightly sour | Dense and moist |
Credit: www.theseasonedmom.com
Frequently Asked Questions
Can You Bake Bread In A Dutch Oven On A Grill?
Yes, you can bake bread in a Dutch oven on a grill. Preheat the grill and Dutch oven for even heat distribution. This method mimics an oven by creating a stable temperature. The cast iron retains heat, ensuring a perfectly baked loaf with a crispy crust.
What Size Dutch Oven Is Best For Bread?
A 5- to 7-quart Dutch oven is ideal for bread baking. It provides enough room for dough expansion. This size ensures even heat distribution, resulting in a well-cooked loaf. Make sure it fits comfortably on your grill with the lid closed.
How Do You Prevent Bread From Sticking?
To prevent sticking, use parchment paper or lightly oil the Dutch oven. Parchment paper acts as a barrier between the dough and the pot. Alternatively, a thin layer of oil helps in easy release. This ensures your bread comes out perfectly without any damage.
What Temperature Should The Grill Be?
Preheat the grill to around 450°F (232°C) for optimal bread baking. This temperature allows for a crispy crust and fluffy interior. Use a thermometer to maintain a consistent temperature. Adjust the grill settings as needed to avoid temperature fluctuations.
Conclusion
Cooking bread in a cast iron Dutch oven on a grill brings great results. The Dutch oven holds heat well and creates a crispy crust. You control the grill temperature to bake bread evenly. This method works well outdoors and adds a smoky flavor.
With practice, you will bake fresh, warm bread anytime. Try different recipes and enjoy homemade bread with your family. Simple steps lead to delicious bread that smells wonderful. Give it a go and taste the difference yourself.