
If you use a stainless steel commercial slicer in your kitchen, you know how important it is to keep it clean. A spotless slicer not only works better but also keeps your food safe and your customers happy.
But cleaning it the right way can be tricky if you’re not sure where to start. This guide will show you simple, effective steps to get your slicer sparkling clean every time. By following these tips, you’ll save time, avoid damage, and make your slicer last longer.
Ready to master the best cleaning routine for your slicer? Let’s dive in.
Credit: www.vevor.ca
Tools Needed
A soft cloth, mild detergent, and a brush with soft bristles are essential for cleaning. Gloves protect your hands while a spray bottle helps apply cleaning solution evenly.
Cleaning Supplies
- Soft cloth or sponge to avoid scratches
- Mild detergent or dish soap for gentle cleaning
- Warm water to help remove grease and food particles
- White vinegar to remove stains and disinfect
- Soft-bristle brush for hard-to-reach areas
- Paper towels or microfiber cloth for drying
Protective Gear
- Cut-resistant gloves to protect hands from blades
- Safety goggles to shield eyes from splashes
- Apron to keep clothes clean and dry
Preparation Steps
Begin by unplugging the slicer to ensure safety. Remove all detachable parts for thorough cleaning. Wipe down surfaces to clear crumbs and residue before washing.
Unplugging The Slicer
Ensure the slicer is turned off. Locate the power cord. Carefully unplug the power cord from the socket. This prevents accidents. Safety is important. Double-check the slicer is off before proceeding.
Disassembling Parts
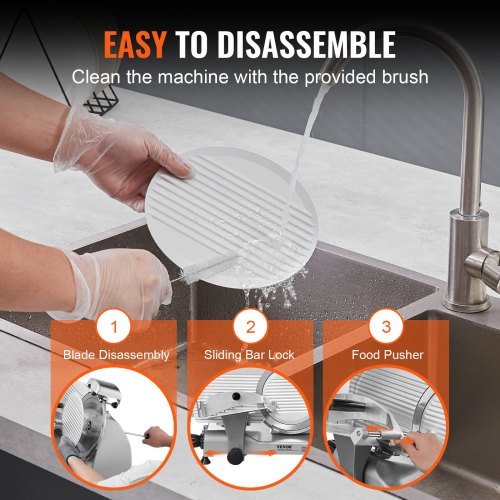
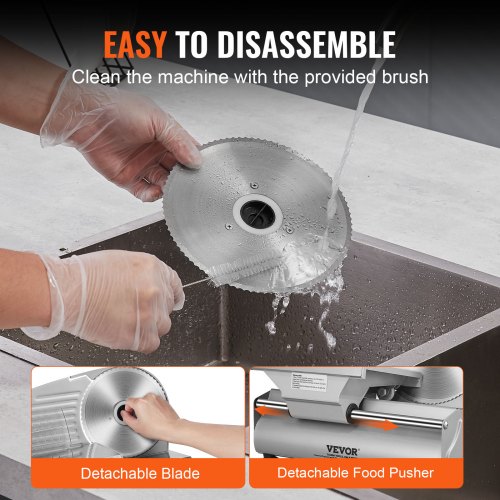
Gently remove the blade guard. Place it aside safely. Next, locate the slicer blade. Unscrew it slowly. Keep your fingers away from the sharp edge. Remove other removable parts. Lay each part on a clean surface. Keep parts organized. You will need them soon. Remember where each part goes.
Cleaning The Blade
Remove any food residuefrom the blade using a soft cloth. Avoid harsh scrubbing that can damage the steel. Use warm water and mild soap to loosen stuck particles. Rinse the blade thoroughly to remove all soap.
Sanitize the blade by wiping it with a food-safe sanitizer. Make sure to cover the entire surface, especially the edges. Allow the blade to air dry to keep it clean and safe. Regular sanitizing helps prevent bacteria growthand keeps the slicer ready for use.
Credit: www.vevor.ca
Cleaning Other Components
The carriage and food trayshould be wiped with a soft cloth. Use warm, soapy water to remove food bits. Avoid abrasive pads that can scratch the surface. Rinse with clean water and dry thoroughly to prevent rust.
For knobs and handles, clean gently with a damp cloth. Remove any food residue or grease to keep them working smoothly. Dry well to avoid slipping during use.
Reassembly And Testing
Make sure all parts are completely dry before reassembly. Use a clean cloth to wipe each component. Moisture can cause rust or damage.
Carefully put the parts back in their correct places. Follow the manufacturer’s guide if available. Ensure the blade is secure and sharp.
- Check the slicer for loose screws or parts.
- Test the blade movement manually for smooth operation.
- Plug in the slicer and run it briefly to confirm it works safely.
- Listen for unusual sounds that might indicate a problem.
Always wear safety gloves during testing. Keep your hands clear of the blade area. Safety first to avoid injuries.
Maintenance Tips
Cleaning the commercial slicer every day keeps it safe and working well. Use warm water and mild soap to wipe all parts. Avoid harsh cleaners that can damage the stainless steel. Dry the slicer fully to stop rust and stains.
| Blade Sharpening Tips | Why It Matters |
|---|---|
| Sharpen blade weekly or as needed | Helps cut smoothly and safely |
| Use the right sharpening tools | Prevents blade damage and dullness |
| Follow the slicer manual instructions | Ensures correct sharpening angle |
Credit: www.vevor.ca
Frequently Asked Questions
How Often Should I Clean A Stainless Steel Slicer?
Clean your stainless steel slicer after each use. Frequent cleaning prevents food buildup and ensures hygiene and safety. Regular maintenance extends the slicer’s lifespan and keeps it performing well.
What Is The Best Cleaner For Stainless Steel Slicers?
Use a mild detergent or a specialized stainless steel cleaner. Avoid harsh chemicals that can damage the surface. Always follow the manufacturer’s cleaning instructions for best results.
Can I Use Bleach To Clean A Commercial Slicer?
Avoid using bleach on stainless steel slicers. Bleach can cause corrosion and discoloration. Opt for non-abrasive, food-safe cleaners to maintain the slicer’s quality.
How Do I Safely Clean The Slicer Blade?
Always unplug the slicer before cleaning the blade. Use a soft cloth with warm, soapy water to wipe the blade carefully. Dry the blade immediately to prevent rust.
Conclusion
Cleaning your stainless steel commercial slicer keeps it working well. Regular cleaning stops germs and food build-up. Use warm water, mild soap, and a soft cloth. Avoid harsh chemicals or abrasive tools. Dry the slicer fully after washing to prevent rust.
Clean every part carefully, including blades and handles. A clean slicer lasts longer and stays safe to use. Simple steps make a big difference in your kitchen. Keep your slicer clean for better food quality and safety.