
Keeping your commercial slicer spotless is key to serving fresh, safe food every time. But cleaning its removable parts can feel tricky and time-consuming.
What if you could master a simple, step-by-step method that saves you effort and keeps your slicer in top shape? You’ll discover exactly how to clean those parts quickly and effectively. By following these easy tips, you’ll protect your equipment, ensure food safety, and make your daily routine much smoother.
Ready to get started? Let’s dive in!
Preparing For Cleaning
Gather all cleaning toolsbefore starting. This includes brushes, cloths, and food-safe cleaners. Use warm water to help remove grease easily. Keep a bucket nearby for rinsing tools.
Safety is key.Always unplug the slicer to avoid accidents. Wear cut-resistant gloves to protect your hands. Ensure the slicer blade is stable and won’t move during cleaning.
- Brush off loose crumbs and debris.
- Use a soft cloth to wipe surfaces.
- Keep cleaning products away from food contact areas.

Credit: partsfe.com
Disassembling The Slicer
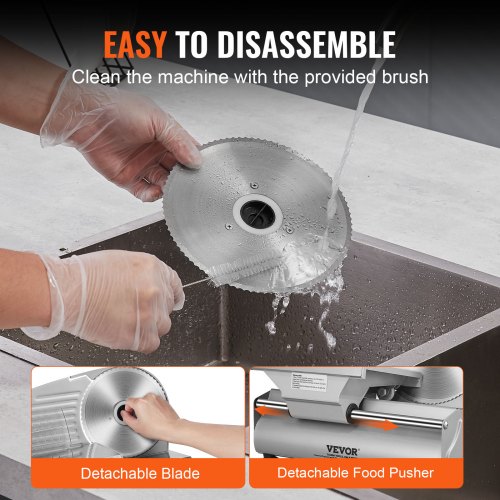
Remove all detachable parts of the commercial slicer carefully. Clean each piece with warm, soapy water to remove food residue. Dry thoroughly before reassembling to ensure safe and efficient use.
Removing Blades Safely
First, unplug the slicer to ensure safety. Use a thick glove to protect your hand. Grasp the blade handle carefully. Turn the locking knob to release the blade. Pull the blade gently away from the slicer. Always keep fingers away from the sharp edge.
Detaching Food Carriage And Guards
Find the release lever for the food carriage. Push it to unlock the carriage. Slide the carriage out gently. Check for screws or clips holding the guards. Use a screwdriver if needed. Remove guards and set them aside. Keep all parts in a safe place.
Cleaning Techniques
Remove the slicer parts carefully before washing. Use warm water with a food-safe cleaning solution. Scrub each part gently with a soft brush or cloth. Rinse thoroughly to remove all soap. Avoid harsh chemicals that can damage parts or leave residues.
Do not soak parts for too long to prevent damage. Dry each part completely with a clean towel. Store parts in a dry place to avoid rust or mold growth.
| Cleaning Tips | What to Avoid |
|---|---|
| Use mild, food-safe detergents | Harsh chemicals or bleach |
| Dry parts thoroughly after washing | Leaving parts wet or soaking too long |
| Handle parts gently to avoid damage | Using abrasive scrubbers or steel wool |
Sanitizing Components
Choosing the right sanitizeris key for cleaning slicer parts. Use sanitizers approved for food contact surfaces. Common options include quaternary ammonium compoundsand chlorine-based sanitizers. Avoid harsh chemicals that can damage parts or leave harmful residues. Always follow sanitizer instructions for safe and effective use.
Proper application ensures all surfaces are disinfected. First, clean partswith warm, soapy water to remove food debris. Rinse well to remove soap traces. Apply sanitizer using a spray or soak method, covering all surfaces.
- Let sanitizer sit for the recommended contact time.
- Do not rinse off sanitizer unless instructions say so.
- Air dry parts fully before reassembling the slicer.
Consistent and careful sanitizing keeps slicer parts safe and extends their life.
Drying And Reassembling
Make sure all parts are completely dry before reassembling. Use a clean cloth or air dry to remove moisture. Wet parts can cause rust and damage the slicer.
Place the parts in a warm, dry area. Avoid direct sunlight as it may warp plastic components. Allow plenty of time for drying to avoid bacteria growth.
- Check each piece for dryness before assembly.
- Use a lint-free cloth to wipe off any water drops.
- Keep parts separated to speed up drying.
Follow the original order when putting parts back. Refer to the slicer manual for correct placement. Tighten screws and locks securely but gently.
Test the slicer after assembly to ensure parts fit well. Loose or wrong parts can cause accidents or poor slicing.
Credit: www.vevor.ca
Maintenance Tips
Keeping a regular cleaning schedulehelps maintain slicer parts and ensures safety. Clean all removable parts after each use to stop food buildup. Use warm water and mild detergent for washing. Rinse parts well and dry completely before reassembling. This prevents rust and keeps the slicer working smoothly.
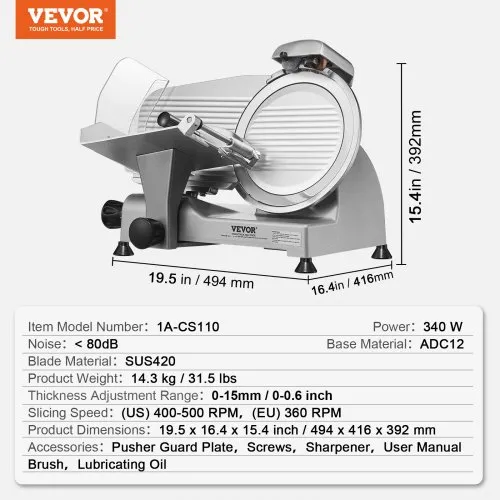
Inspect parts for wear and tearoften. Look for cracks, dull blades, or loose screws. Replace damaged parts quickly to avoid accidents or poor slicing. Regular checks extend the slicer’s life and keep it safe to use.
Credit: www.vevor.ca
Frequently Asked Questions
How Often Should I Clean Removable Parts Of A Commercial Slicer?
You should clean removable parts after every use to maintain hygiene. Regular cleaning prevents bacterial growth and ensures safe food handling.
What Is The Best Cleaning Solution For Slicer Parts?
Use a food-safe sanitizer or a mild detergent solution. Avoid harsh chemicals that can damage parts or contaminate food.
Can Removable Slicer Parts Be Washed In A Dishwasher?
Most removable parts are dishwasher safe, but check the manufacturer’s guidelines. Hand washing is recommended for delicate or non-dishwasher-safe components.
How Do I Safely Remove Slicer Parts For Cleaning?
Turn off and unplug the slicer. Follow the manufacturer’s instructions to disassemble parts carefully without damaging them.
Conclusion
Cleaning removable parts of your commercial slicer keeps it safe and working well. Regular care stops food buildup and germs from growing. Always follow the steps for washing and drying each part carefully. Clean slicers slice better and last longer.
Remember, a clean slicer means safer food for everyone. Take a few minutes after each use to keep your slicer in top shape. Simple habits lead to big results. Keep your slicer clean, and your kitchen runs smoothly.