
Is your slicer’s thickness knob stuck or broken? If so, you know how frustrating it can be when your favorite kitchen tool won’t work properly.
But don’t worry—you can fix it yourself without calling a repair technician or buying a new slicer. In this guide, you’ll learn exactly how to replace the slicer thickness knob step-by-step. By the end, your slicer will feel like new again, letting you slice your meats, cheeses, and veggies with perfect precision.
Keep reading, and you’ll save time, money, and avoid unnecessary hassle.
Credit: www.techwood.online
Identify The Problem
Signs of a faulty thickness knobinclude difficulty adjusting the slicer settings and uneven slice thickness. The knob may feel loose or stuck. Sometimes, the slicer does not respond when the knob is turned. These problems affect the quality of your slices and make the slicer hard to use.
Tools needed for replacementare simple and easy to find. You will need a screwdriver, usually a Phillips head. A pair of pliers helps to grip small parts. A replacement knob matching your slicer model is essential. Keep a clean cloth handy to wipe parts during replacement.
Prepare The Slicer
First, make sure to unplugthe slicer. This keeps it safe. Use a clean clothto wipe the surfaces. Remove any food bits stuck on the slicer. This prevents accidentsand keeps the device hygienic. A clean slicer works better and lasts longer.
Carefully take off the safety guards. Place them aside. This gives you clear access to the slicer. Make sure to remember where each guard goes. This helps when putting them back. Without the guards, you can see the thickness knobclearly. Now you are ready to replace it.
Remove The Old Knob
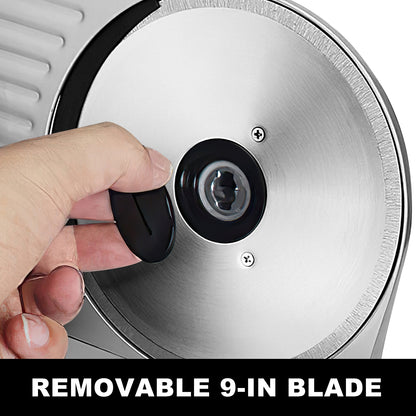
First, find where the thickness knobis attached to the slicer. This is usually on the side or front of the machine. The knob might be secured with a small screwor a clip. Check carefully to see how it is fixed.
Next, use a screwdriver or your fingers to remove the knob. Turn the screw counterclockwise until it is loose. If the knob is clipped on, gently pull it away from the slicer. Avoid using too much force to prevent damage.
Credit: www.vevor.com
Install The New Knob
Place the replacement knobover the slicer’s spindle carefully. Make sure the knob’s hole fits exactlyon the spindle. The knob should align with the grooves or markers on the slicer. This ensures it turns smoothly and adjusts thickness properly.
Press the knob gently until it sits firmlyin place. Avoid forcing it to prevent damage. Check that the knob does not wobble or move loosely. A secure knob will control the slicer thickness accurately and safely.
Test The Slicer
Test the slicer by turning the thickness knob slowly. Check for any resistanceor unusual sounds. The knob should move smoothlywithout sticking or slipping.
Adjust the thickness settings to see if the blade moves closer or farther. This ensures the knob controls the slicer accurately. Make small changes and observe the slicer’s response.
- Turn the knob gently to avoid damage.
- Listen for clicking or grinding noises.
- Make sure the thickness changes match your knob adjustments.
- If the knob is loose, it may need tightening or replacement.

Credit: waltons.com
Maintenance Tips
Keep the slicer thickness knob clean for smooth operation. Use a soft cloth to wipe away crumbs and dust regularly. Avoid water or harsh cleaners that may damage the knob.
Apply a small amount of food-safe lubricant to the knob’s moving parts. This helps reduce friction and wear. Too much lubricant can attract dirt, so use sparingly.
| Cleaning Tips | Lubrication Tips |
|---|---|
| Wipe with a dry or slightly damp cloth | Use food-safe lubricant only |
| Clean after each use | Apply a thin layer to moving parts |
| Do not soak or immerse knob | Wipe off excess lubricant |
Frequently Asked Questions
How Do I Remove The Old Slicer Thickness Knob?
To remove the old knob, first unplug the slicer. Grip the knob firmly and twist it counterclockwise. If stuck, use a cloth for better grip. Avoid using excessive force to prevent damage.
What Tools Are Needed To Replace The Slicer Thickness Knob?
You typically need no special tools. However, a screwdriver might be useful to remove any securing screws. Always check your slicer’s manual for specific instructions and recommended tools.
How Do I Install A New Slicer Thickness Knob?
Align the new knob with the slicer’s control shaft. Push it gently onto the shaft. Twist clockwise until it fits snugly. Test for smooth rotation before using the slicer.
Can I Use Any Knob As A Replacement?
No, use a knob designed for your slicer model. Universal knobs may not fit properly or work efficiently. Check the manufacturer’s recommendations for compatible replacement parts.
Conclusion
Replacing a slicer thickness knob is simple and quick. Follow the steps carefully, and you will fix it easily. Using the right tools makes the job smoother and safer. Regular checks keep your slicer working well for longer. Now, you can enjoy slicing with the perfect thickness again.
Don’t let a broken knob slow your kitchen work. Try the process yourself and save time and money. A little care helps your slicer last and perform better every day.