
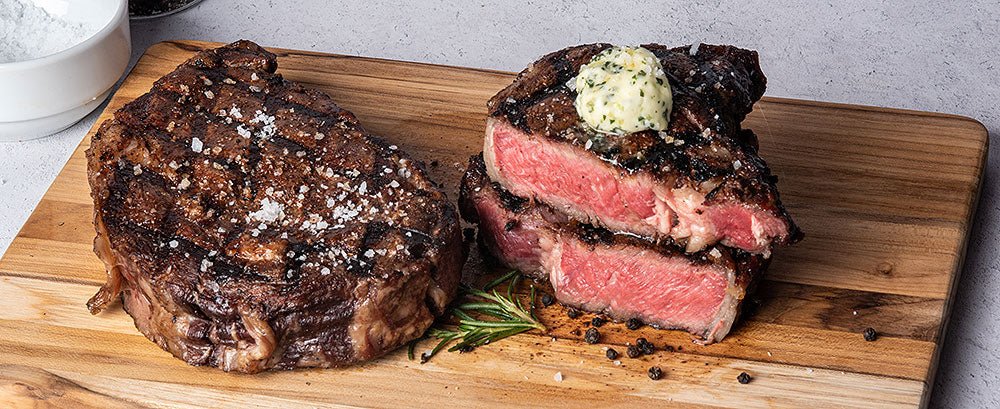
Are you tired of overcooked steaks and unevenly cooked roasts? The secret to achieving that perfect, mouth-watering crust on the outside while keeping the inside juicy and tender might just lie in mastering the reverse sear technique.
But here’s the game-changer: using a thermometer. You might think it’s just a simple tool, but when used correctly, it can revolutionize your cooking. Imagine having the confidence to serve a perfectly cooked piece of meat every single time. Sounds like a dream, right?
Stick around as we dive into the simple yet powerful strategy of using a thermometer for reverse sear cooking, and transform your culinary skills from basic to brilliant. Ready to impress your taste buds and your guests? Let’s get started!
Choosing The Right Thermometer
A good thermometer is key for a perfect reverse sear. There are different types to choose from. Instant-read thermometersgive quick results but may need careful handling. Probe thermometersstay in the meat while cooking, showing constant temperature.
Important features include accuracyand a clear digital display. A long probe helps keep hands safe from heat. Some thermometers have alarms that beep when food reaches the right temperature.
| Type | Pros | Cons |
|---|---|---|
| Instant-read | Quick reading, easy to use | Cannot stay in meat during cooking |
| Probe | Continuous reading, safe to leave in meat | Usually more expensive |
- Look for a thermometer with a wide temperature range.
- Choose one that is easy to clean.
- Check the battery life if it is digital.
Good options are available at different prices. Basic models work well for most cooks. More expensive ones offer extra features but are not always necessary.
Preparing Steak For Reverse Sear
Choose a thick cut of steak for the best reverse sear. Ribeye, sirloin, and strip steak work well. Thicker cuts cook evenly and stay juicy.
- Use salt and pepper to season the steak simply.
- Let the salt sit for at least 40 minutes for better flavor.
- Add garlic powder or herbs if you like extra taste.
Take the steak out of the fridge and let it sit. Bringing it to room temperature helps cook it evenly. This usually takes 30 to 60 minutes.
Setting Up The Thermometer
Calibrating the thermometer ensures accurate temperature readings. Use boiling water or ice water to check if the device shows the correct temperature. Adjust the thermometer according to the manual instructions. This step helps avoid overcooking or undercooking.
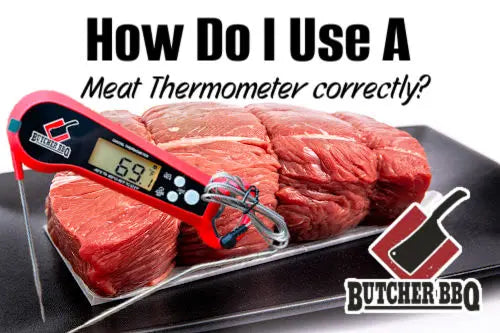
Proper probe placement is key for reliable results. Insert the probe into the thickest partof the meat, away from bone or fat. This position shows the true internal temperature. Avoid touching the grill or pan with the probe, as it can give false readings.
| Feature | Wireless Models | Wired Models |
|---|---|---|
| Mobility | Allows free movement | Limited by wire length |
| Connection | Bluetooth or Wi-Fi | Direct cable link |
| Battery | Needs charging | Powered by device |
| Durability | May be less robust | Usually more durable |
Credit: madaboutfood.co
Cooking With Reverse Sear Method
Start by cooking the meat slowlyat a low temperature. This helps the inside cook evenly and stay juicy. Use an oven or grill set to about 225°F (107°C). Insert a meat thermometerinto the thickest part of the meat to track the temperature.
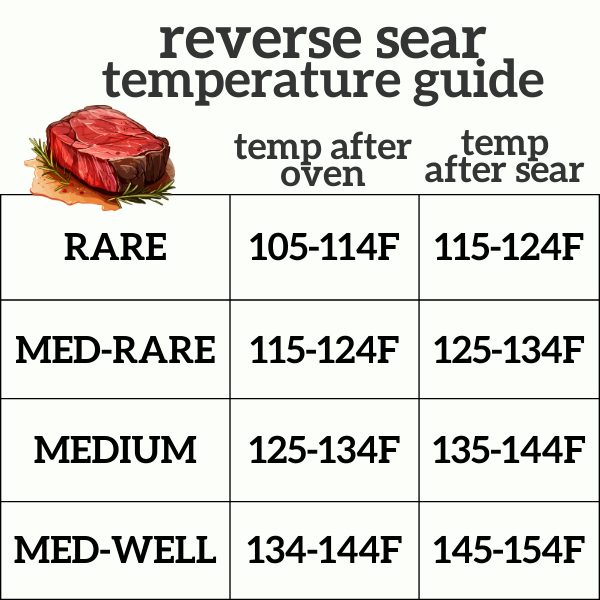
Keep checking the internal temperature. For most steaks, aim for about 115°F to 120°F(46°C to 49°C) before searing. This stage is crucial for a perfect finish.
The searing phase begins when the meat reaches the target temperature. Heat a pan or grill very hot. Sear each side for 1-2 minutes to create a crustand seal juices inside.
Searing Steak To Perfection
Choosing the right pan is key for a good sear. Cast iron pans hold heat well and give a crispy crust. Stainless steel pans can also work but need more heat control. Avoid non-stick pans because they don’t get hot enough for searing.
Heat the pan until it is very hot. Medium-high heat is usually best. The pan should be almost smoking before adding the steak. Too low heat will cook the steak slowly, losing the sear effect.
Use a thermometer to check the steak’s surface temperature while searing. Aim for around 300°F (149°C)on the pan surface for a perfect crust. Insert the thermometer into the thickest part of the steak to track doneness. This helps avoid overcooking while achieving a golden-brown crust.
Resting And Serving
Resting meat after reverse searing is very important. It lets juices settle inside. The ideal resting timeis about 10 to 15 minutes. This helps keep the meat juicy and tender.
Use your thermometer to do a final temperature check. The meat’s temperature usually rises a few degrees while resting. Aim for a target temperaturebased on the type of meat and doneness you want.
For presentation tips, slice the meat against the grain. This makes it easier to chew. Serve on a warm plate to keep it hot. Garnish with fresh herbs or a light sauce for extra flavor and appeal.
Troubleshooting Common Issues
Steak can be overcookedif the thermometer is left in too long. Remove it once the target temperatureis reached. Undercooked steak happens if the thermometer is not deep enough in the meat. Insert it in the thickest part for an accurate reading.
Thermometers can show wrong numbers if the battery is low or the probe is dirty. Clean the probe before use. Replace batteries regularly. Calibrate the thermometer if readings seem off by comparing with boiling or ice water temperatures.
| Steak Thickness | Cooking Tip |
|---|---|
| Less than 1 inch | Lower cooking time, watch temperature closely |
| 1 to 2 inches | Standard cooking time, check temperature midway |
| More than 2 inches | Increase cooking time, use thermometer carefully |

Credit: wildwoodgrilling.com
Credit: butcherbbq.com
Frequently Asked Questions
How Do I Use A Thermometer For Reverse Sear?
Insert the thermometer probe into the thickest part of the meat. Monitor internal temperature during slow cooking. Remove when it reaches desired pre-sear temperature. This ensures precise doneness before searing.
What Is The Ideal Temperature For Reverse Sear?
Set your thermometer to 10-15°F below your target doneness. For medium-rare, remove at 115-120°F before searing. This prevents overcooking and achieves a perfect crust.
How Long Should I Wait To Sear After Thermometer Reading?
Sear the meat immediately after reaching target temperature. Waiting too long can cause heat loss and uneven cooking. Quick searing locks in juices and flavor.
Can I Use Any Thermometer For Reverse Sear?
Use an instant-read or probe thermometer with accurate readings. Avoid analog thermometers that are slow or less precise. Reliable thermometers improve cooking control and results.
Conclusion
Using a thermometer helps cook meat just right with reverse sear. It shows the exact temperature inside the meat. This stops overcooking and keeps the meat juicy. Check the thermometer often for best results. Let the meat rest after cooking for full flavor.
With practice, using a thermometer becomes easy and natural. Enjoy tender, tasty meat every time you try reverse sear. Simple tools, great results.