
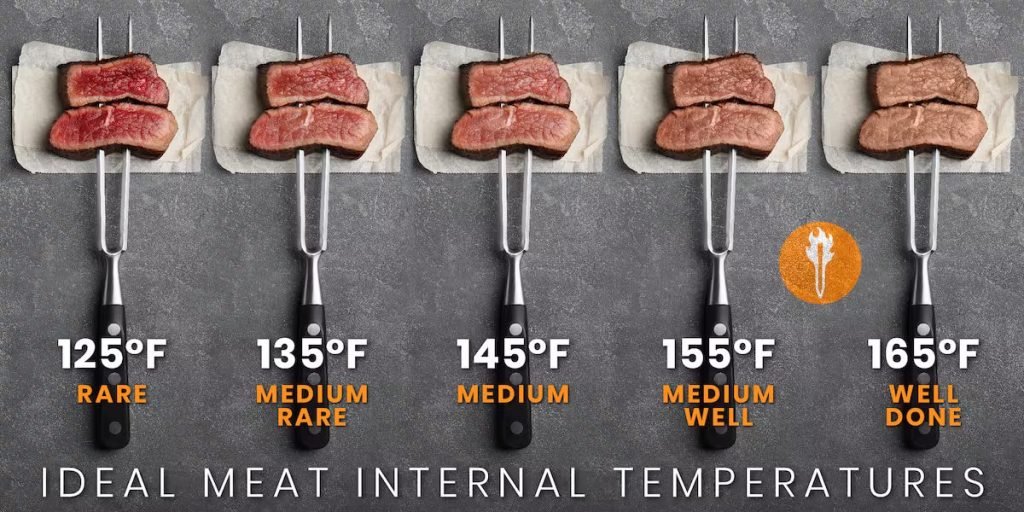
Have you ever wondered if your meat is truly cooked to perfection? Using a meat thermometer can be the simple trick that transforms your cooking from guesswork to guaranteed success.
Knowing exactly when to use a meat thermometer saves you from undercooked dinners and dry, overcooked meals. You’ll discover the best moments to pull out this handy tool, ensuring every bite is juicy, safe, and delicious. Keep reading to unlock the secret to cooking meat just right every time.
Choosing The Right Meat Thermometer
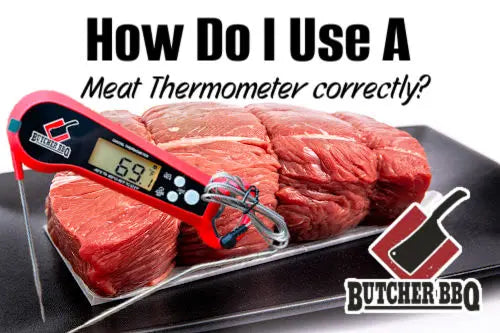
Meat thermometers come in different types. Choose based on how you cook and the meat type. Here are common types:
- Instant-read thermometersgive quick results, good for most meats.
- Digital probe thermometersstay in the meat while it cooks.
- Dial thermometersare simple but slower to read.
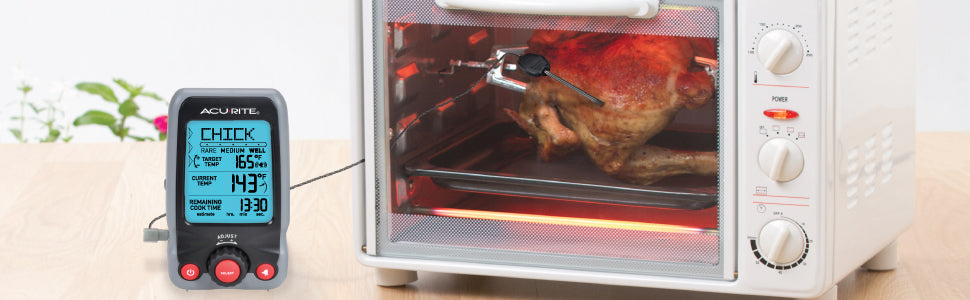
- Oven-safe thermometerscan stay inside during cooking.
Look for these featuresin a good meat thermometer:
- Easy to read display
- Fast and accurate temperature reading
- Water-resistant or waterproof design
- Wide temperature range
- Durable and easy to clean
Calibration helps keep readings accurate. Check calibration often by:
- Placing probe in ice water; it should read 32°F (0°C).
- Adjusting the thermometer if the reading is off.
- Using boiling water to check high temperature accuracy (212°F or 100°C).
Ideal Cooking Temperatures
Different meats need different safe temperaturesto be cooked well. Using a meat thermometerhelps check these. For example, chicken should reach 165°F (74°C)to be safe. Ground beef needs 160°F (71°C). Steaks and roasts are best at 145°F (63°C)for medium rare. Pork should also reach 145°F (63°C).
| Type of Meat | Safe Cooking Temp (°F) | Safe Cooking Temp (°C) |
|---|---|---|
| Chicken & Turkey (whole) | 165 | 74 |
| Ground Beef & Pork | 160 | 71 |
| Steaks & Roasts (Beef, Pork, Lamb) | 145 | 63 |
| Fish | 145 | 63 |
Resting meat after cooking helps juices spread. Let meat rest for 3 to 5 minutes. This keeps it tender and juicy. The temperature may rise a few degrees while resting. This is called carryover cooking. Always check temperatures before and after resting.
Timing Your Temperature Checks
Insert the thermometer near the end of cooking, not too early.
Check the thickest part of the meat. Avoid touching bones or fat.
Wait a few seconds for the thermometer to show the right temperature.
False readings happen if the thermometer touches bone or fat.
Keep the probe steady and avoid moving it around too much.
Check temperatures in different spots for accuracy.
- Insert in the thickest part of the meat.
- Avoid bone, fat, or gristle.
- Wait until the last few minutes of cooking.
- Take readings from multiple spots.
- Allow the thermometer to stabilize before reading.

Credit: www.goodhousekeeping.com
Using A Meat Thermometer In Various Cooking Methods
Grilling and barbecuingdemand close temperature checks. Use a meat thermometer to avoid undercooking or overcooking. Insert the probe into the thickest part of the meat. This ensures safe eating and the best taste.
Roasting and bakingrequire patience. A meat thermometer helps track heat inside the oven. Check the meat’s center to confirm it’s done. It prevents dry or raw spots, keeping food juicy.
Sous vide and smokinginvolve long cooking times at low temperatures. A digital thermometer ensures the meat reaches the right heat. It helps keep texture and flavor perfect.
Maintaining And Cleaning Your Thermometer
Proper Cleaning Techniquesensure your meat thermometer works well and lasts long. Clean the probe with warm, soapy water after every use. Avoid soaking the whole thermometer to protect the digital parts. Use a soft cloth or sponge to gently remove food bits. Sanitize the probe with rubbing alcohol or a disinfectant wipe. Dry it completely before storing.
Storage Tipskeep your thermometer safe and ready to use. Store it in a clean, dry place away from heat and moisture. Use the protective case that comes with the thermometer to avoid damage. Avoid bending or twisting the probe to prevent breaking. Keeping it in a drawer or kitchen box works well.
Troubleshooting Common Issueshelps you fix small problems quickly. If the thermometer does not turn on, check or replace the batteries. If the reading is slow or wrong, clean the probe well. Avoid dropping the thermometer as this can damage internal parts. Reset the thermometer by turning it off and on again if needed.
Credit: butcherbbq.com
Credit: www.acurite.com
Frequently Asked Questions
When Is The Best Time To Use A Meat Thermometer?
Use a meat thermometer near the end of cooking. Check the internal temperature before removing meat from heat. This ensures perfect doneness and food safety.
How Does A Meat Thermometer Improve Cooking Results?
A meat thermometer ensures accurate cooking by measuring internal temperature. It prevents undercooking or overcooking, delivering juicy and safe meat every time.
What Meats Require Checking Temperature With A Thermometer?
Use a meat thermometer for poultry, beef, pork, lamb, and ground meats. It helps achieve safe temperatures and desired doneness for all these meats.
Can A Meat Thermometer Prevent Foodborne Illness?
Yes, a meat thermometer ensures meat reaches safe temperatures. This kills harmful bacteria and reduces the risk of foodborne illnesses effectively.
Conclusion
Using a meat thermometer ensures perfectly cooked meals. It helps avoid overcooking or undercooking. You know exactly when food is safe to eat. This tool is easy to use and reliable. It takes the guesswork out of cooking. Perfect for beginners and experts alike.
Enjoy delicious, juicy meals every time. Keep your family safe from foodborne illnesses. A small step for great cooking results. Simple and effective. Consider adding a meat thermometer to your kitchen essentials. It’s a wise choice for better meals. Cook with confidence and enjoy every bite.