
Craving that perfect crispy waffle cone to hold your favorite ice cream? What if you could make them right at home, fresh and warm, using a waffle maker you already have?
You’re just a few simple steps away from creating delicious, homemade waffle cones that will impress your family and friends. In this guide, you’ll discover easy tips and tricks to turn your waffle maker into a cone-making machine. Ready to transform your dessert game and enjoy the unbeatable taste of fresh waffle cones anytime?
Let’s get started!

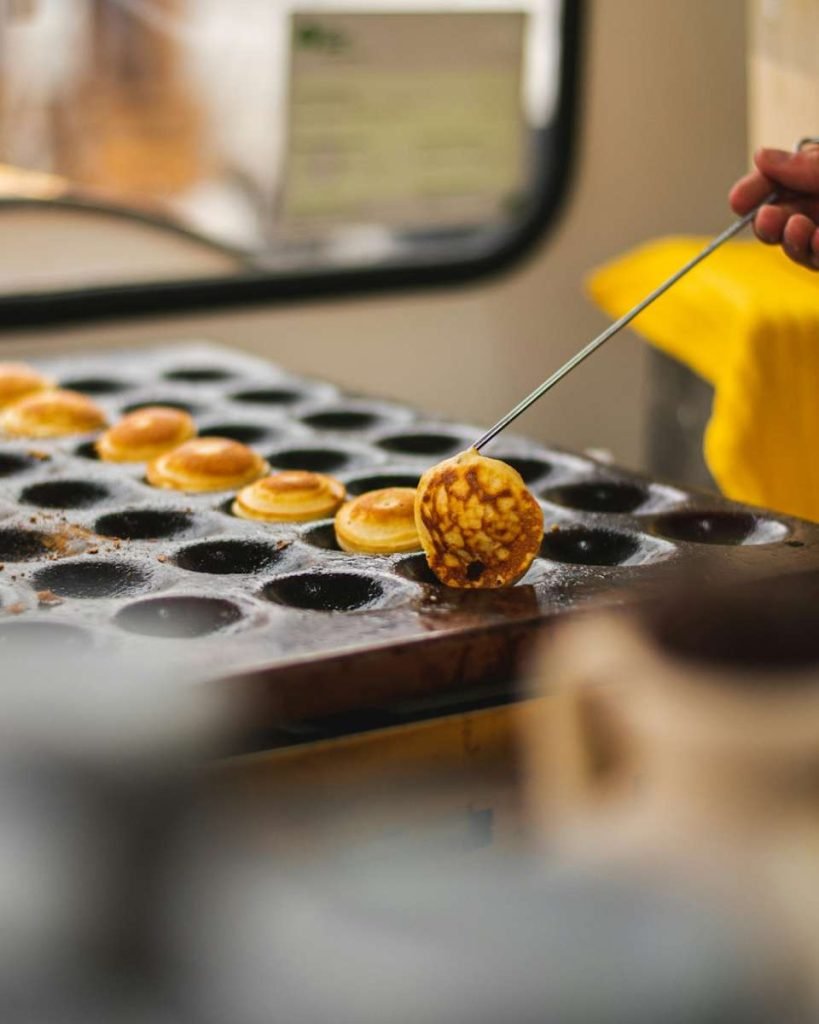
Credit: www.restaurantsupply.com
Ingredients Needed
Making waffle cones at home is easy and fun. You only need a few simple ingredients.
These ingredients create a crispy and sweet cone perfect for ice cream.
All-purpose Flour
All-purpose flour is the base of the waffle cone batter. It helps give structure and texture.
Use fresh, sifted flour to avoid lumps and get a smooth batter.
Sugar
Sugar adds sweetness to the waffle cone. It also helps create a golden color when cooked.
Granulated white sugar works best, but you can try brown sugar for a richer taste.
Eggs
Eggs bind the ingredients together and add moisture. They also help the cone hold its shape.
Use large eggs at room temperature for better mixing and texture.
Butter
Butter gives the waffle cones a rich flavor and crisp texture. Melted butter mixes easily with the batter.
Use unsalted butter to control the salt level in the cones.
Milk
Milk adds moisture to the batter and helps make the cones tender. Whole milk works best.
You can use a little less or more milk to get the right batter consistency.
Vanilla Extract
Vanilla extract adds a nice flavor to the waffle cones. It makes them taste sweet and rich.
Use pure vanilla extract for the best flavor.
Credit: honestandtruly.com
Choosing The Right Waffle Maker
Picking the right waffle maker is key to making perfect waffle cones. The right tool helps you cook evenly and shape cones easily.
Not all waffle makers work well for waffle cones. This guide covers what to look for to get the best results.
Waffle Maker Size And Shape
Choose a waffle maker with a round or square shape. Round plates make it easier to roll cones. A smaller size lets you cook thin waffles needed for crisp cones.
Non-stick Surface
A non-stick surface prevents batter from sticking. This helps you remove waffles without breaking them. It also makes cleaning easier.
Temperature Control
Look for a waffle maker with adjustable temperature settings. This control lets you cook waffles to the right crispness without burning.
Portability And Storage
Consider size and weight if you have limited space. A compact waffle maker is easy to store and move.
- Compact design fits small kitchens
- Lightweight models are easier to handle
- Foldable or vertical storage options save space
Power And Heating Time
| Power (Watts) | Heating Speed | Cooking Result |
| 800 – 1000 | Fast | Even and crispy |
| Below 800 | Slow | May cook unevenly |
| Above 1000 | Very fast | Risk of burning |
Preparing The Batter
Making waffle cones starts with a simple batter. The batter must be smooth and well-mixed. This helps the cones bake evenly and hold their shape.
Below are key tips to prepare the batter properly. Follow these to get the best results from your waffle maker.
Basic Batter Recipe
The basic waffle cone batter uses common ingredients. Measure them carefully to keep the right texture and taste.
| Ingredient | Amount |
| All-purpose flour | 1 cup |
| Sugar | 1/4 cup |
| Salt | 1/4 teaspoon |
| Eggs | 2 large |
| Milk | 1/2 cup |
| Melted butter | 4 tablespoons |
| Vanilla extract | 1 teaspoon |
Mix the dry ingredients first. Then add eggs, milk, butter, and vanilla. Stir gently until smooth. Avoid lumps for a fine texture.
Tips For Crispy Texture
- Use melted butter for a rich, crisp finish.
- Do not overmix the batter; it should be slightly runny.
- Let the batter rest for 10 minutes before cooking.
- Cook cones on medium heat for even crispiness.
- Cool cones on a rack to keep them crisp longer.
Following these tips helps you make waffle cones that are crunchy and light. The right batter and cooking method make all the difference.
Heating And Greasing The Waffle Maker
Heating and greasing the waffle maker are key steps to make perfect waffle cones. Proper heat ensures the batter cooks evenly. Greasing prevents sticking and helps you remove the cones smoothly.
Follow these tips to prepare your waffle maker before pouring the batter. This will save time and avoid frustration during cooking.
Preheating The Waffle Maker
Plug in your waffle maker and close the lid. Let it heat until the indicator light shows it is ready. This usually takes about 3 to 5 minutes. Preheating helps the batter cook quickly and evenly.
Choosing The Right Grease
Use a grease that can handle high heat and is safe for cooking. Common options include melted butter, vegetable oil, or non-stick cooking spray. Avoid using too much grease to keep your cones crisp.
How To Grease The Waffle Maker
- Use a pastry brush or paper towel to spread a thin layer of grease.
- Apply grease evenly on both the top and bottom plates.
- Reapply grease if you make multiple cones to prevent sticking.
- Do not pour grease directly into the waffle maker.
Greasing Tips Table
| Type of Grease | Best Use | Notes |
| Melted Butter | Rich flavor | May brown quickly |
| Vegetable Oil | Neutral taste | Good for high heat |
| Non-stick Spray | Easy application | Use sparingly |
Cooking The Waffle Cones
Making waffle cones at home is simple and fun. Using a waffle maker helps create a crispy and tasty cone.
Cooking the cones correctly is key. This part explains how to pour the batter and the best cooking time and temperature.
Pouring The Batter
Pour the batter evenly on the waffle maker for a uniform cone shape. Spread it slightly but do not use too much.
- Preheat the waffle maker before adding batter.
- Pour about 2 to 3 tablespoons of batter.
- Spread gently to cover the surface without overflowing.
- Close the lid carefully to avoid batter spills.
Cooking Time And Temperature
Set the waffle maker to medium-high heat. Cooking time depends on your machine but usually takes under 2 minutes.
| Temperature Setting | Cooking Time | Result |
| Medium | 90 seconds | Light golden and flexible cones |
| Medium-High | 120 seconds | Crispy and darker cones |
| High | Over 2 minutes | Too dark or burnt cones |
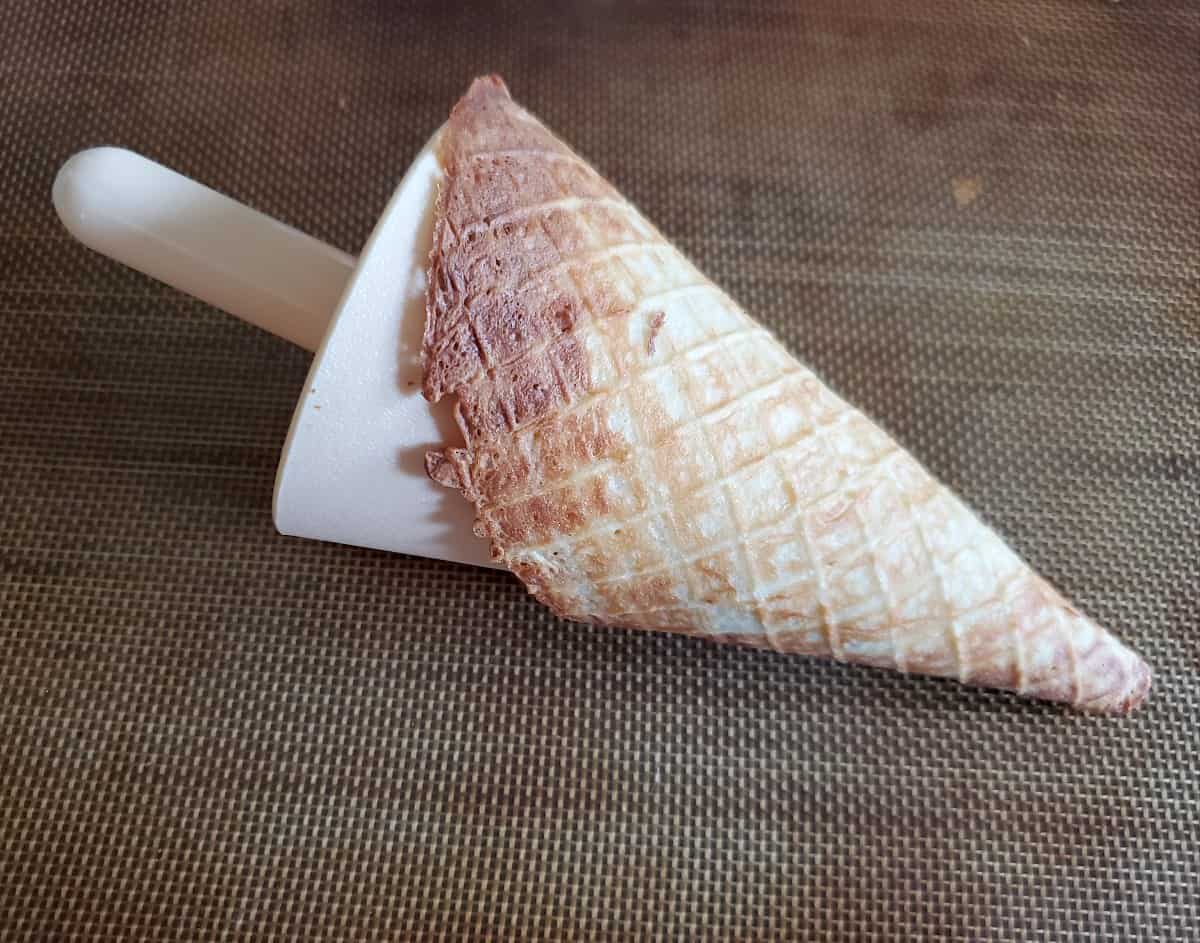
Shaping The Cones
Shaping waffle cones is a key step after cooking the batter. The cones need to be formed quickly while warm and flexible.
This guide shows how to shape waffle cones using a cone mold or without one. Both ways work well for homemade cones.
Using A Cone Mold
A cone mold helps create perfect, even cones every time. Use it right after the waffle comes off the maker.
Wrap the hot waffle around the mold and press gently. Hold the shape for a few seconds until it cools.
- Place the mold on a flat surface for stability
- Wrap the warm waffle tightly but carefully
- Hold the cone until it cools and firms up
- Remove the cone gently from the mold
Shaping Without A Mold
You can shape waffle cones by hand if you don’t have a mold. Timing and care are very important.
Fold the warm waffle into a cone shape using your fingers. Press the edges gently to seal the cone.
- Pick up the waffle while still warm and soft
- Lift one edge and roll diagonally to form a cone
- Pinch the seam to keep the cone closed
- Hold the cone until it cools and holds shape
Cooling And Storing
After making waffle cones in a waffle maker, cooling and storing them properly keeps them crisp. This step prevents sogginess and helps maintain their shape.
Cooling the cones completely before storing is important. Warm cones can trap moisture and become soft.
Cooling The Waffle Cones
Remove each cone carefully from the waffle maker using a spatula. Shape the cone quickly before it cools and hardens. Let the cones cool on a wire rack. This allows air to circulate and keeps them crisp.
Storing The Waffle Cones
Store waffle cones in an airtight container to keep them crunchy. Avoid storing them in the fridge, which adds moisture. Keep cones in a dry and cool place away from sunlight.
- Use a plastic or glass container with a tight lid
- Add a paper towel inside the container to absorb moisture
- Store cones in a single layer to avoid breaking
- Consume cones within 3 to 5 days for best freshness
Signs Of Stale Waffle Cones
| Sign | Cause |
| Soft texture | Moisture exposure |
| Off smell | Old age or contamination |
| Crumbled pieces | Improper storage or handling |
Troubleshooting Common Issues
Making waffle cones with a waffle maker can be easy and fun. Sometimes, problems happen. These problems can stop you from getting the perfect cone.
This guide will help you fix common issues. You will learn how to handle soft waffles and waffles that stick to the maker.
Waffles Too Soft
Soft waffles may not hold their shape well for cones. This can happen if the batter is too wet or the waffle is undercooked.
Try using less liquid in your batter. Also, cook the waffle longer until it turns golden brown and feels firm.
- Reduce milk or water in the batter
- Cook waffles for extra 1-2 minutes
- Check if the waffle is crispy before shaping
- Use fresh batter for best results
Waffles Sticking To The Maker
Waffles that stick to the maker can break when you remove them. This can ruin your cone shape and make a mess.
Make sure to preheat your waffle maker fully. Use a small amount of oil or non-stick spray before pouring the batter.
- Preheat waffle maker until hot
- Lightly grease cooking plates
- Do not open the maker too soon
- Use a silicone spatula to remove waffles gently
Creative Variations
Making waffle cones in a waffle maker is easy and fun. You can add different flavors and decorations to make them special.
Try new ideas to create unique waffle cones. This makes your cones tastier and more attractive.
Flavor Additions
You can add flavors to the waffle batter to change the taste of your cones. Mix simple ingredients before cooking.
- Vanilla extract for a sweet, classic taste
- Cocoa powder for chocolate-flavored cones
- Cinnamon or nutmeg for warm spice notes
- Crushed nuts or seeds for crunch and flavor
- Orange or lemon zest for a fresh, citrus twist
Mix these ingredients well into the batter. Taste your cones with ice cream or fruit for a new experience.
Decorating Tips
Decorate waffle cones to make them more fun and colorful. Use toppings that stick well to the cone surface.
- Dip the edges in melted chocolate or caramel
- Sprinkle crushed nuts, sprinkles, or coconut flakes on the dipped edges
- Use edible glitter or colored sugar for shine
- Wrap cones with paper or ribbons for a neat look
- Fill cones with fresh fruits or whipped cream before ice cream
Let the decorations set before serving. This helps keep the toppings in place and looks nice.

Credit: honestandtruly.com
Frequently Asked Questions
How Do I Make Waffle Cones In A Waffle Maker?
Mix your waffle batter, cook a thin layer in the waffle maker, then quickly shape it into a cone while warm. Let it cool to harden the shape before filling with ice cream or treats.
What Batter Works Best For Waffle Cones?
A thin, sweet batter with flour, sugar, eggs, butter, and vanilla works best. The batter should spread easily and cook quickly for a crisp cone texture.
How Long Should I Cook Waffle Cones In A Waffle Maker?
Cook each waffle cone for about 1-2 minutes or until golden brown. Avoid overcooking to keep cones crispy but not burnt.
Can I Reuse Waffle Cones Once Shaped?
Yes, waffle cones can be stored in an airtight container for several days. Keep them dry to maintain crispness and avoid sogginess.
Conclusion
Making waffle cones at home is simple and fun. With a waffle maker, you can enjoy fresh, crispy cones anytime. Just follow the steps for a perfect treat. Try different flavors and toppings to add variety. Your homemade cones will surely impress family and friends.
Plus, you get to control the ingredients. So, it’s healthier and tastier. Enjoy making your own waffle cones today. Perfect for any ice cream lover. Happy cooking!