
Are you ready to transform your worn-out floors into smooth, flawless surfaces? Knowing how to grind the floor can save you money and give your space a fresh, new look.
Whether you want to remove old paint, level uneven spots, or prepare for a new finish, mastering this skill is easier than you think. In this guide, you’ll discover simple steps and expert tips that make floor grinding safe and effective—even if you’ve never tried it before.
Keep reading, and by the end, you’ll feel confident to tackle your floor like a pro.
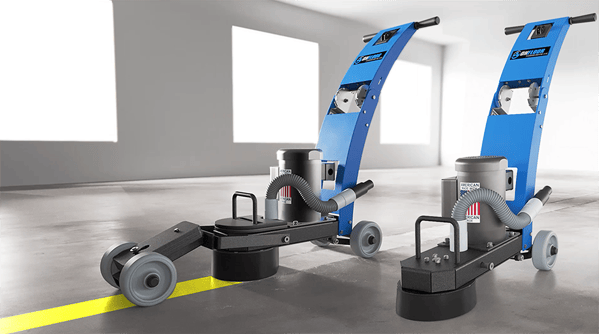
Choosing The Right Grinder
Choosing the right grinder depends on the floor size and type. Handheld grinderswork well for small areas and corners. Walk-behind grinderscover large spaces quickly and evenly. Consider the power source: electric grinders suit indoor jobs, while gas-powered ones handle outdoor tasks.
- Single-disc grindersare good for light grinding and polishing.
- Planetary grindersmove multiple discs in small circles for smooth finishes.
- Concrete scarifiersremove thick coatings or rough surfaces.
Grinding discs come in different materials like diamond, silicon carbide, or aluminum oxide. Diamond discsare the best for concrete and stone floors. Choose the disc grit carefully: coarse gritsremove material fast, while fine gritspolish the surface. Match disc size to the grinder for safety and efficiency.
Preparing The Floor
Clear the floor area by removing all furniture and objects. Sweep or vacuum to get rid of dust and dirt. A clean surface helps the grinder work better.
Fix cracks and holes before grinding. Use a concrete patch or filler to smooth out these spots. Let the repair dry fully to avoid damage during grinding.
Check the floor for any loose parts or bumps. Sand down high spots to make the surface even. This step ensures a smooth finish after grinding.
Safety Measures
Wear protective gearto stay safe. Use safety gogglesto protect eyes from dust and debris. Gloves shield hands from rough surfaces and sharp edges. A dust mask or respirator keeps dust particles out of your lungs. Ear protectionhelps reduce loud noise from the grinder.
Ensure proper ventilationin the work area. Open windows or use fans to keep air moving. This helps remove dust and fumes. Use a vacuum or dust extractor attached to the grinder. It controls dust and keeps the floor clean. Keeping air clean protects your health and improves work quality.
Credit: blog.onfloor.com
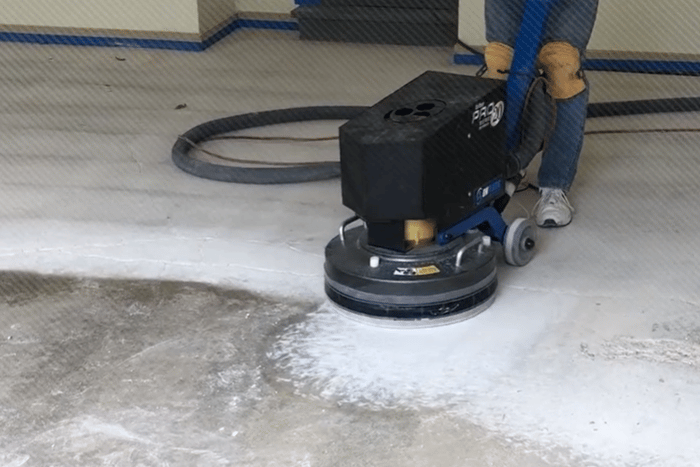
Grinding Techniques
Begin by choosing the right grinder and abrasive pad for your floor type. Move the grinder slowly and evenly to remove surface imperfections and achieve a smooth finish. Keep the floor clean to see your progress clearly.
Starting And Stopping The Grinder
Always start the grinder away from the floor. This avoids deep marks. Hold the tool firmly and switch it on. Let the machine reach full speed before touching the floor. To stop, lift the grinder off the surface first. Then turn off the power. This helps prevent uneven spots.
Maintaining Even Pressure
Apply consistent pressure on the grinder. Too much force can damage the floor. Too little pressure slows the job. Move the grinder smoothly and keep the tool flat. Keep hands steady to avoid gouges or scratches.
Working In Sections
- Divide the floor into small parts.
- Grind one section at a time.
- Overlap slightly for a smooth finish.
- Check your work often.
- Clean dust before moving on.
Dealing With Common Challenges
Grinding floors often brings issues like dust, uneven surfaces, and machine handling. Tackling these problems early ensures a smooth, clean finish every time. Proper preparation and steady movements help avoid common mistakes during the grinding process.
Handling Uneven Surfaces
Uneven floors need special care. Use a floor grinder with adjustable settings. Start with a coarse grit to smooth big bumps. Move slowly to avoid gouges. Check the floor often to track progress. Fill deep holes with a patching compound before grinding. This makes the surface more even and safe.
Reducing Dust And Noise
- Wear a mask to protect from dust.
- Use a grinder with a dust shroud or vacuum attachment.
- Work in short bursts to reduce noise.
- Place sound barriers if working indoors.
- Close windows and doors to keep dust contained.
Finishing Touches
Polishing the floormakes it smooth and shiny. Use a polishing machine with the right pad for best results. Start with a coarse pad to remove rough spots. Then switch to finer pads to make the surface gleam. Move the machine slowly and evenly over the floor. This helps avoid scratches or uneven shine.
Sealing and protecting the surfacekeeps the floor safe from damage. Choose a sealant that matches your floor type. Apply the sealant in thin, even layers using a brush or roller. Let each layer dry well before adding another. This creates a strong barrier against dirt, stains, and water.
- Clean the floor before sealing to remove dust and debris.
- Work in small sections for better control.
- Use good ventilation to help the sealant dry faster.
- Wear gloves to protect your skin.
Maintenance Tips For Grinders
Cleaning grinders after each use helps keep them working well. Dirt and dust can cause damage if left on the machine. Use a soft brush to remove debris from all parts. Avoid using water directly on the motor to prevent rust.
Store grinders in a dry place, away from moisture. Cover them with a cloth to stop dust from settling. Proper storage extends the tool’s life and keeps it ready for use.
| Inspection Area | What to Check | Action |
|---|---|---|
| Power Cord | Look for cuts or frays | Replace if damaged |
| Grinding Wheel | Check for cracks or wear | Change if worn out |
| Motor | Listen for strange sounds | Repair if noisy |
Fix problems quickly to avoid bigger repairs. Regular checks keep the grinder safe and efficient.

Credit: www.familyhandyman.com

Credit: www.carpetremovalsydney.com.au
Frequently Asked Questions
What Equipment Is Needed To Grind A Floor?
You need a floor grinder, diamond grinding pads, a vacuum system, and safety gear. These tools ensure smooth, dust-free grinding results.
How Do I Prepare The Floor For Grinding?
Clear the floor of debris and furniture. Inspect for nails or loose materials. Clean thoroughly before starting grinding.
What Grit Size Should I Use For Floor Grinding?
Start with coarse grit (30-40) for rough floors. Progress to finer grits (80-120) for a smooth finish. Adjust grit based on floor condition.
How Long Does It Take To Grind A Floor?
Grinding time depends on floor size and condition. A small room may take 1-2 hours; larger areas require more time.
Conclusion
Grinding the floor takes patience and careful steps. Use the right tools and follow safety rules. Work in small sections for best results. Keep the surface even and smooth as you go. Clean the area well before starting and after finishing.
With steady effort, your floor will look fresh and neat. Practice makes the process easier over time. Remember, good preparation helps avoid mistakes. Now, you can take on floor grinding with confidence.