

Imagine holding a perfectly crisp, sweet mini waffle cone in your hand—ready to be filled with your favorite ice cream or dessert. Making mini waffle cones at home is easier than you think, and once you learn how, you’ll never want to buy them from the store again.
You’ll discover simple steps and insider tips to create these delightful treats yourself. Get ready to impress your friends and satisfy your cravings with homemade mini waffle cones that taste as good as they look. Keep reading, and you’ll be a waffle cone pro in no time!

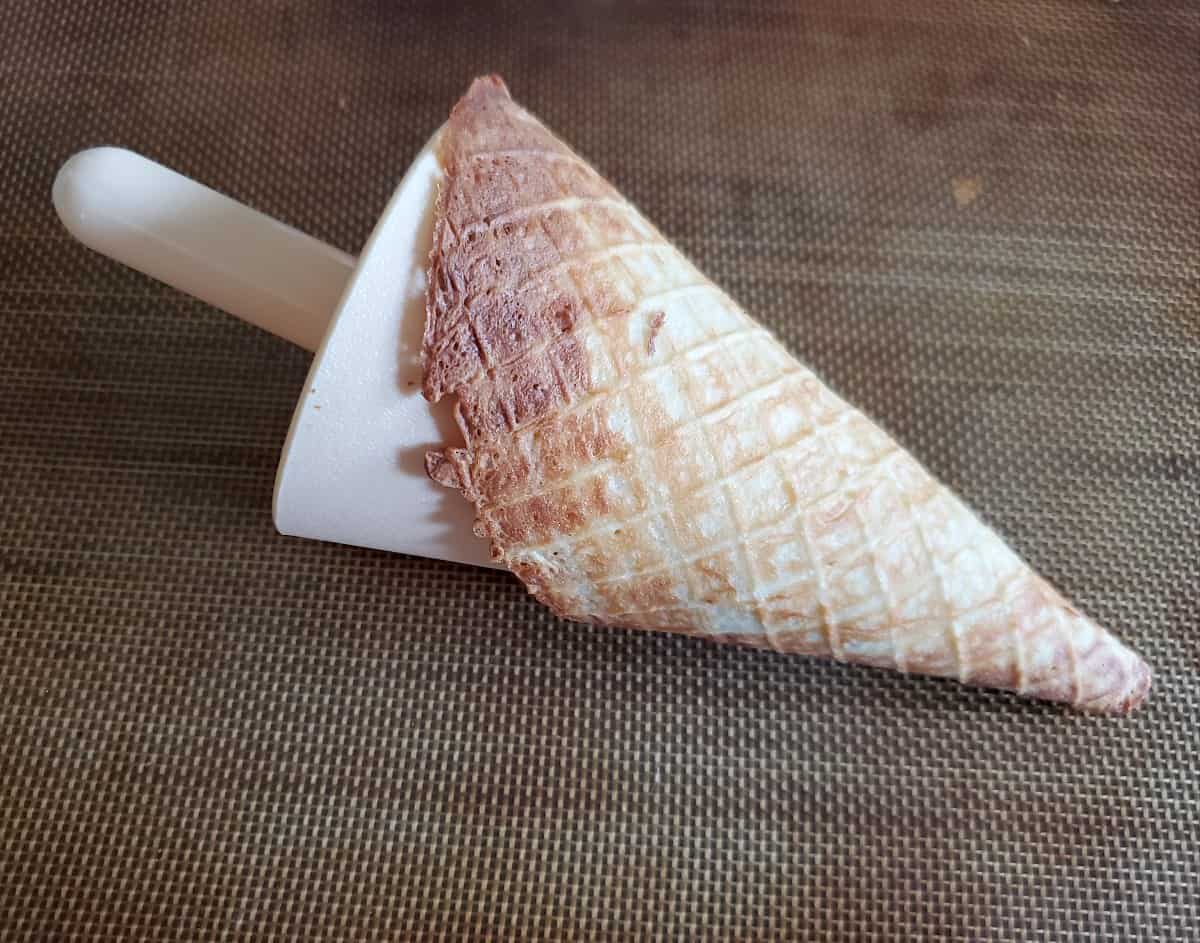
Credit: www.leeshandlusrecipebox.com
Ingredients Needed
Making mini waffle cones at home is simple and fun. You only need a few basic ingredients to create crispy, sweet cones.
These ingredients combine to give your cones a classic waffle flavor and perfect texture. Gather them before you start baking.
Basic Ingredients
These ingredients form the batter for your mini waffle cones. Each one plays a key role in taste and texture.
- All-purpose flour
- Granulated sugar
- Unsalted butter
- Eggs
- Milk
- Vanilla extract
- Salt
Optional Flavor Additions
You can add extra flavors to make your mini waffle cones unique. These options are easy to mix into the batter.
| Ingredient | Purpose |
| Cinnamon | Adds warm spice flavor |
| Lemon zest | Gives fresh citrus aroma |
| Cocoa powder | Creates chocolate taste |
| Almond extract | Enhances nutty notes |
Essential Tools
Making mini waffle cones at home needs a few basic tools. These tools help shape and cook the cones evenly.
Using the right tools makes the process easier and the cones look better. Let’s look at what you need.
Mini Waffle Cone Maker
This is a small waffle iron designed to make thin waffle discs. These discs become the cones.
It heats evenly and cooks the batter quickly. A mini waffle cone maker is essential for consistent results.
Cone Roller Or Mold
A cone roller helps shape the hot waffle into a cone. It keeps the shape until the waffle cools.
You can buy a metal or wooden cone mold. Some people use a simple cone-shaped tool at home.
Non-stick Spatula
A non-stick spatula helps remove the hot waffle from the maker. It prevents breaking or tearing.
Choose a spatula with a thin, flexible edge. This makes lifting the waffle easy without damage.
Measuring Cups And Spoons
Accurate measurements ensure the batter has the right texture and taste. Use clean measuring tools for best results.
Measuring cups and spoons help you follow the recipe exactly. This keeps your cones consistent every time.
Cooling Rack
A cooling rack lets the mini waffle cones cool evenly after shaping. It stops them from getting soggy.
Place the cones on the rack in a way that air flows all around. This keeps the cones crisp and fresh.
Preparing The Batter
Making mini waffle cones starts with a good batter. The batter needs to be smooth and well mixed. This helps the cones cook evenly and taste great.
Follow simple steps to prepare the batter correctly. Focus on mixing dry and wet ingredients separately before combining them.
Mixing Dry Ingredients
First, gather all dry ingredients like flour, sugar, and salt. Mixing them well prevents lumps in the batter.
Use a whisk or fork to combine the dry ingredients evenly. This helps the batter have a consistent texture.
- All-purpose flour
- Granulated sugar
- A pinch of salt
- Baking powder (optional)
Combining Wet Ingredients
In another bowl, mix wet ingredients like eggs, milk, and melted butter. These add moisture and flavor to the cones.
Beat the eggs lightly before adding milk and butter. This helps blend the wet ingredients smoothly.
- Eggs
- Milk
- Melted butter
- Vanilla extract (optional)
Blending Batter Smoothly
Pour the wet ingredients into the dry ingredients slowly. Stir gently to avoid lumps and overmixing.
Mix until the batter is smooth and thick. Let the batter rest for a few minutes before cooking.
Credit: honestandtruly.com
Heating The Waffle Iron
Heating the waffle iron correctly is key to making perfect mini waffle cones. It ensures the batter cooks evenly and the cones hold their shape.
Understanding the right temperature and preheating process helps you avoid undercooked or burnt cones. Let’s explore how to do this well.
Choosing The Right Temperature
The temperature setting affects how the cones cook and crisp up. Too low, and the cone is soft. Too high, and it burns fast.
| Temperature Setting | Effect on Mini Waffle Cones |
| Low (250°F – 300°F) | Soft texture, longer cooking time |
| Medium (300°F – 350°F) | Even cooking, crisp edges |
| High (350°F – 400°F) | Quick cooking, risk of burning |
Preheating Tips
Preheating your waffle iron helps the cones bake evenly. It also prevents the batter from sticking to the iron.
- Turn on the waffle iron and set it to your chosen temperature.
- Let it heat for at least 5 minutes before adding batter.
- Test the heat by sprinkling a few drops of water on the surface. If it sizzles, it is ready.
- If the iron has adjustable plates, make sure they are clean and properly aligned.
- A well-preheated iron gives a golden brown color to the cones.
Cooking The Waffles
Cooking the waffles for mini cones needs care and attention. The right technique makes the cones crisp and tasty.
This guide covers how to pour the batter correctly and how long to cook for perfect results.
Pouring Batter Correctly
Pouring the batter evenly ensures the waffle cooks well and has a uniform shape. Use a small ladle or measuring cup to control the amount.
- Preheat the waffle iron before pouring the batter.
- Pour a small amount in the center of the iron.
- Spread the batter gently by closing the lid to avoid spills.
- Avoid overfilling; it can cause uneven cooking.
- Clean edges prevent burnt spots on the cone.
Cooking Time Guidelines
Cooking time depends on your waffle iron’s heat and batter thickness. Use this table to check your ideal cooking time.
| Waffle Iron Heat Setting | Cooking Time | Result |
|---|---|---|
| Low | 2 to 3 minutes | Soft and light, may need longer |
| Medium | 1.5 to 2 minutes | Crisp edges, soft center |
| High | 1 to 1.5 minutes | Crispy and golden brown |
Shaping Mini Cones
Shaping mini waffle cones takes practice and care. You need to work quickly while the waffles are warm. This helps them form a perfect cone shape without cracking.
In this guide, we will cover how to roll warm waffles, use cone molds, and cool the cones to set their shape.
Rolling Warm Waffles
After baking, the waffles are soft and pliable. This is the best time to shape them. Use a clean kitchen towel to lift one waffle at a time.
- Place the warm waffle on a flat surface.
- Lift one edge and roll it tightly into a cone shape.
- Press the seam gently to seal it.
- Use your fingers to shape the tip of the cone.
- Work fast before the waffle cools and hardens.
Using Cone Molds
Cone molds help create uniform mini cones with clean shapes. They are usually metal or silicone tubes designed for this purpose.
Follow these tips when using cone molds:
- Warm the waffle and place it flat.
- Wrap the waffle around the cone mold tightly.
- Hold the edges together until the waffle cools slightly.
- Slide the cone off carefully once it holds its shape.
- Use oven mitts if the mold is hot.
Cooling And Setting
Cooling is important to keep the cone’s shape. Let the cones rest on a rack or stand upside down to avoid flattening.
| Cooling Method | Advantages |
| Place cones on a wire rack | Air circulates, cones dry evenly |
| Stand cones upside down | Prevents flattening and keeps shape |
| Cool at room temperature | Avoids moisture buildup inside cones |
Storing And Serving
Mini waffle cones are a fun treat to make. Keeping them fresh and tasty is important. Proper storing and serving help keep their crunch and flavor.
This guide shares tips on how to keep your cones crispy and creative ways to serve them.
Keeping Cones Crispy
Store waffle cones in a dry place away from moisture. Moisture makes cones soft and less enjoyable.
- Use an airtight container to block air and humidity.
- Keep cones in a cool spot, not near heat sources.
- Avoid stacking cones tightly to stop breakage.
- Do not store cones in the fridge or freezer, as they can get soggy.
Creative Serving Ideas
Mini waffle cones work well beyond just ice cream. Try these ideas to serve them in new ways.
| Serving Idea | Description |
| Fruit Salad Cups | Fill cones with chopped fresh fruits for a healthy snack. |
| Dip Holders | Use cones to hold dips like chocolate, caramel, or yogurt. |
| Mini Dessert Cones | Layer pudding or mousse inside cones and top with sprinkles. |
| Party Snacks | Fill with popcorn or nuts for easy party treats. |
Troubleshooting Tips
Making mini waffle cones can be fun but tricky. Some problems may happen during the process.
This guide helps you fix common issues to get perfect cones every time.
Avoiding Soggy Cones
Soggy cones often happen if moisture gets trapped inside. This makes the cone soft and less tasty.
To keep cones crisp, store them in a dry place and avoid covering them tightly right after baking.
- Let cones cool completely on a rack before storing.
- Use an airtight container with a paper towel to absorb moisture.
- Avoid filling cones with wet ingredients too early.
- Serve cones soon after making for best crunch.
Fixing Batter Issues
Thick or thin batter can cause cones to cook unevenly or break. Adjust batter consistency for smooth cooking.
Mix batter until smooth but avoid overmixing, which can make cones tough.
- If batter is too thick, add a small amount of milk to thin it.
- If batter is too runny, add a bit more flour for thickness.
- Use fresh ingredients to keep batter quality high.
- Cook cones on medium heat to avoid burning or undercooking.

Credit: www.youtube.com
Frequently Asked Questions
How Long Does It Take To Make Mini Waffle Cones?
Making mini waffle cones usually takes about 10 to 15 minutes. This includes batter preparation, cooking, and shaping. Quick cooking ensures cones remain crispy and fresh, perfect for serving with ice cream or desserts.
What Ingredients Are Needed For Mini Waffle Cones?
You need flour, sugar, eggs, butter, and vanilla extract. Some recipes add salt and milk for better texture. These simple ingredients create a sweet, crispy, and flavorful mini waffle cone.
Can I Use A Regular Waffle Maker For Mini Cones?
Yes, a regular waffle maker works if it has small grids. Use a thin batter and shape cones immediately after cooking. This method helps achieve the perfect mini waffle cone shape and texture.
How Do I Store Mini Waffle Cones To Keep Crisp?
Store mini waffle cones in an airtight container at room temperature. Avoid moisture and humidity to keep them crispy longer. Proper storage helps maintain their fresh, crunchy texture for days.
Conclusion
Making mini waffle cones at home is easier than you think. With a few simple ingredients and steps, you can enjoy fresh cones anytime. They add a fun touch to your ice cream or desserts. Practice a bit, and you will get better each time.
Homemade cones taste great and make your treats special. Try making them today and enjoy a delicious, crunchy snack.