

Craving the perfect waffle cone but don’t have a machine? You’re not alone—and the good news is, you don’t need one to make crispy, delicious waffle cones right at home.
Imagine holding a warm, fresh cone filled with your favorite ice cream, made by your own hands. This guide will show you simple steps to create waffle cones without any special equipment. By the end, you’ll have a new skill that turns ordinary desserts into unforgettable treats.
Ready to impress yourself and anyone you share them with? Let’s get started.
Ingredients Needed
Making waffle cones without a machine is easy if you have the right ingredients. These simple items help create a crunchy and tasty cone.
Most ingredients are common and can be found in your kitchen. Measure them carefully for the best results.
All-purpose Flour
All-purpose flour is the base of the waffle cone batter. It gives the cones structure and crispness.
Use sifted flour to avoid lumps. This helps make a smooth batter that cooks evenly.
Sugar
Sugar adds sweetness to the cones. It also helps in browning during cooking.
Use granulated sugar for a classic taste. Adjust the amount if you want a less sweet cone.
Eggs
Eggs bind the ingredients together. They also add richness to the batter.
Use fresh eggs at room temperature. This helps the batter mix smoothly.
Butter
Butter adds flavor and makes the cones crispier. Melted butter works best in the batter.
Use unsalted butter to control the salt level. Let the butter cool before mixing it in.
Milk
Milk thins the batter and helps mix the ingredients well. It also adds a little creaminess.
Use whole milk for better taste. You can substitute with almond or soy milk if you prefer.
Vanilla Extract
Vanilla extract adds a sweet aroma and flavor to the cones. It makes the taste more enjoyable.
Add a small amount, about one teaspoon. Too much can overpower the other flavors.
Salt
A pinch of salt enhances the flavor of the waffle cones. It balances the sweetness.
Use fine salt for even mixing. Do not skip this ingredient for best taste.
Credit: honestandtruly.com
Tools Required
Making waffle cones without a machine is easy with the right tools. You only need a few kitchen items.
These tools help you cook and shape the cones perfectly by hand.
Non-stick Skillet Or Griddle
A non-stick skillet or griddle is important to cook the waffle batter evenly. It prevents sticking and burning.
Use medium heat to cook the batter until it is golden brown and crispy.
Mixing Bowl
You need a mixing bowl to combine your ingredients. A medium-sized bowl works well for small batches.
Choose a bowl that is easy to hold and mix without spilling.
Whisk Or Spoon
A whisk or spoon helps you mix the waffle batter smoothly. It removes lumps and blends ingredients.
Use a whisk for faster mixing or a spoon if you do not have one.
Measuring Cups And Spoons
Measuring cups and spoons are needed to get the right amount of each ingredient. This keeps the batter balanced.
Use standard measuring tools for best results.
Spatula
A spatula helps you flip the waffle batter carefully. It also lifts the cooked waffle off the pan without breaking it.
Use a thin, flexible spatula for easy handling.
Cone Shaper Or Rolling Tool
To shape the waffle into a cone, use a cone shaper or a simple rolling tool. A clean, dry bottle or cup works well too.
Shape the warm waffle quickly before it hardens to get a perfect cone.
Preparing The Batter
Making waffle cone batter by hand is easy and fun. You only need a few simple ingredients. Mixing them well gives you a smooth batter that cooks nicely.
Focus on mixing dry and wet ingredients carefully. The right batter texture helps you form perfect waffle cones without a machine.
Mixing Dry Ingredients
Start by combining the dry ingredients in a large bowl. These usually include flour, sugar, and a pinch of salt.
- Use all-purpose flour for the best texture.
- Add granulated sugar for sweetness.
- Include a small amount of salt to balance flavors.
- Optionally, add a bit of baking powder for slight crispness.
Adding Wet Ingredients
Mix the wet ingredients in a separate bowl. Common wet ingredients are eggs, milk, and melted butter.
| Wet Ingredient | Purpose |
| Eggs | Bind ingredients and add richness |
| Milk | Make the batter smooth and thin |
| Melted Butter | Add flavor and help crisp the cones |
Slowly add the wet ingredients to the dry mix. Stir gently until combined but do not overmix.
Achieving The Right Consistency
The batter should be smooth and pourable but not runny. It needs to hold shape on the cooking surface.
Check batter thickness like this:
- Scoop a spoonful of batter.
- Let it drip back into the bowl.
- It should flow slowly, like thick cream.
Cooking Without A Waffle Cone Maker
Waffle cones are a tasty way to enjoy ice cream. You do not need a special machine to make them. There are simple ways to cook waffle cones using kitchen tools you already have.
This guide shows how to make waffle cones on a stovetop skillet, a griddle, and other cooking methods. Each method creates crispy, delicious cones at home.
Using A Stovetop Skillet
Using a stovetop skillet is a great way to cook waffle cones without a machine. A non-stick or cast iron skillet works best. Heat the skillet on medium.
Pour a small amount of batter into the skillet. Spread it thinly and cook for 1 to 2 minutes. Flip carefully to cook the other side for 30 seconds more. Then shape the warm waffle into a cone.
Baking On A Griddle
A griddle gives you a large flat surface to cook many waffle cones. Heat the griddle to medium heat. Pour the batter and spread it evenly.
- Cook the batter for 2 minutes without moving.
- Flip carefully and cook for 1 more minute.
- Remove and shape the waffle while warm.
- Let the cone cool to harden.
Alternative Cooking Methods
You can try other ways to cook waffle cones. A microwave or oven can also work but need care to avoid burning.
| Method | How to Use | Tips |
|---|---|---|
| Microwave | Heat batter in a thin layer on microwave-safe plate for 20-30 seconds. | Watch closely to avoid overheating. |
| Oven | Bake thin batter on parchment paper at 350°F for 4-5 minutes. | Remove quickly and shape before cooling. |
| Toaster Oven | Use similar method to oven, but watch more carefully. | Small batches work best. |
Shaping The Cones
Making waffle cones without a machine is simple with the right technique. Shaping the cones properly gives them a perfect hold for your ice cream.
This guide focuses on shaping the cones by rolling them while warm, using a mold substitute, and cooling them correctly.
Rolling While Warm
Waffle cones become soft and flexible right after cooking. This is the best time to shape them. Use a clean kitchen towel to lift the hot waffle gently. Then, roll it quickly but carefully into a cone shape.
- Lift the hot waffle with a towel.
- Place it over your hand or a cone mold.
- Roll the waffle from one edge to the other.
- Press the edges gently to seal the cone.
- Hold the shape for a few seconds.
Using A Cone Mold Substitute
If you don’t have a cone mold, use a simple substitute. A clean metal or heatproof plastic cone-shaped object works well. This helps shape the waffle evenly and quickly.
Cone Mold Substitute Ideas:
- Empty paper towel tube covered with foil
- Upside-down ice cream cone cup
- Rolled baking parchment paper into a cone
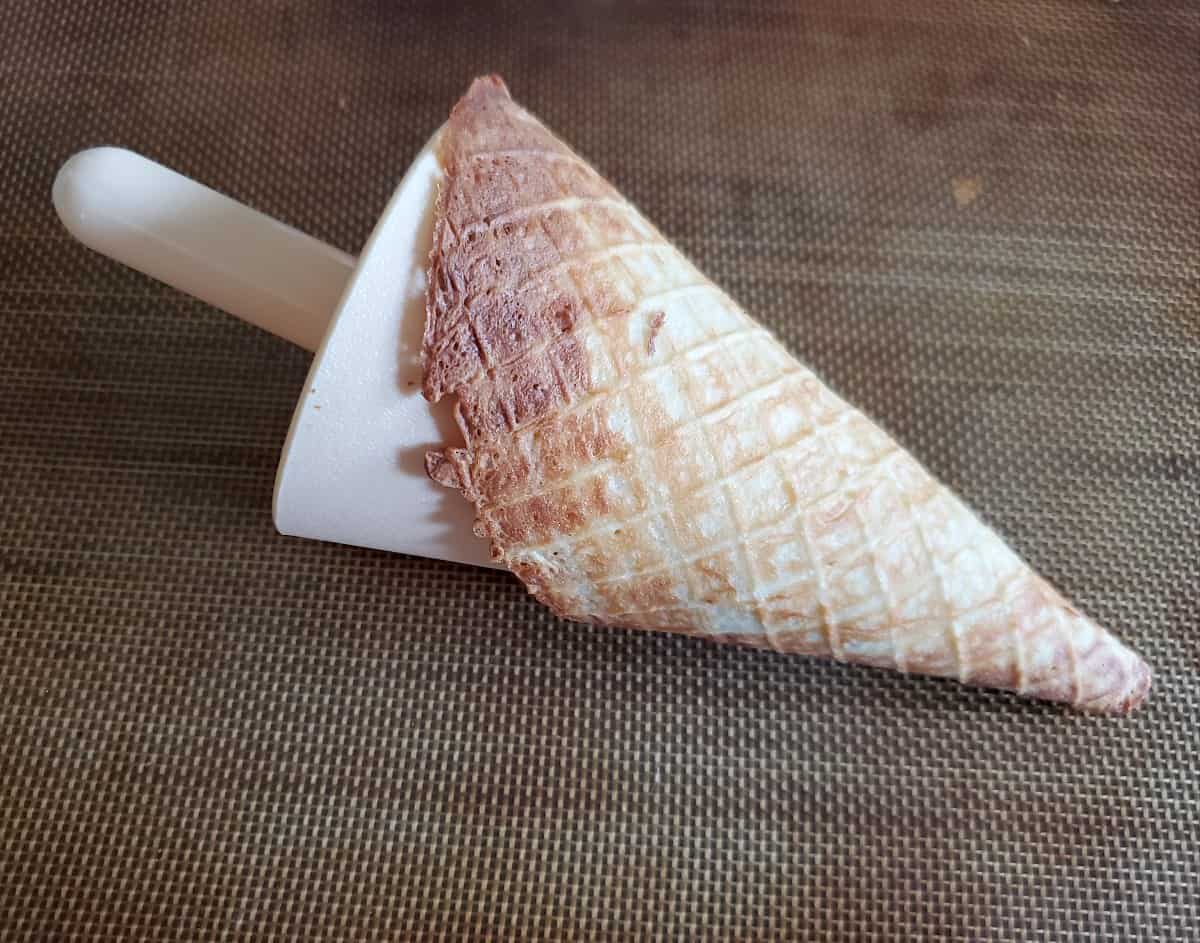
Cooling And Hardening
After shaping, let the cones cool fully on a rack. Cooling makes them hard and crispy. Avoid stacking cones before they cool. This keeps them from sticking or losing shape.
- Place cones upright on a wire rack.
- Leave them to cool for at least 10 minutes.
- Check if they feel firm and crisp.
- Store in an airtight container once cooled.

Credit: honestandtruly.com
Tips For Perfect Waffle Cones
Making waffle cones without a machine is easy with the right tips. You only need a simple batter and a way to shape the cones.
These tips help you avoid cracks, adjust flavors, and store cones properly for the best results.
Preventing Cracks
Waffle cones can crack if they dry too fast or are too thin. Work quickly after cooking the waffle to shape it.
Use a damp cloth to cover the cones while they cool. This keeps them moist and less likely to crack.
- Cook waffles evenly to avoid weak spots
- Shape cones while warm and flexible
- Cover cones with a damp cloth during cooling
- Store cones in a dry place away from air leaks
Adjusting Sweetness And Flavor
You can change the sweetness of your waffle cones by adding more or less sugar to the batter. Try different flavors to match your ice cream.
Vanilla, cinnamon, or cocoa powder are good choices to add simple flavor changes without extra steps.
- Reduce sugar for less sweet cones
- Add vanilla extract for a classic taste
- Mix cinnamon for a warm flavor
- Use cocoa powder for chocolate cones
Storage Suggestions
Keep waffle cones fresh by storing them in an airtight container. Moisture makes cones soft and chewy, not crisp.
Store cones at room temperature in a dry place. Avoid the fridge, as it adds moisture and ruins crispness.
- Use airtight containers for storage
- Keep cones away from humidity
- Store at room temperature, not cold
- Use cones within one week for best taste

Credit: www.leeshandlusrecipebox.com
Frequently Asked Questions
How Can I Make Waffle Cones Without A Machine?
You can make waffle cones using a simple stovetop method. Use a hot skillet or griddle to cook thin waffle batter. Quickly shape the warm waffle into a cone using a rolling pin or cone mold. Let it cool to harden before filling.
What Ingredients Are Needed For Homemade Waffle Cones?
Basic ingredients include flour, sugar, eggs, butter, and milk. These combine to create a smooth, thin batter. You can add vanilla or cinnamon for extra flavor. No special ingredients or machines are required for this recipe.
How Do I Shape Waffle Cones Without A Cone Maker?
Shape waffle cones by rolling the warm, flexible waffle around a cone-shaped object. Use a clean rolling pin or a sturdy cup to form the cone. Hold the shape until it cools and hardens. This method avoids the need for a cone maker.
Can I Store Homemade Waffle Cones For Later Use?
Yes, store waffle cones in an airtight container at room temperature. Keep them away from moisture to maintain crispness. Properly stored cones can last up to one week without losing texture or flavor.
Conclusion
Making waffle cones without a machine is simple and fun. You only need a few basic ingredients and some patience. Practice a little, and you will get the perfect shape and crunch. Enjoy your homemade cones with your favorite ice cream.
This easy method saves money and adds a personal touch. Try it today and surprise your family and friends with delicious treats. Homemade waffle cones bring joy to any dessert time. Give it a try and enjoy the sweet results!