
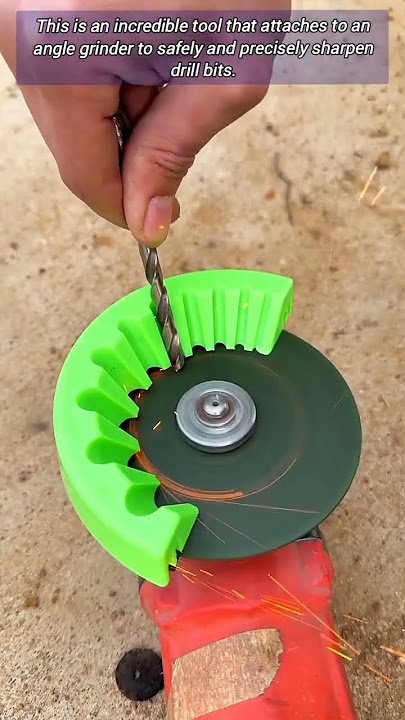
Are your drill bits starting to lose their edge? Dull bits can slow down your work and make drilling frustrating.
But what if you could bring them back to life quickly and easily? Sharpening your drill bits with an angle grinder is a simple skill that can save you time and money. In this guide, you’ll learn step-by-step how to sharpen your drill bits safely and effectively, so they cut like new again.
Keep reading to unlock the secret to sharper, more efficient drilling every time you pick up your tools.
Choosing The Right Angle Grinder
Choosing the right angle grinderis key to sharpening drill bits safely and well. There are two main types:
- Corded angle grindersoffer constant power for heavy tasks.
- Cordless angle grindersgive more freedom but may run out of battery.
For drill bits, a grinder with a 4 to 5-inch discis usually best. It fits well for small sharpening jobs.
The grinding discyou choose matters a lot. A diamond or aluminum oxide discworks well for metal drill bits. Avoid discs meant for stone or wood.
| Type of Disc | Best For | Notes |
|---|---|---|
| Aluminum Oxide | Metal drill bits | Common and affordable |
| Diamond | Hard metals | Lasts longer, more expensive |
| Stone | Concrete, masonry | Not for metal |
Preparing Drill Bits For Sharpening
Drill bits must be cleanedbefore sharpening. Remove any dirt, grease, or rust using a wire brush or cloth. Check for damagelike cracks or chips. Damaged bits should not be sharpened as they can break easily.
Wear safety glassesand glovesto protect eyes and hands. Use a dust mask to avoid breathing metal dust. Work in a well-ventilated area to reduce inhaling particles. Keep a firm grip on the angle grinder to avoid slips.
- Clear workspace:No clutter around the grinding area.
- Secure drill bit:Use a clamp or vise to hold it steady.
- Check angle grinder:Make sure the disc is sharp and undamaged.
Sharpening Techniques
Using an angle grinder to sharpen drill bits helps restore their cutting edge quickly. Hold the bit at the right angle and gently grind the worn areas. This technique improves drilling efficiency and extends the tool’s life.
Setting The Correct Angle
Set the angle grinder to about 60 degreesfor most drill bits. This angle helps keep the bit sharp and effective. Hold the bit steady and align it carefully with the grinder’s wheel. Keep the angle consistent to avoid uneven edges.
Grinding The Cutting Edges
Lightly press the bit against the grinder wheel. Move it back and forth to grind the cutting edges evenly. Avoid grinding too long in one spot to prevent overheating. Cool the bit often by dipping it in water.
Maintaining Bit Symmetry
Check both sides of the bit for equal shape and size. Symmetry helps the drill bit cut straight and fast. Use a marker to mark the edges before grinding. Grind gently and compare sides regularly to keep balance.

Credit: www.youtube.com
Finishing Touches
After sharpening, rough edges might still be visible on the drill bit. Use the angle grinder lightly to smooth these edges. Hold the bit steady and run the grinder gently over all sides. This helps prevent any sharp burrs that could catch during drilling.
To test the sharpness, try drilling into a piece of soft wood. A sharp bit will cut quickly and cleanly without much pressure. If the bit struggles or makes rough holes, it needs more sharpening.
- Check for smooth cutting edges
- Look for clean, even cuts in wood
- Listen for less grinding noise
Common Mistakes To Avoid
Overheating the bitcan cause it to lose hardness and break easily. Use short bursts when grinding to keep it cool. Dip the bit in water often to stop heat build-up. Avoid pressing too hard on the grinder; let the tool do the work.
Uneven sharpeningmakes the drill bit less effective and can cause wobbling. Keep the angle consistent while sharpening. Check both sides equally to maintain balance. Use steady, smooth movements for a clean edge.

Credit: www.amazon.ca
Maintaining Drill Bits For Longevity
Proper storagehelps keep drill bits sharp and safe. Store bits in a dry place to avoid rust. Use a case or rack to keep them organized and prevent damage. Avoid tossing them in a toolbox where they can bump and dull.
Regular inspectionis key. Check drill bits for dullness or chips before each use. A sharp bit drills better and safer. If a bit looks dull or damaged, it needs re-sharpening.
Re-sharpening with an angle grinder restores the edge quickly. It saves money and extends the bit’s life. Keep the angle grinder steady and use light pressure. Always wear safety gear like goggles and gloves.

Credit: www.walmart.com
Frequently Asked Questions
How Do You Sharpen Drill Bits With An Angle Grinder?
To sharpen drill bits with an angle grinder, securely hold the bit and gently grind the cutting edges. Maintain the original angle and avoid overheating by grinding briefly and cooling frequently.
What Safety Tips Should I Follow When Using An Angle Grinder?
Always wear safety goggles, gloves, and ear protection. Secure the drill bit firmly, work in a well-ventilated area, and keep sparks away from flammable materials. Use steady, controlled movements.
Can All Drill Bits Be Sharpened With An Angle Grinder?
No, only high-speed steel (HSS) drill bits are suitable for angle grinder sharpening. Carbide or coated bits require specialized sharpening tools or professional services.
How Often Should Drill Bits Be Sharpened?
Sharpen drill bits when you notice reduced cutting efficiency or rough holes. Regular inspection after every few uses ensures optimal performance and longer tool life.
Conclusion
Sharpening drill bits with an angle grinder saves time and money. It keeps your tools ready for any job. Always wear safety gear and work carefully. Keep the angle grinder steady and use light pressure. Sharpen regularly to maintain bit performance and extend life.
This simple method helps you get clean, precise holes. Practice a few times to improve your skill. Now, you can handle drill bit sharpening at home easily.